EPSON Stylus CX4100/CX4200/CX4700/CX4800/DX4200/DX4800/DX4850 Revision A
DISASSEMBLY/ASSEMBLY Removal procedure Specific to the Model With No Card Slot (Stylus CX4100/CX4200/DX4200) 169
4.6.2 Waste Ink Pads
External view
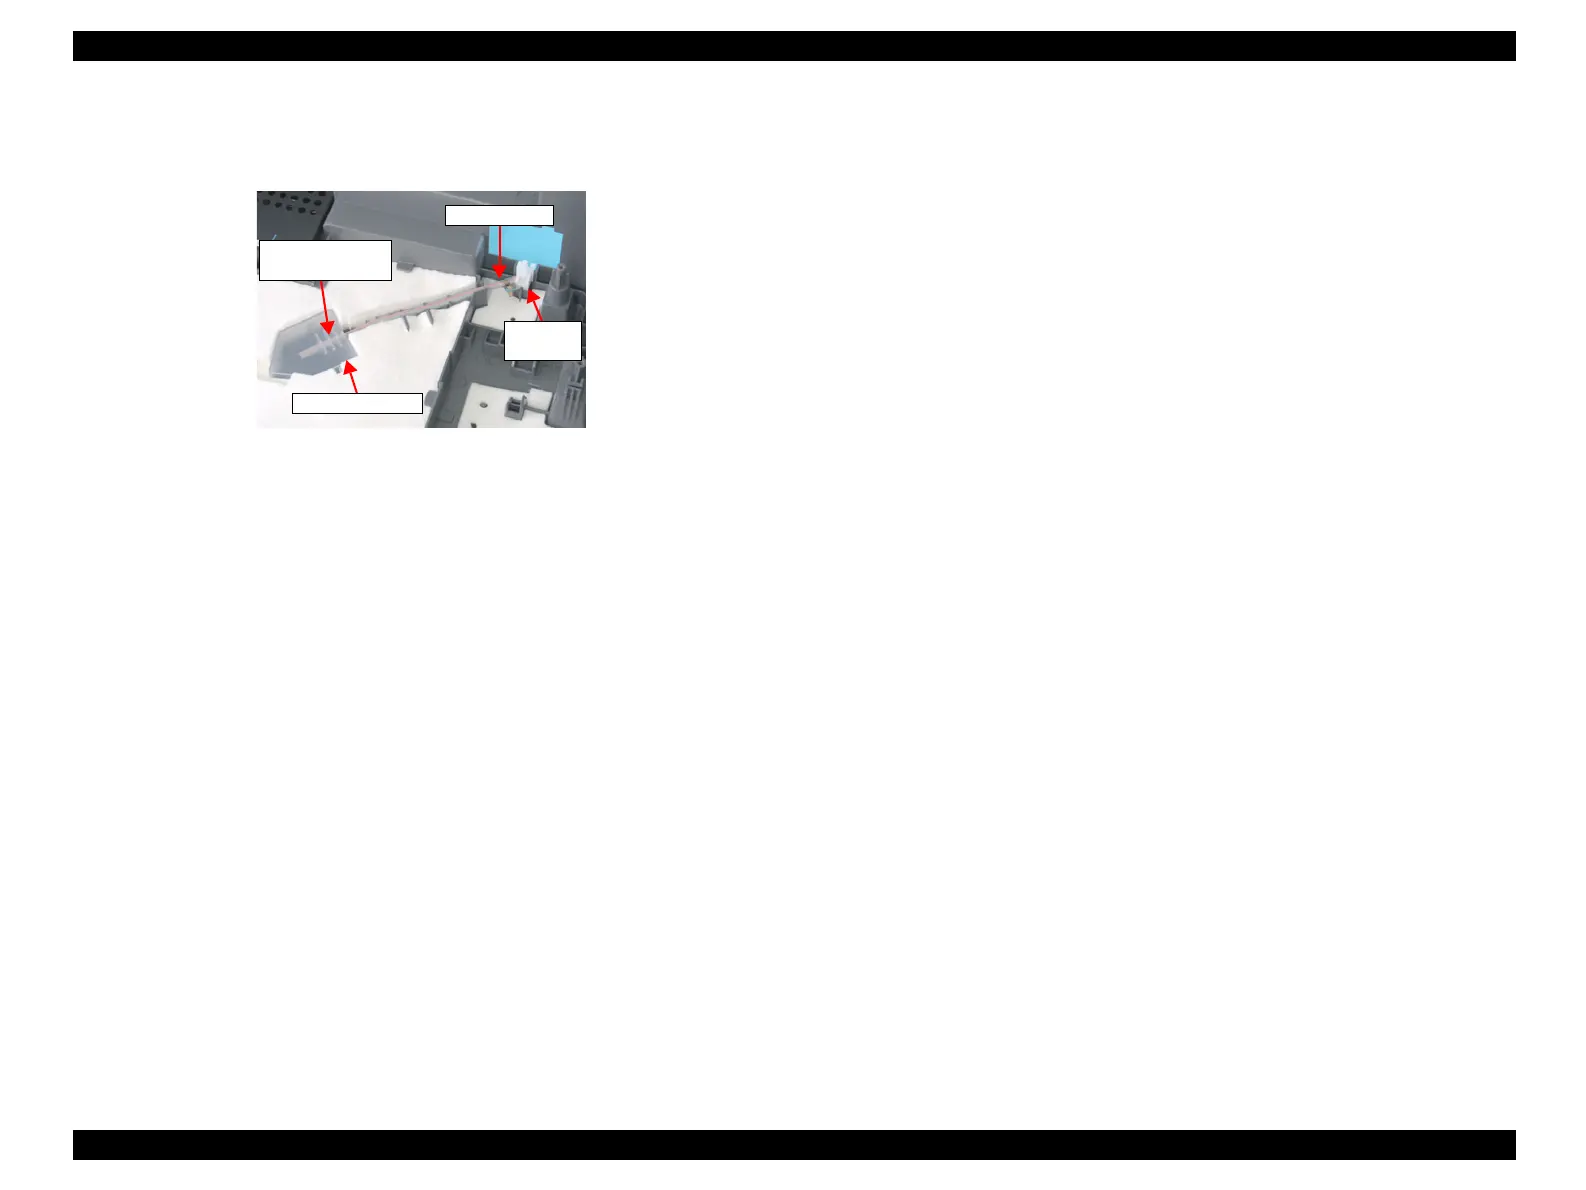
Figure 4-56. Waste Ink Pads
Part/Unit that should be removed before removing Waste Ink Pads
Document Cover / Paper Support Assy. / Stacker / Scanner Unit / Panel Unit /
Housing, Upper / Printer Mechanism
Removal procedure
1. Perform the removal procedure Step 1 of Waste Ink Pads/Stacker Lock/PG
Lever/Rubber Feet (p138).
2. Follow the instructions below to remove the Waste Ink Tube.
1. Release the Waste Ink Tube from the groove of the Housing, Lower.
2. Pull out the Waste Ink Tube from the Waste Ink Cover.
3. Remove the Waste Ink Tube together with the Tube Clump and the Eject
Ink Joint.
3. Remove the Waste Ink Cover and 11 pieces of the Waste Ink Pads from the
Housing, Lower.
Waste Ink Tube
and Groove
Tube Clump
Eject Ink
Joint
Waste Ink Cover
 Loading...


