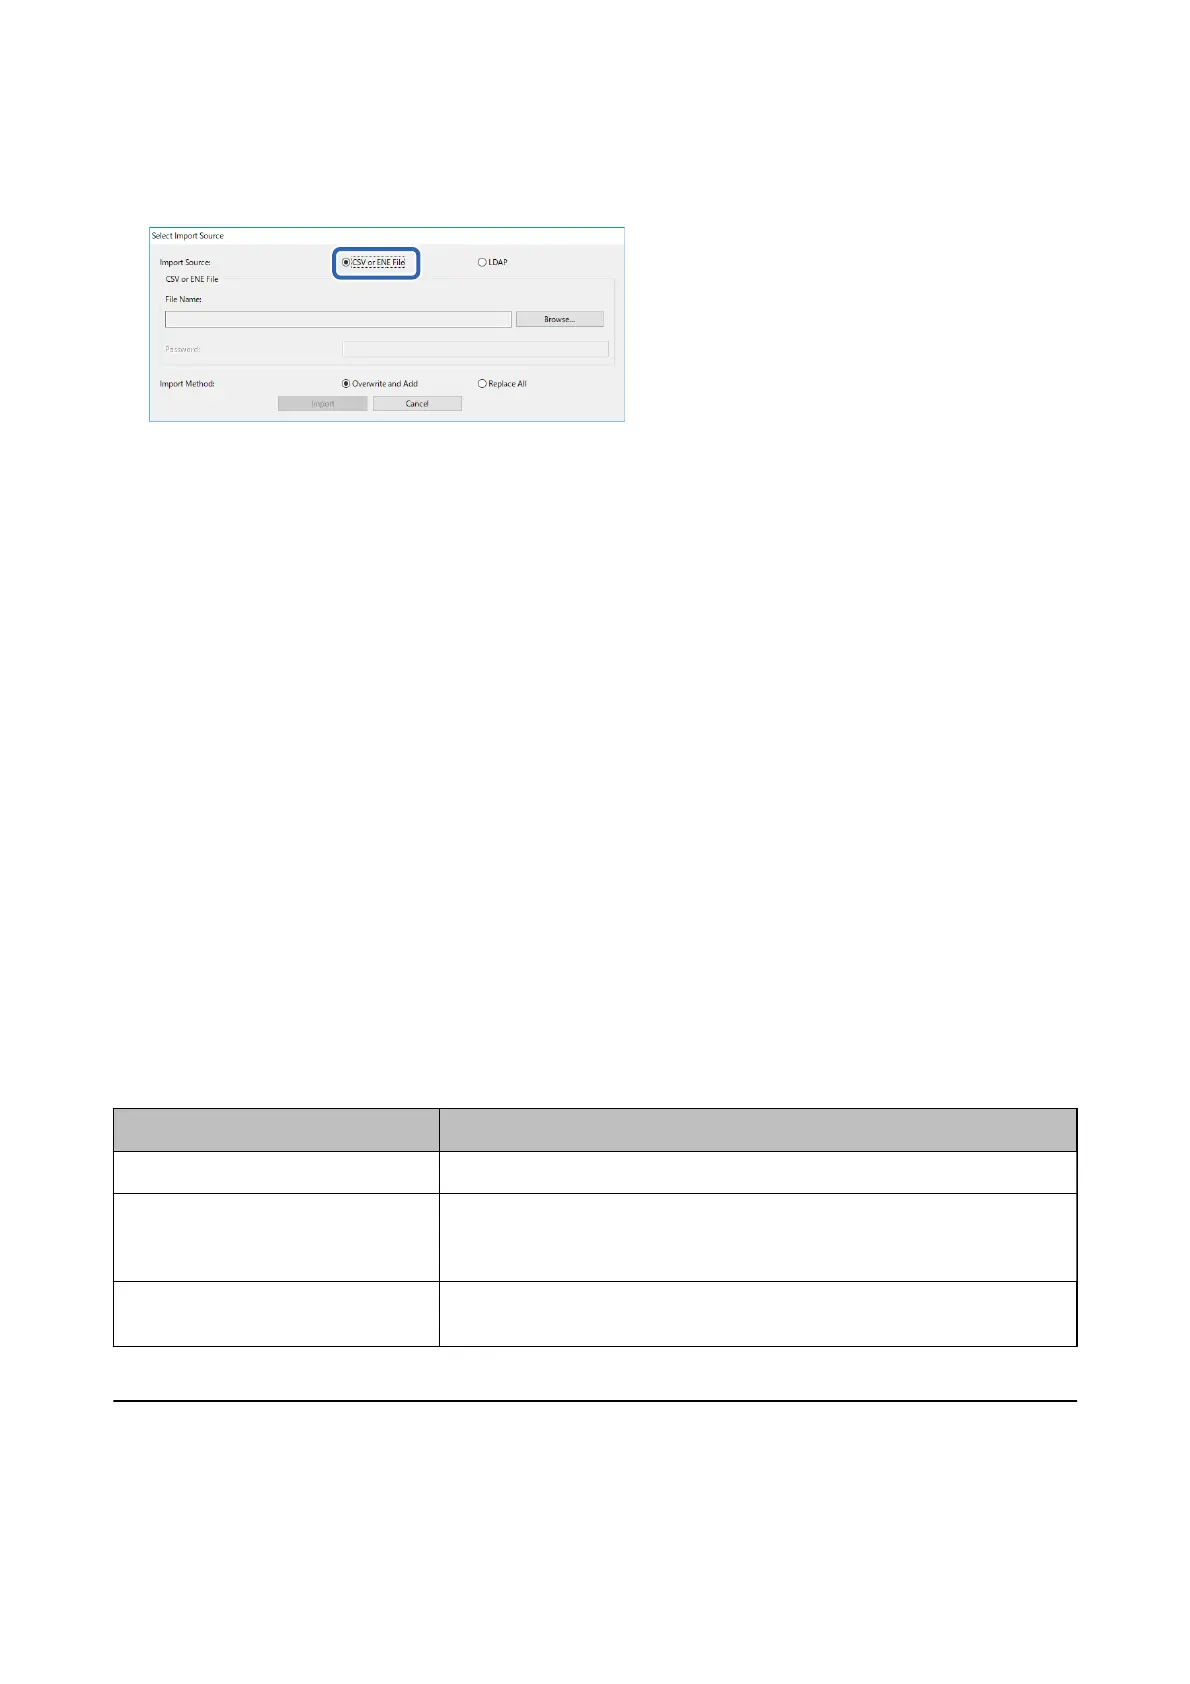
9. Select CSV or ENE File on Import Source.
10.
Click Browse.
e le selection screen is displayed.
11.
Select the le you want to import, and then click Open.
12. Select an import method.
❏ Overwrite and Add : If there is the same user ID, overwrite it. Otherwise add it.
❏ Replace All : Replace all the user information with the new one.
13. Click OK.
e conrmation screen is displayed.
14. Click OK.
Verication of the imported le starts, and the result is displayed.
Note:
Click Valid Users to open the user information deletion screen. You can delete the user information before importing by
selecting it and clicking Delete.
15.
Click Import.
Export Format
Item Explanation
CSV File UTF-16 (*.csv) Export to a tab-delimited CSV le encoded in Unicode (UTF-16).
CSV File UTF-8 (*.csv) Export to a comma-delimited or semicolon-delimited CSV le encoded in
Unicode (UTF-8). The delimiter can be set in CSV data delimiter by selecting
Options > Formats.
Binary le (*.ene) Export to an ENE le. You can set the password to it for import. You cannot edit
the ENE le since it is an encrypted binary le.
Checking the Printer Information from Web
Cong
You can check the printer information by using Web Cong.
Setup & Administration Guide
Operation and Management
95
 Loading...