36
Changing the Operating Pressure from the Remote
The following instructions must only be undertaken by a suitably approved
person. Any tampering by an unauthorised person will void the product’s
warranty and may result in a dangerous condition.
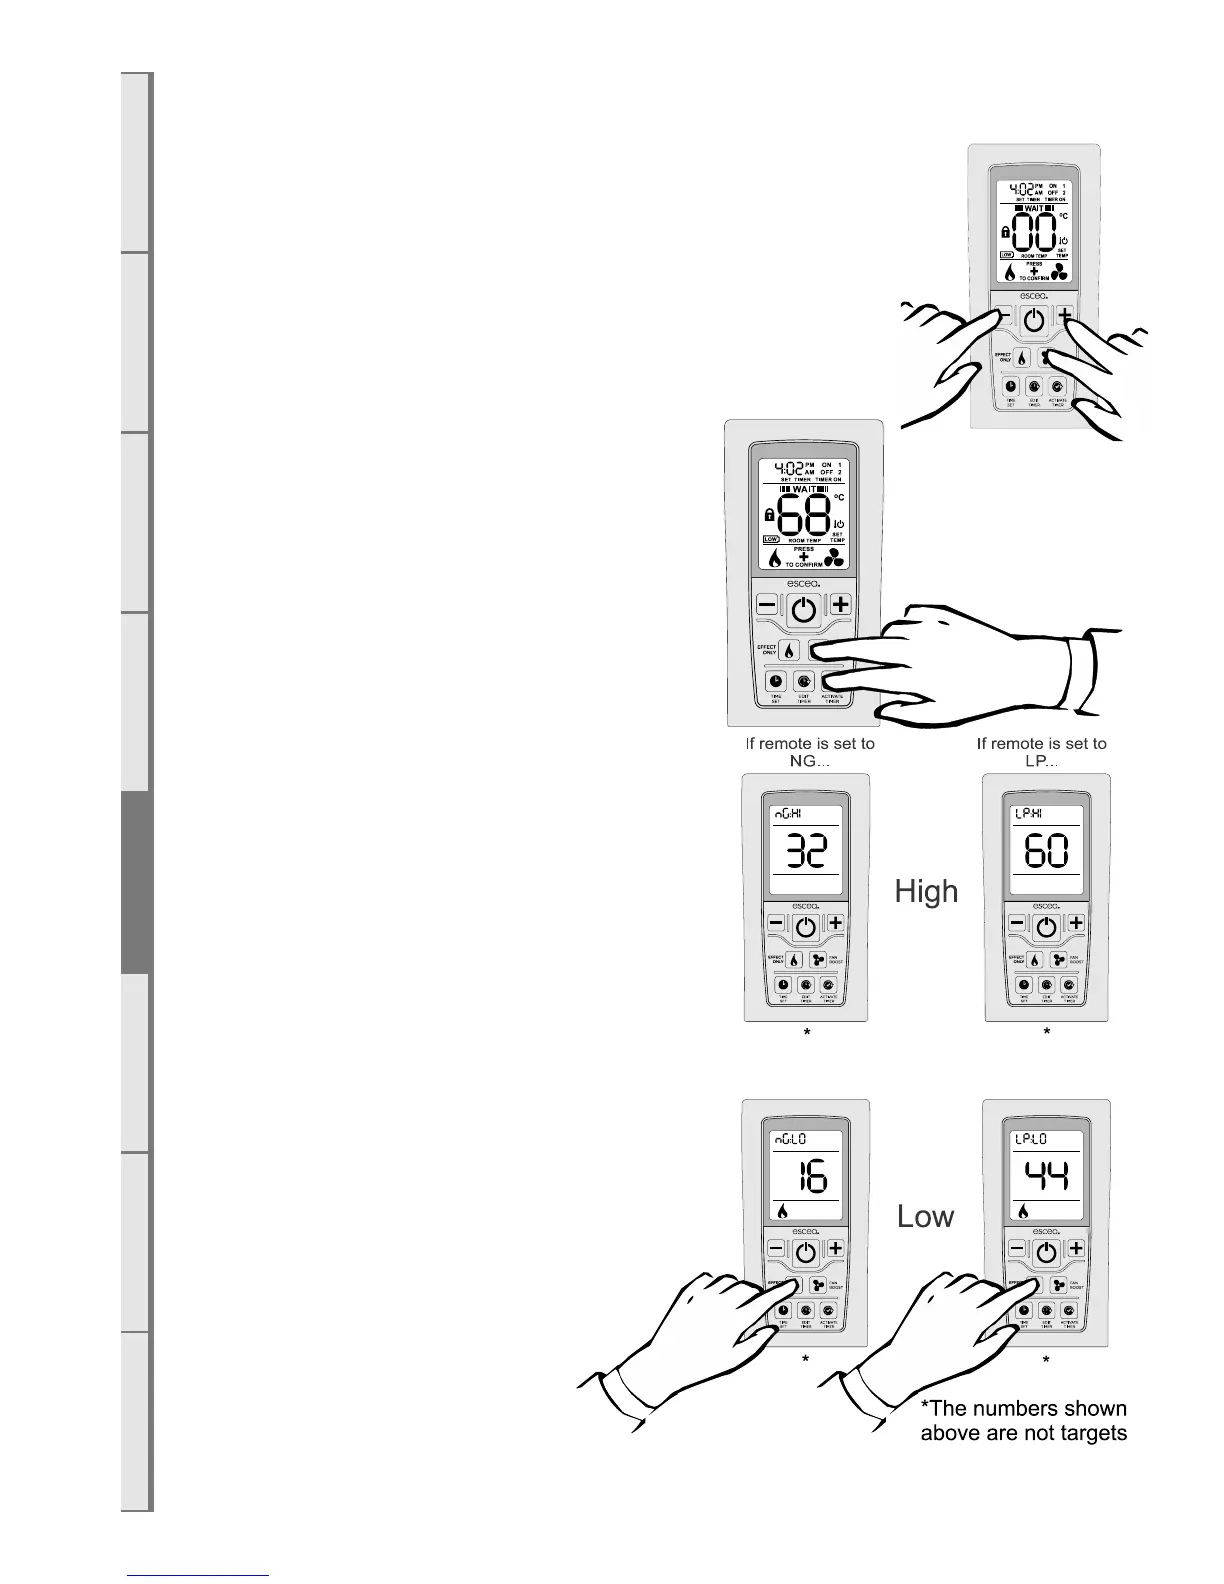
While the remote is in its “OFF” mode with only the time showing on the
display, press the MINUS, PLUS and FAN BOOST buttons simultaneously
(as shown right) until the characters “03” light up on the display. Release the
buttons and the remote will count down and display “GO”. The screen will
then display all characters and should be reading 00. This will put the remote
into test mode.
Whilst in test mode: press and hold
the “Activate Timer” and “Fan Boost” buttons for
4 seconds to access the gas valve settings. The appliance
will automatically turn on while in this mode.
WAIT; allow the appliance to fully light all burners before
continuing.
The high setting for the currently set gas
type is displayed first (indicated in
the clock segments at the top). Pressing
the plus or minus keys will change the set-
ting up or down respectively and change
the gas pressure measured at point A or
D. The large digits will blink rapidly after
the setting is made until the verification is
received from the fire.
Note: the numbers displayed on the
remote should only be used to achieve
the correct pressure. The numbers by
themselves don’t represent anything and
should not be relied upon.
Toggling to the low setting is done by
pressing the “Flame Eect” button
(indicated in the clock segments at the
top and by the “Flame Eect” icon at the
bottom). Settings are made with the Plus
Minus buttons as above. Exiting this mode
is by pressing the on/o button.