34
Eversense E3 CGM User Guide
4
This section describes how to link the sensor and smart transmitter for the rst time after your
healthcare provider has inserted the sensor. Only your GP can insert the sensor. See “About the
Sensor” to learn more.
Once your healthcare provider has inserted your sensor, the smart transmitter and the sensor must be linked in order
to start the 24-hour Warm-Up Phase. Your smart transmitter can only be linked to one sensor at a time. There is no
need to wear the smart transmitter during the Warm-Up Phase.
You can link your sensor to the smart transmitter any time after the sensor is inserted and the smart transmitter is
paired with the Eversense App. To link the sensor, your mobile device must be connected to the internet and your
transmitter must be charged, turned on, and paired with your mobile device.
4. Linking the Sensor
IMPORTANT: Please read this entire section before linking your sensor.
IMPORTANT: Your healthcare provider will complete an Implant Card
at the time of your insertion. Please keep this card in your wallet and replace
it when you receive a new card with your next insertion.
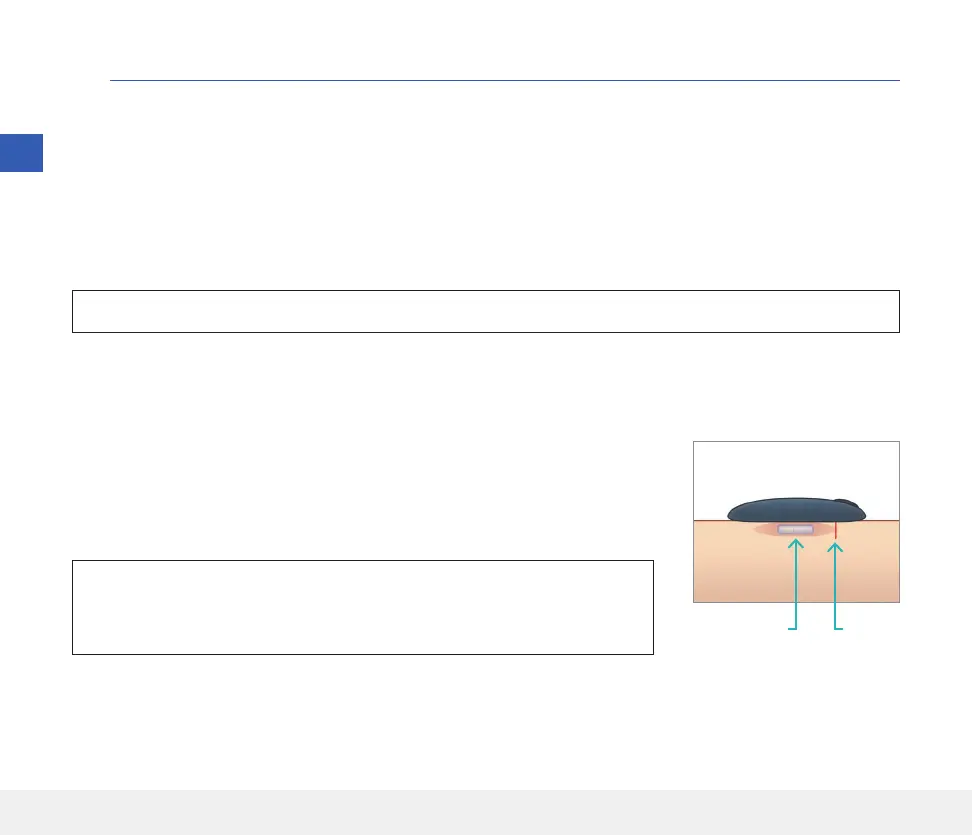
The incision site is closed using Steri Strips and an adhesive bandage, such as
Tegaderm is placed over the top. It is important to understand how the smart
transmitter should be positioned over the sensor to ensure linking can be
completed. The smart transmitter should be centred over the sensor as shown.
IncisionSensor
4