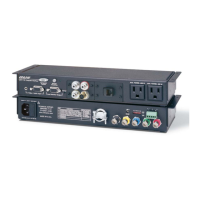
SSP 200 • Panel Features 8
E
LAN port — RJ‑45 connector allows the SSP 200 to be connected to a Local Area
Network (LAN) connection for control and configuration. As with the RS‑232 and
USB connections, the device can be controlled using SIS commands through an
external control system or via PCS in order to configure the device and receive status
information as required.
The Ethernet cable can be terminated as a straight‑through cable or a crossover cable
and must be properly terminated for your application (see figure7 for wiring information).
• Crossover cable — Direct connection between the computer and the SSP 200.
• Patch (straight) cable — Connection of the SSP 200 to an Ethernet LAN.
12345678
RJ-45
Connector
Insert Twisted
Pair Wires
Pins:
A cable that is wired as TIA/EIA T568A at one
end and T568B at the other (Tx and Rx pairs
reversed) is a "crossover" cable.
A cable wired the same at both ends is called
a "straight-through" cable because no pin/pair
assignments are swapped.
T568B T568A T568B T568B
Straight-through Cable
(for connection to a switch, hub, or router)
End 1 End 2
Pin Wire Color Pin Wire Color
1 white-orange 1 white-orange
2 orange 2 orange
3 white-green 3 white-green
4 blue 4 blue
5 white-blue 5 white-blue
6 green 6 green
7 white-brown 7 white-brown
8 brown 8 brown
Crossover Cable
(for direct connection to a PC)
End 1 End 2
Pin Wire Color Pin Wire Color
1 white-orange 1 white-green
2 orange 2 green
3 white-green 3 white-orange
4 blue 4 blue
5 white-blue 5 white-blue
6 green 6 orange
7 white-brown 7 white-brown
8 brown 8 brown
Figure 7. RJ-45 Ethernet Connector Pin Assignment
F
Reset button — The Reset button initiates various levels of soft resets, which restore
various tiers of SSP 200 settings to their defaults (see System Reset on page14).
Use a pointed stylus or small screwdriver (such as an Extron Tweeker) to press the internal
button.
G
Status LED — The Status LED is used in conjunction with the Reset button (see
System Reset on page14).
H
Analog outputs (see figure8) — Outputs are balanced or unbalanced line level analog
signals that feed into multichannel amplifiers for configurations up to 7.1.2 or 5.1.4
surround sound. For more information, see Speaker Placement on page18.
DTS
D
PCM
2-CH
DTS: X
ATMOS
HDCP
EXP
SOURCE
INPUT
1 2 3 4 5
VOLUME
OUTS
1(LF) 2(RF) 3(C) 4(SUB) 5(LS) 6(RS) 78
0(MIX)
RS-232
Tx Rx G
1 THRU
INPUTS
2
5
LR
34
Figure 8. Analog Audio Outputs
7
8