TLP Pro x25 Series and TLS x25 Series • Panel Features 12
A
MENU button (TLS Series and TLP Pro x25M only) — (figure 4 on page 11) Activates the On-screen Menus
(see page 16).
B
RESET button (TLS Series and TLP Pro x25M only) — Pressing the RESET button allows the unit to be reset
in any of three different modes and can also be used to toggle between enabling and disabling the DHCP
client (see Reset Modes on page 38).
C
Reset LED (TLS Series and TLP Pro x25M only) — Provides feedback about the reset status when the RESET
button is pressed (see Reset Modes).
D
Mounting slots (TLS Series and TLP Pro x25M only) — The TLP Pro 725M and 1025M have four, one in
each corner. The TLP Pro 525M has two, one in each top corner (see Mounting the TLP Pro x25M Series
and TLS Series Touchpanels on page 31).
E
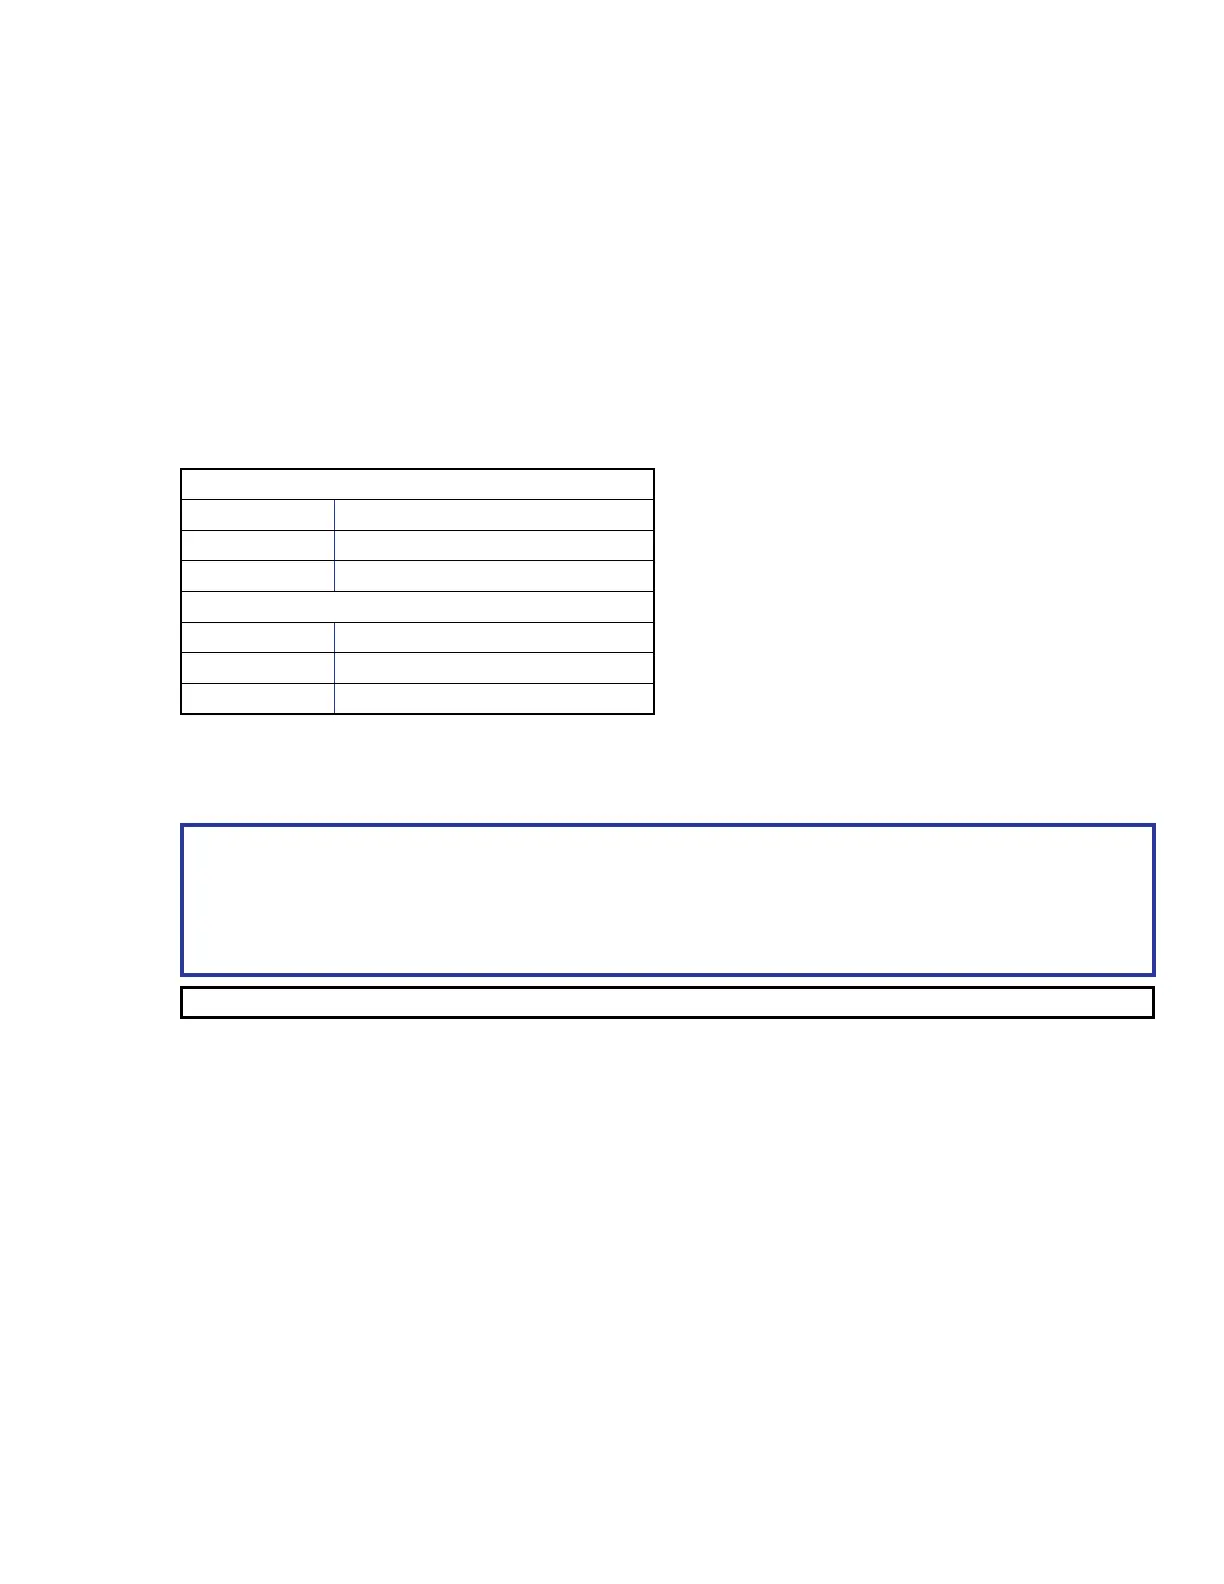
Digital input monitoring port (TLS Series and TLP Pro x25M only) — This two-pole captive screw port
(1 = signal and G = ground) monitors digital input with or without a +5 VDC pull-up.
The table below provides information about the ports:
Digital Input, Pullup Disabled
Logic State Notes
Logic Low Voltage below 2.0 VDC
Logic High Voltage above 2.8 VDC
Digital Input, Pullup Enabled
Logic State Notes
Logic Low Externally shorted to ground
Logic High Open, +5V from pull-up resistor
See Digital I/O Port Cases on page 37, for examples of how these ports function.
F
LAN/PoE connector (TLS Series and TLP Pro x25M only) — These touchpanels must be powered by Power
over Ethernet (PoE; see Connecting Power on page 14).
ATTENTION:
• Do not power on the touchpanels or control processors until you have read the ATTENTION about
Power over Ethernet (PoE) power supplies (see page 15).
• Ne branchez pas les écrans tactiles ou les processeurs de contrôle avant d’avoir lu la mise en
garde sur les sources d’alimentation via Ethernet (PoE) (voir page 15).
NOTE: The touchpanels ship without a power injector. The power injector must be purchased separately.
An Extron IPL Pro control processor must also be connected to the same network domain as the TouchLink
Pro touchpanel (see www.extron.com for a list of compatible models).
The network port has two LEDs. The green LED lights steadily to indicate that the touchpanel is connected
correctly to a network. The yellow LED blinks to indicate that data is being passed to or from the touchpanel.
G
USB port — Compatible with USB 2.0. The TLP Pro 525T, TLP Pro 725T, and TLP Pro 1025T have a plastic
cover that must be removed for access to the USB port.
H
Speaker (TLS Series and TLP Pro x25M only) — Provides audible feedback for the user. The TLP Pro 525M
and 725M have a single speaker. The TLP Pro 1025M has two (dual mono) speakers.
I
Slot for mounting plate (TLS Series and TLP Pro x25M only) — The tongue at the bottom of the mounting
plate fits into this slot, for wall mounting (Mounting the TLP Pro x25M Series and TLS Series
Touchpanels).
J
Mounting screw (TLS Series and TLP Pro x25M only) — Tightens against the tongue of the mounting plate
to secure the touchpanel (see Mounting the TLP Pro x25M Series and TLS Series Touchpanels).
MENU button
RESET button
Reset LED
Mounting slots
Digital input monitoring port
LAN/PoE connector
USB port
Speaker
Slot for mounting plate
Mounting screw