TLP Pro x25 Series and TLS x25 Series • On-screen Menus 16
On-screen Menus
On-screen menus allow initial configuration of the touchpanels. The figures in this section show screens for the
TLP Pro 525M. Unless stated otherwise, the screens for the other touchpanels are very similar.
Setup Menu
To open the setup menu, use a screw driver with a fine blade to press the MENU button. The MENU button is
located on the rear panel of the TLP Pro 525M, 725M, or 1025M (see figure 4,
A
, on page 11) or on the base of
the TLP Pro 525T, 725T, or 1025T (see figure 5,
A
, on page 13).
The menus open at the Status screen. There are seven different panels:
• Status (see below) • Display (see page 21)
• LinkLicenses (see page 17) • Audio (see page 22)
• System Information (see page 18) • Advanced (see page 23)
• Network (see page 19)
Status, Network, Display, Audio, and Advanced screens can be selected by pressing the appropriate button in
the navigation panel at the top of the screen. The button for the selected screen is yellow. The buttons for the
remaining screens are black.
LinkLicenses and System Information are available only from the Status screen.
Press the red Exit button in the top right corner of the screen button to apply and save any changes and close the
menu screens.
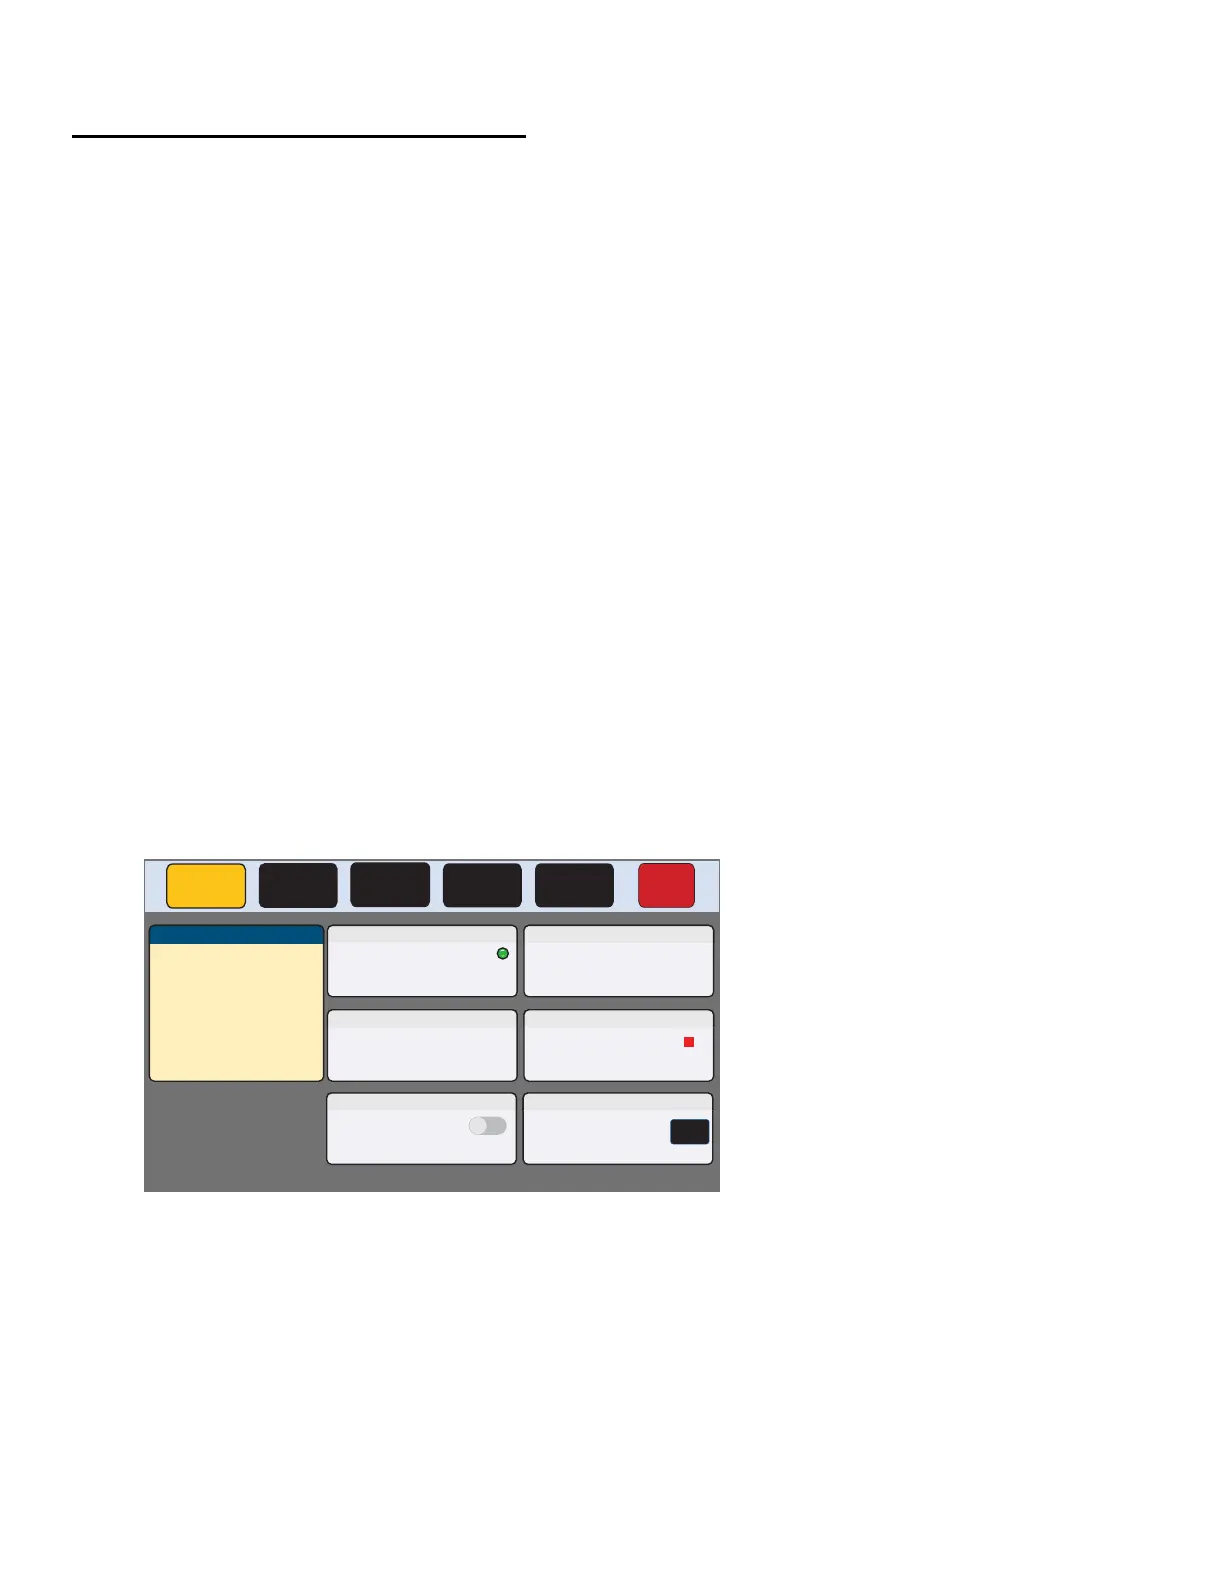
Status
Press the Status button in the navigation panel at the top of any screen to open the Status screen.
Status
Display Audio Advanced Exit
Network
Info
Model: TLP Pro 725M
Part Number: 60-1563-02
Firmware
Version:
3.09.0000-b003
Network
IP Address:
DHCP:
Host Name:
Off
192.168.254.251
TLP-AB-CD-EF
Display
Resolution:
GUI Project:
Sleep Timer:
800x480
N/A
5 Minutes
Audio
System Volume:
System Mute: Off
99
Advanced
Controller IP: N/A
Project Size: N/A
Bootloader
Version:1.00.0002
LinkLicenses
LinkLicenses
User Interface
System Information
Primary Controller Address:
N/A
System ID: N/A
Edit
LinkLicense for TLP Pro Control Processor
Figure 7. Status Screen
The Status screen is mostly read-only and provides basic information about the touchpanel. Each of the other six
panels shows a summary of the information on the other screens.
Pressing the Network, Display, Audio, and Advanced panels opens the corresponding screen in exactly the
same way as pressing the buttons in the top navigation panel. Features in the LinkLicenses (see page 17) and
System Information (see page 18) panels can only be accessed from the Status screen.
A green bubble in the Network panel lights when there is a network connection or a red square appears if there is
no connection (see figure 7). The green bubble in the Advanced panel lights when a control processor is
connected or a red square appears if none is connected.
gure 7