TLP Pro x25 Series and TLS x25 Series • On-screen Menus 20
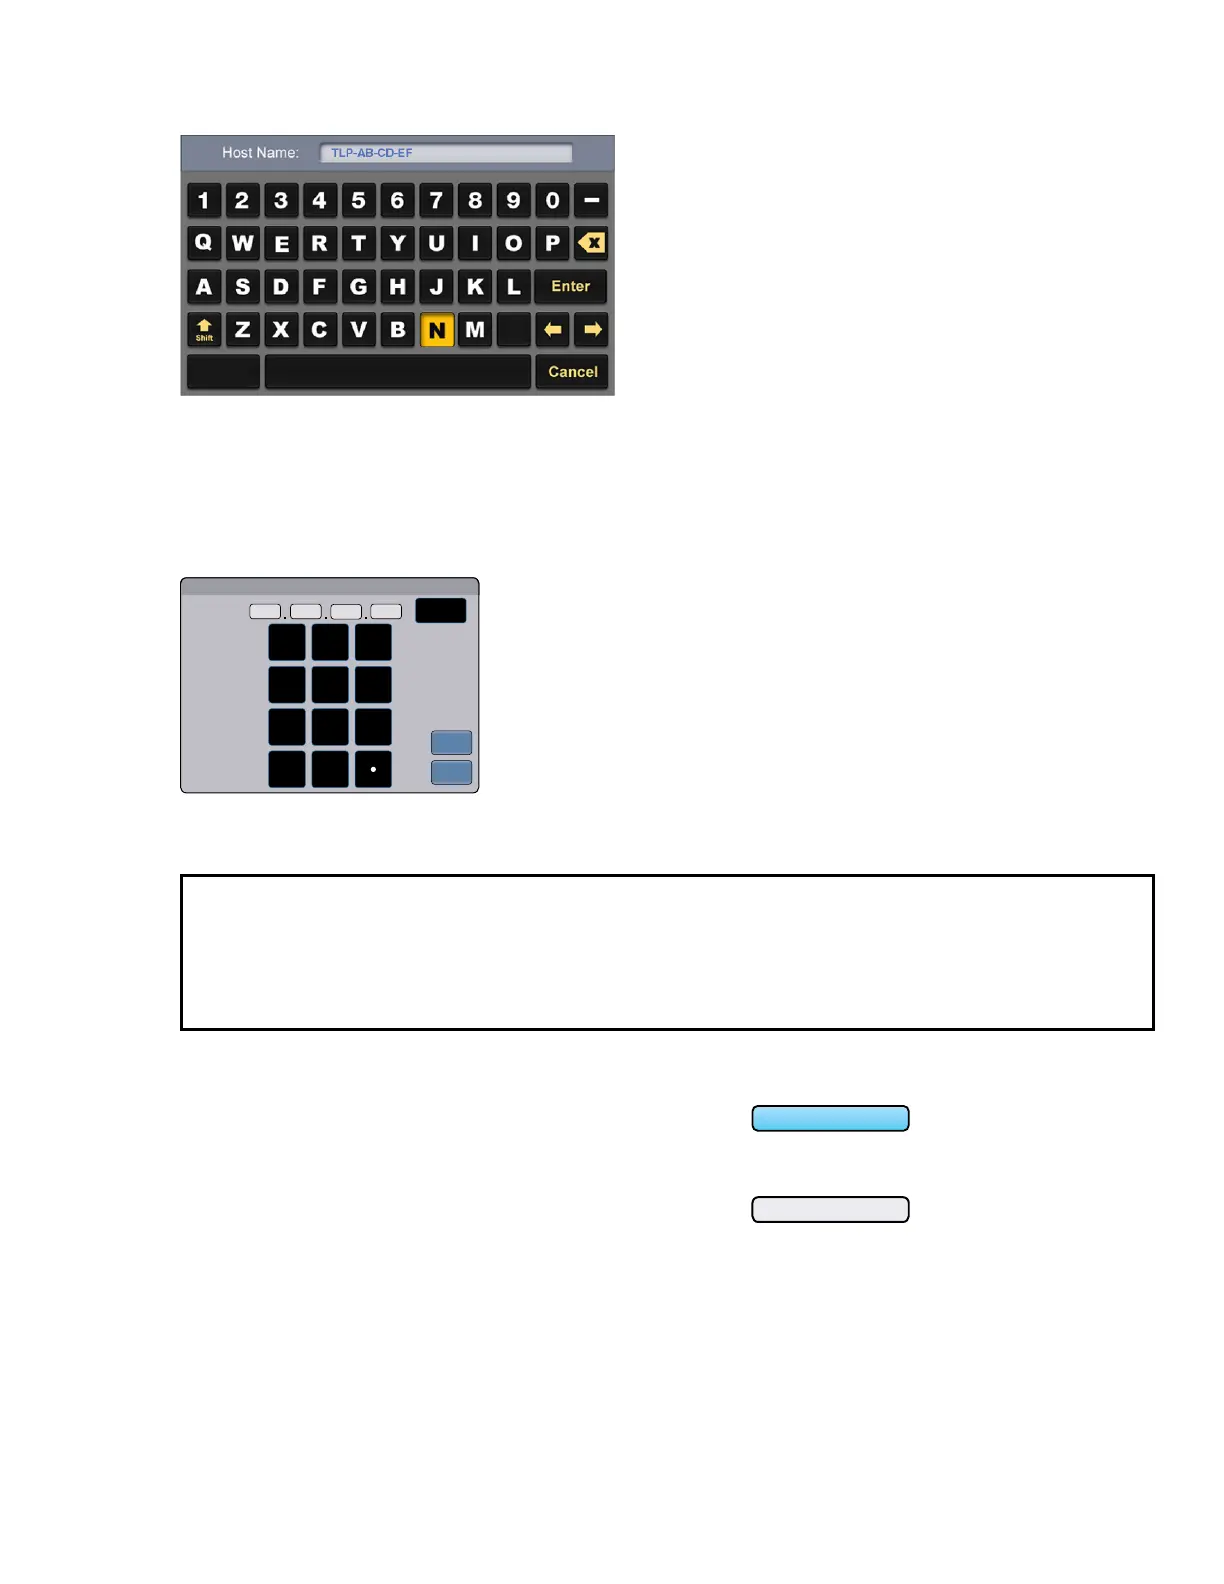
2. If DHCP is on, press the Host Name button to edit the Host Name. The Host Name dialog box opens:
Figure 12. Alphanumeric Keypad
3. Use the keypad to enter a new name, which appears in the Host Name text box.
If DHCP is disabled, set the unit IP address, subnet mask, gateway address, and DNS server address.
1. Press the button for the address to be edited (see figure 11 on page 19). A screen opens, showing the
address and a numerical keypad.
IP Address
192 168 254 251
Back
0
1
4
7
3
6
98
5
2
Clear
Cancel
OK
Figure 13. Numeric Pad for Setting IP Addresses
2. Select an octet and enter the 3-digit value (leading zeroes in the octet are ignored).
NOTES:
• Octets can have any value between 0 and 255.
• If you attempt to enter an invalid number, for example 892, you are able to enter the 89 but the 2
cannot be entered.
• When a valid 3-digit value is entered, the next octet is automatically selected.
3. Press OK to save the changes and return to the Network screen or press Cancel to return to the Network
screen without saving the changes.
If you have changed any of the values in the Network
screen, the background color of the button changes
to blue. Press Apply to apply the new values or press
Revert to return to the previous values without
saving the changes. The address button returns to
gray (see figure 11 on page 19).
If you have not made any changes, the Apply and
Revert buttons are grayed out.
0.0.0.10
0.0.0.10
Unsaved
Figure 14. IP Address, unsaved (top)
and saved (bottom).