TLP Pro x25 Series and TLS x25 Series • On-screen Menus 24
Menu PIN
The PIN setup options allow you to enable, disable, or change the setup menu PIN. The PIN is a 4-digit number.
Each digit can have any value from 0-9.
1. Click On to enable the use of a PIN. Click Off to disable the use of a PIN. Click Change to edit an existing
PIN. (see figure 17 or figure 18 on page 23).
If no PIN has been set, clicking On or Change opens the PIN dialog.
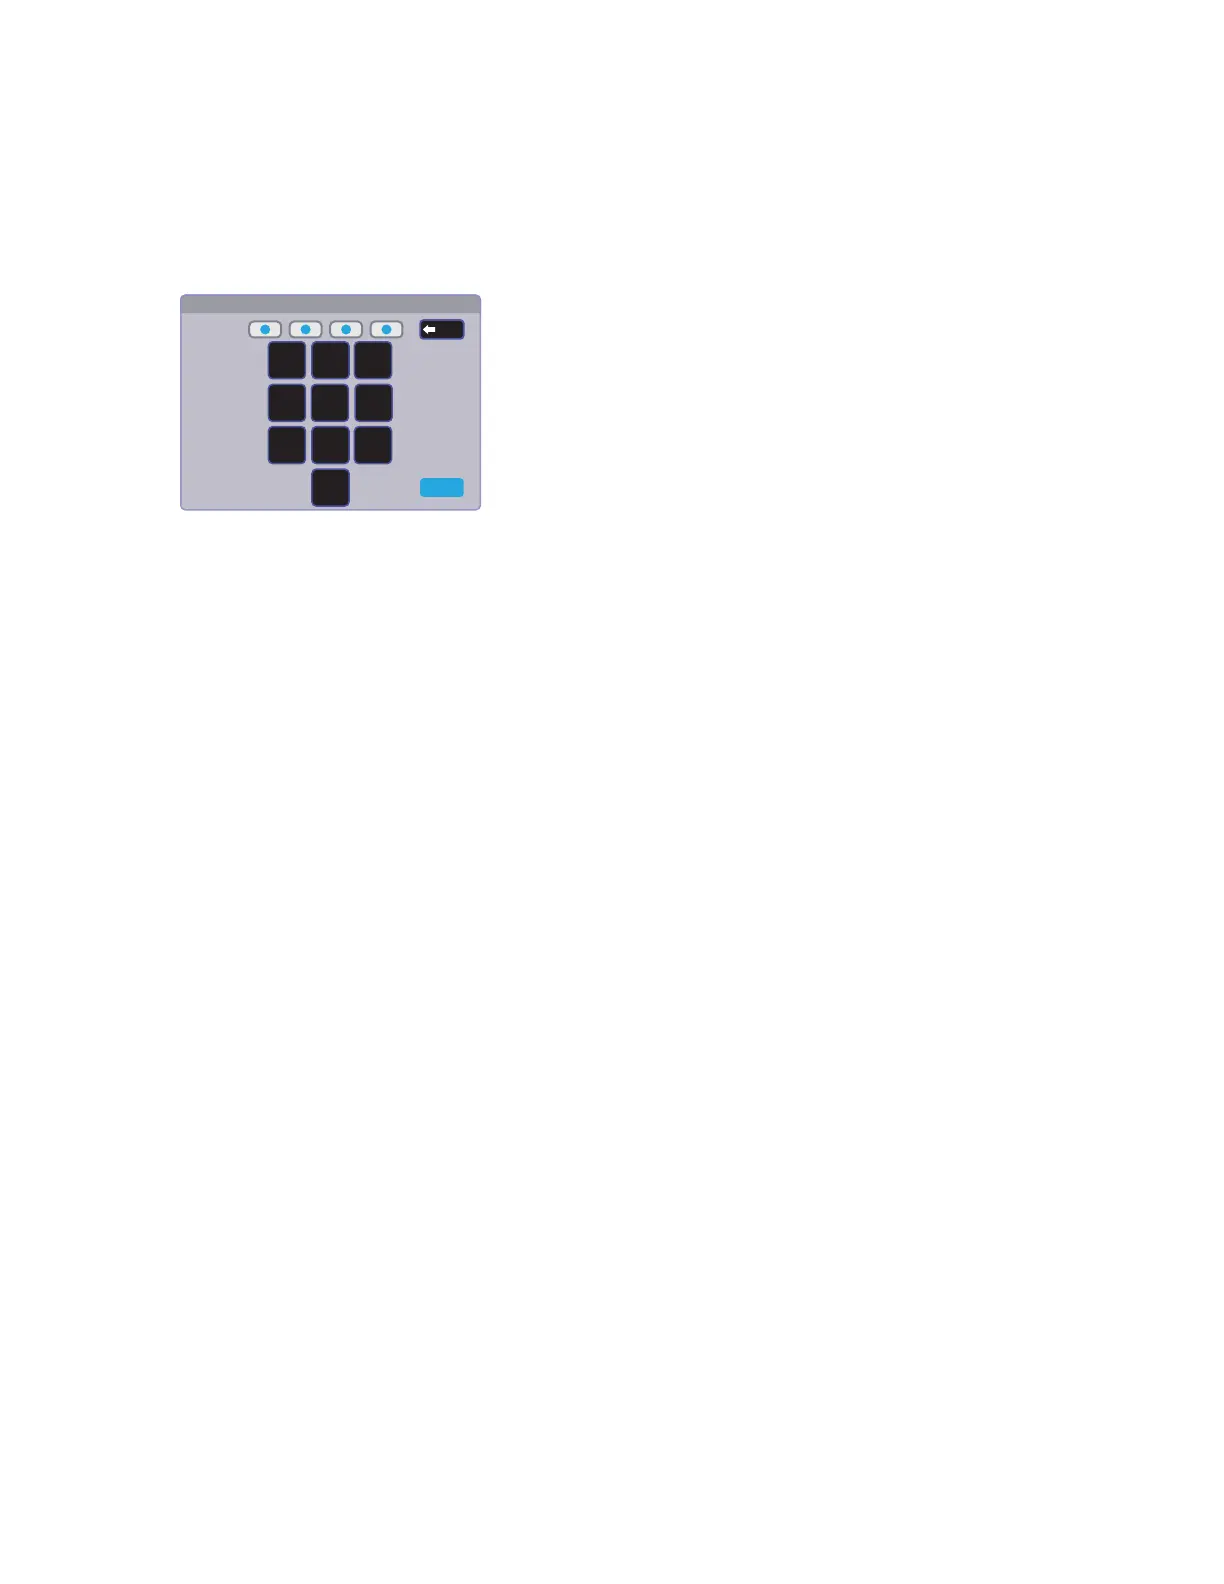
Enter New Menu PIN
456
7
8
9
0
213
Cancel
Back
Figure 19. Numeric Keypad for Setting PIN
2. Press a number on the keypad. A blue circle appears in the first box.
3. Select the other three digits for the PINs. The fourth circle appears momentarily and then the screen changes
to Confirm New Menu Pin.
4. Enter the PIN a second time. When the PIN entered on the second occasion matches the PIN entered on the
first occasion, the PIN is set and the dialog closes.
Rear Status Lights
These lights can be switched on or off by pressing the Enable or Disable button (see figure 17 on page 23
[TLP Pro 725M and TLP Pro 1025M series only]).
Communication LED
The LED can be switched on or off by pressing the Enable or Disable button (see figure 17 or figure 18 on
page 23).