41
0
1
2
3
4
5
!
"
#
!
Dust Extractor
RL 250 / RL 300 / RL 350
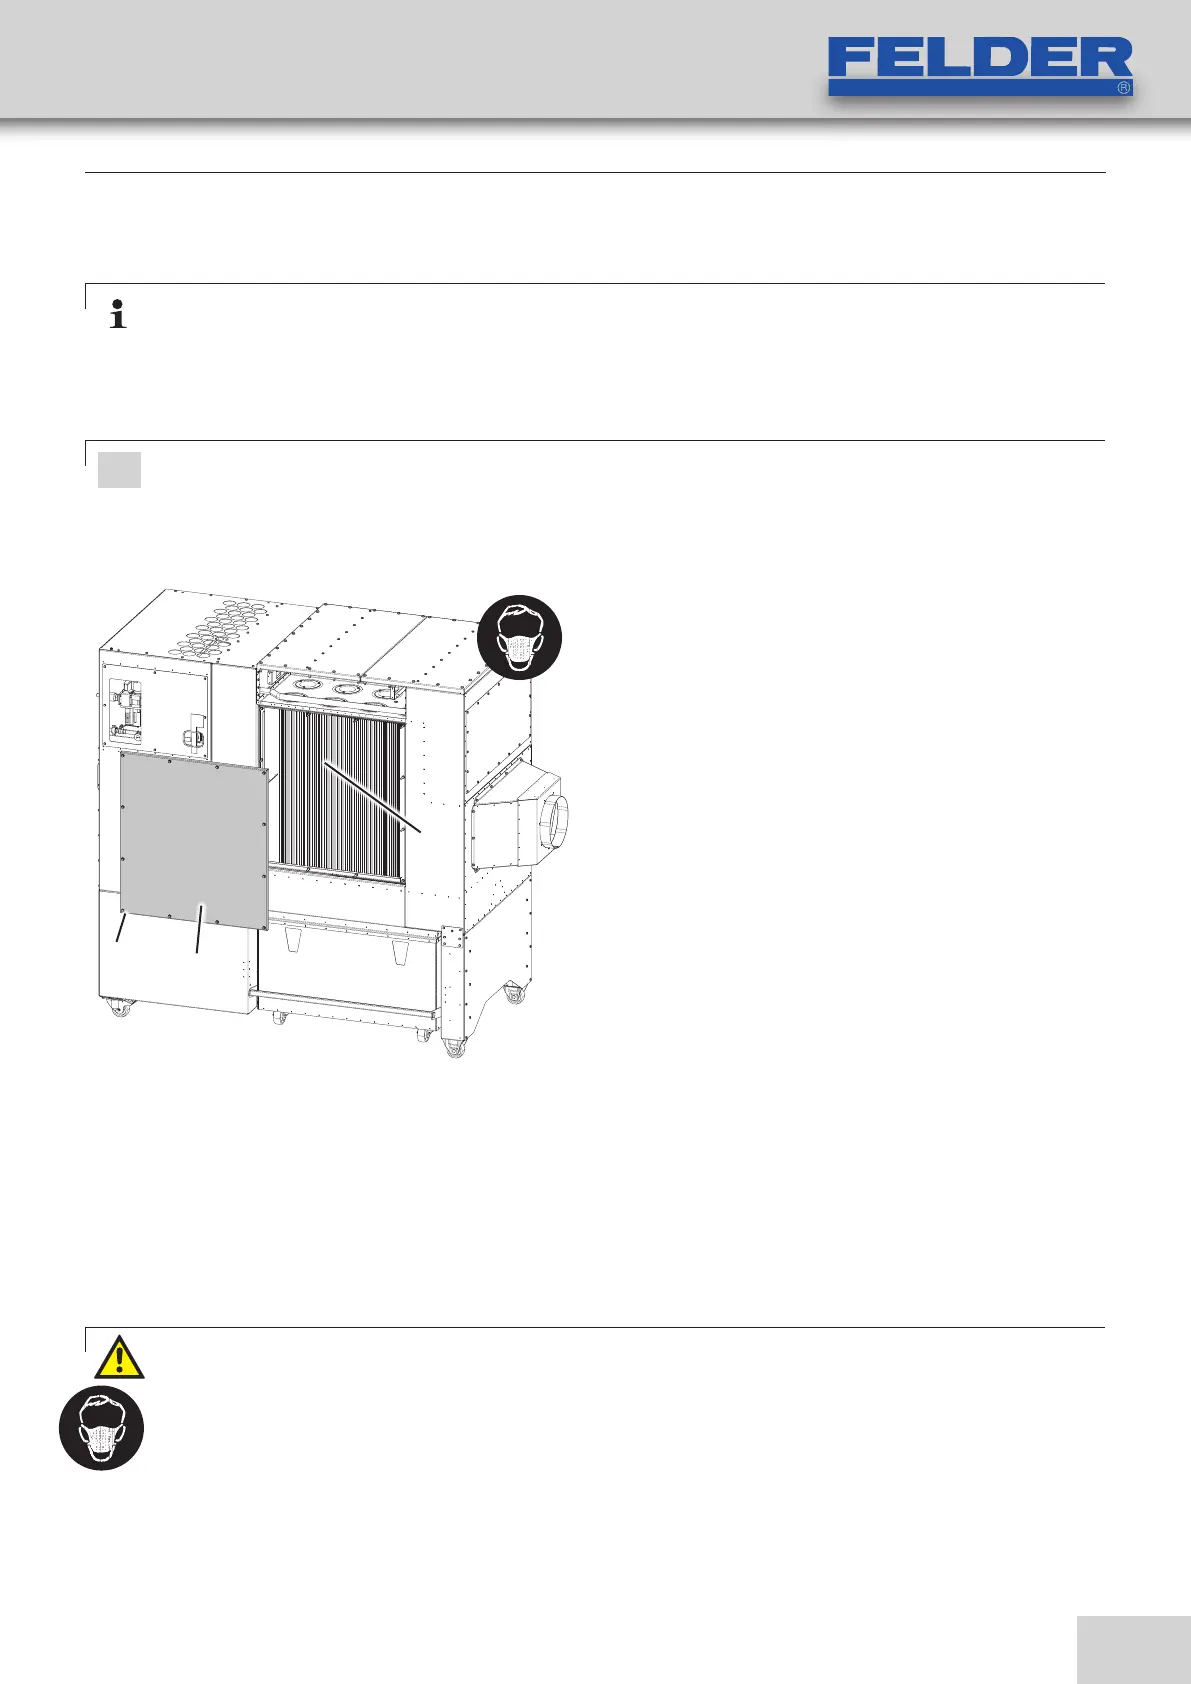
8.9 Changing the filter
Fig. 8-3: Changing the filter
Note:
After a certain period of time, depending on the type and amount of vacuumed material, it is no longer
possible to clean the filters as the filter pores have become clogged with very fine dust.
It is then necessary to replace the filters.
Only insert original and intact filter cartridges!
Only carry out this task with a dust respirator (filter mask with particle filter, Class 2)!
First clean the filters carefully!
1. Switch the device off and pull out the power plug.
2. Loosen and remove the hex nuts.
Take off the covering lid (on both sides)
3. The cartridges are mounted with a screw thread.
Vacuum the cartridges with an appropriate (B1 at
least) industrial vacuum (accordint to EN 60335-2-69,
dust class M). Insert the collecting containers during
the cleaning process to collect the falling dust.
4. Control the individual cartridges for damage.
5. Remove the filter cartridges and insert the new filters.
Order no. Filter cartridge (1 pcs.)
02.0.467 - for wooden materials
02.0.468 - for plastic materials
6. reassemble the cover (on both sides)
!Nuts (Cover)
"Cover (Guard plate)
#Filter cartridge
RL 250-300: 16 pcs.
RL 350: 23 pcs.
Warning! Danger of dust inhalation:
Always use a dust respirator (filter mask with a particle collector, Class 2) when carrying out this task. Prevent
uninvolved people from being exposed to the dust pollution.
Dust and shavings must be disposed of according to the regulations of the country where the machine is
installed.
Service