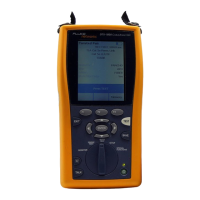
DTX Series CableAnalyzer
Technical Reference Handbook
3-6
Autotest on Twisted Pair Cabling
Figure 3-2 shows the equipment needed for certifying
twisted pair cabling.
Figure 3-2. Equipment for Certifying Twisted Pair Cabling
To run the Autotest on twisted pair cabling:
1
Verify that the settings listed in Table 3-1are
appropriate.
2
Attach adapters appropriate for the job to the tester
and the smart remote.
3
Turn the rotary switch to AUTOTEST and turn on the
smart remote. Connect to the cabling, as shown in
Figure 3-3 for a permanent link or Figure 3-4 for a
channel.
4
If a fiber module is installed, you may need to press
J Change Media to select Twisted Pair as the media
type.
5
Press Pon the tester or smart remote. To stop the test
at any time, press
I.
6
The tester shows the Autotest Summary screen when
the test is complete (see page 3-10). To view results for
a specific parameter, use
A D to highlight
the parameter; then press H.
If the Autotest failed, press
J Fault Info for possible
causes of the failure.
7
To save the results, press N. Select or create a cable ID;
then press
N again.
amd40af.eps
A
Tester and smart remote with battery packs
B
Memory card (optional)
C
Two ac adapters with line cords (optional)
D
For testing permanent links: two permanent link
adapters
E
For testing channels: two channel adapters
1
2
3
4
5
TEST
LOW BATTERY
TONE
TALK
FAIL
TEST
PASS
TALK
TALK
MONITOR
ENTER
TEST
SAVE
SPECIAL
FUNCTIONS
SETUP
AUTO
TEST
SINGLE
TEST
EXIT
F1 F2 F3

 Loading...