24
5.2.4. Burnt-in Text
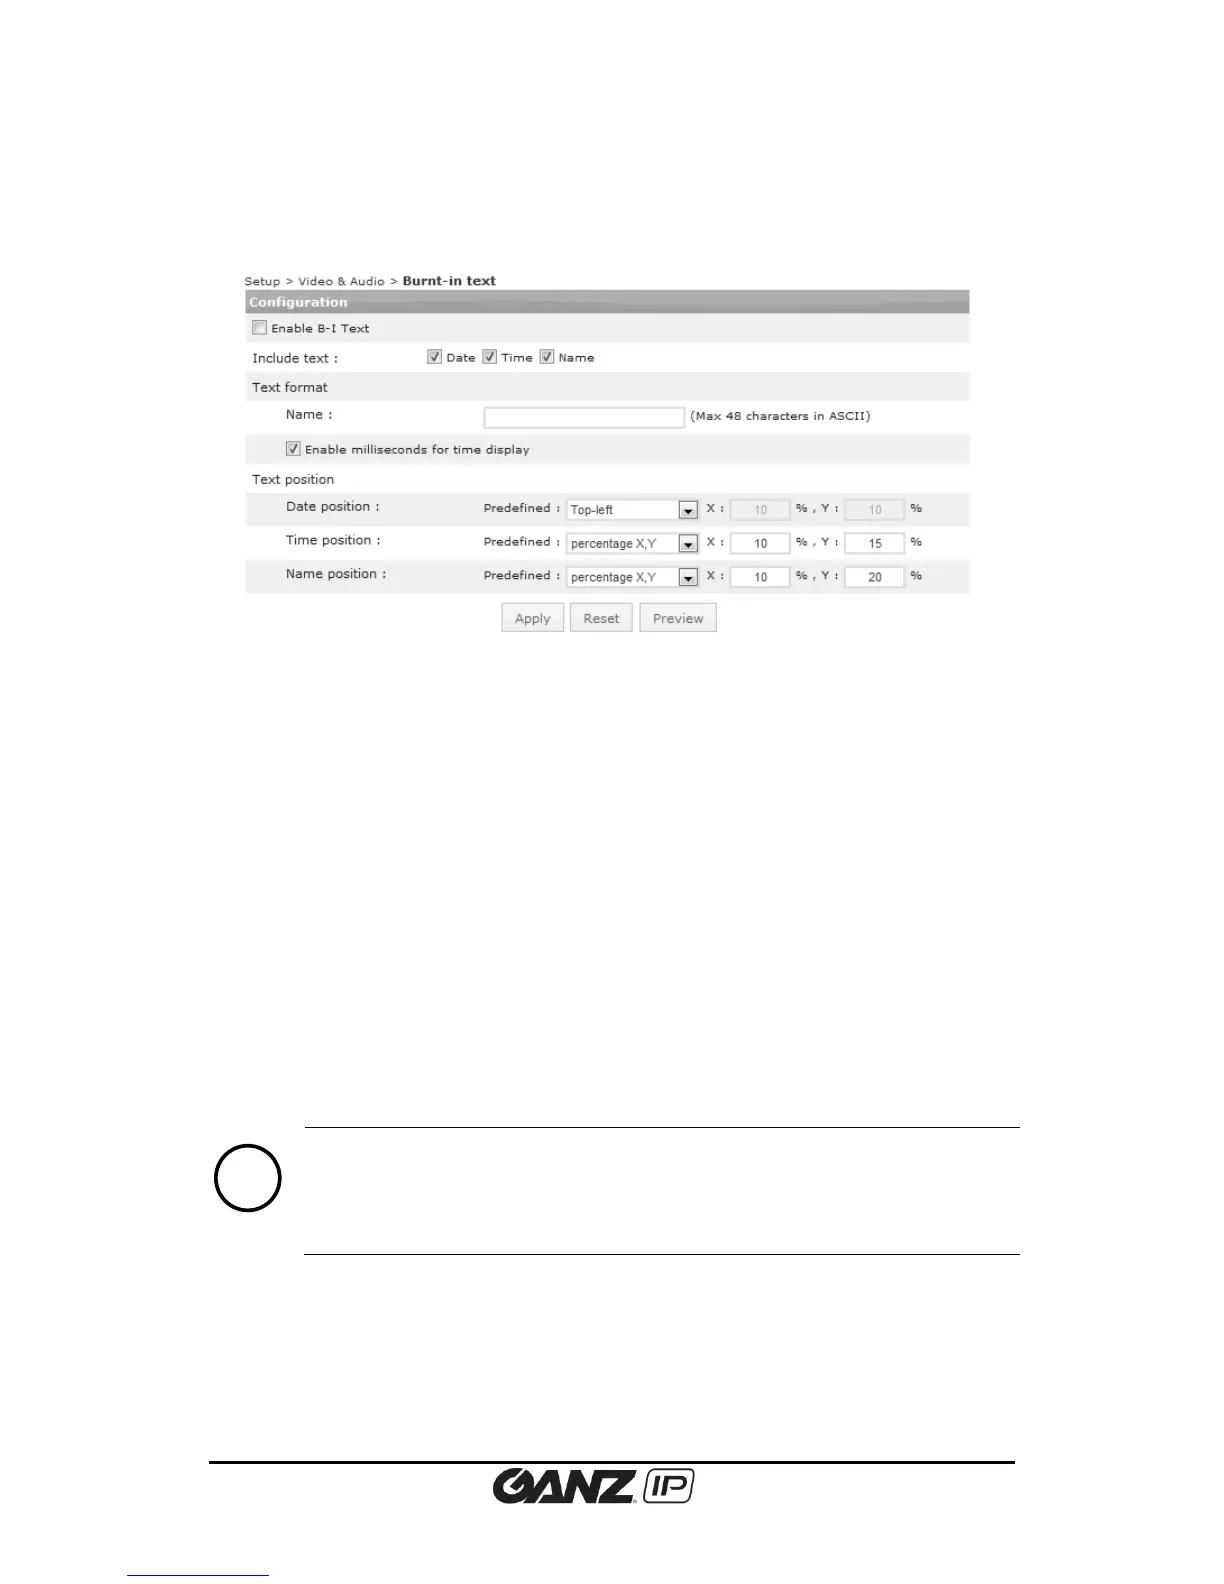
To change the burnt-in text setting, go to Setup > Video & Audio > Burnt-in Text.
The setting of the Burnt-in Text is applied to first stream, second stream (if the device
supports) and snapshot modes identically. To add burnt-in text, select the Enable check box
after the setting and click the Apply button.
What is Burnt-in Text?
Burnt-in Texts ‘burns’ information into streaming visuals before it gets compressed, thus
prohibiting manipulation or alteration of the events’ time. It allows the file to become reliable
evidence as it discourages intentional manipulation of the date and time for an alibi.
Text configuration
Select information (Date, time and name) to include as the burnt-in text in image. To include a
specific name or info, type the desired text on the name text box. To display millisecond (time),
check the ‘Enable milliseconds for time display’ checkbox.
Text position
Set where the burnt-in text will be positioned in image. Predefined locations are provided as
well as manual position options.
It is recommended to use normalized X, Y instead of predefined positions (left-top,
left-bottom, right-top, right-bottom) for the burnt-in text positions. Selecting
same predefined positions on all three categories may cause overlapping texts,
depending on image resolution or the position of each text. Utilizing PREVIEW is
highly encouraged to review the selected positions of those burnt-in texts.