Replacing or adding drives 29
9
Holding the drive at an angle with the right side lower than the left side,
slide the holes in the right side of the drive over the pins on the right
side of the drive bay.
10 Rotate the left side of the drive down until the drive rests level in the
drive bay. Make sure that the data and power connectors on the drive
face the interior of the chassis.
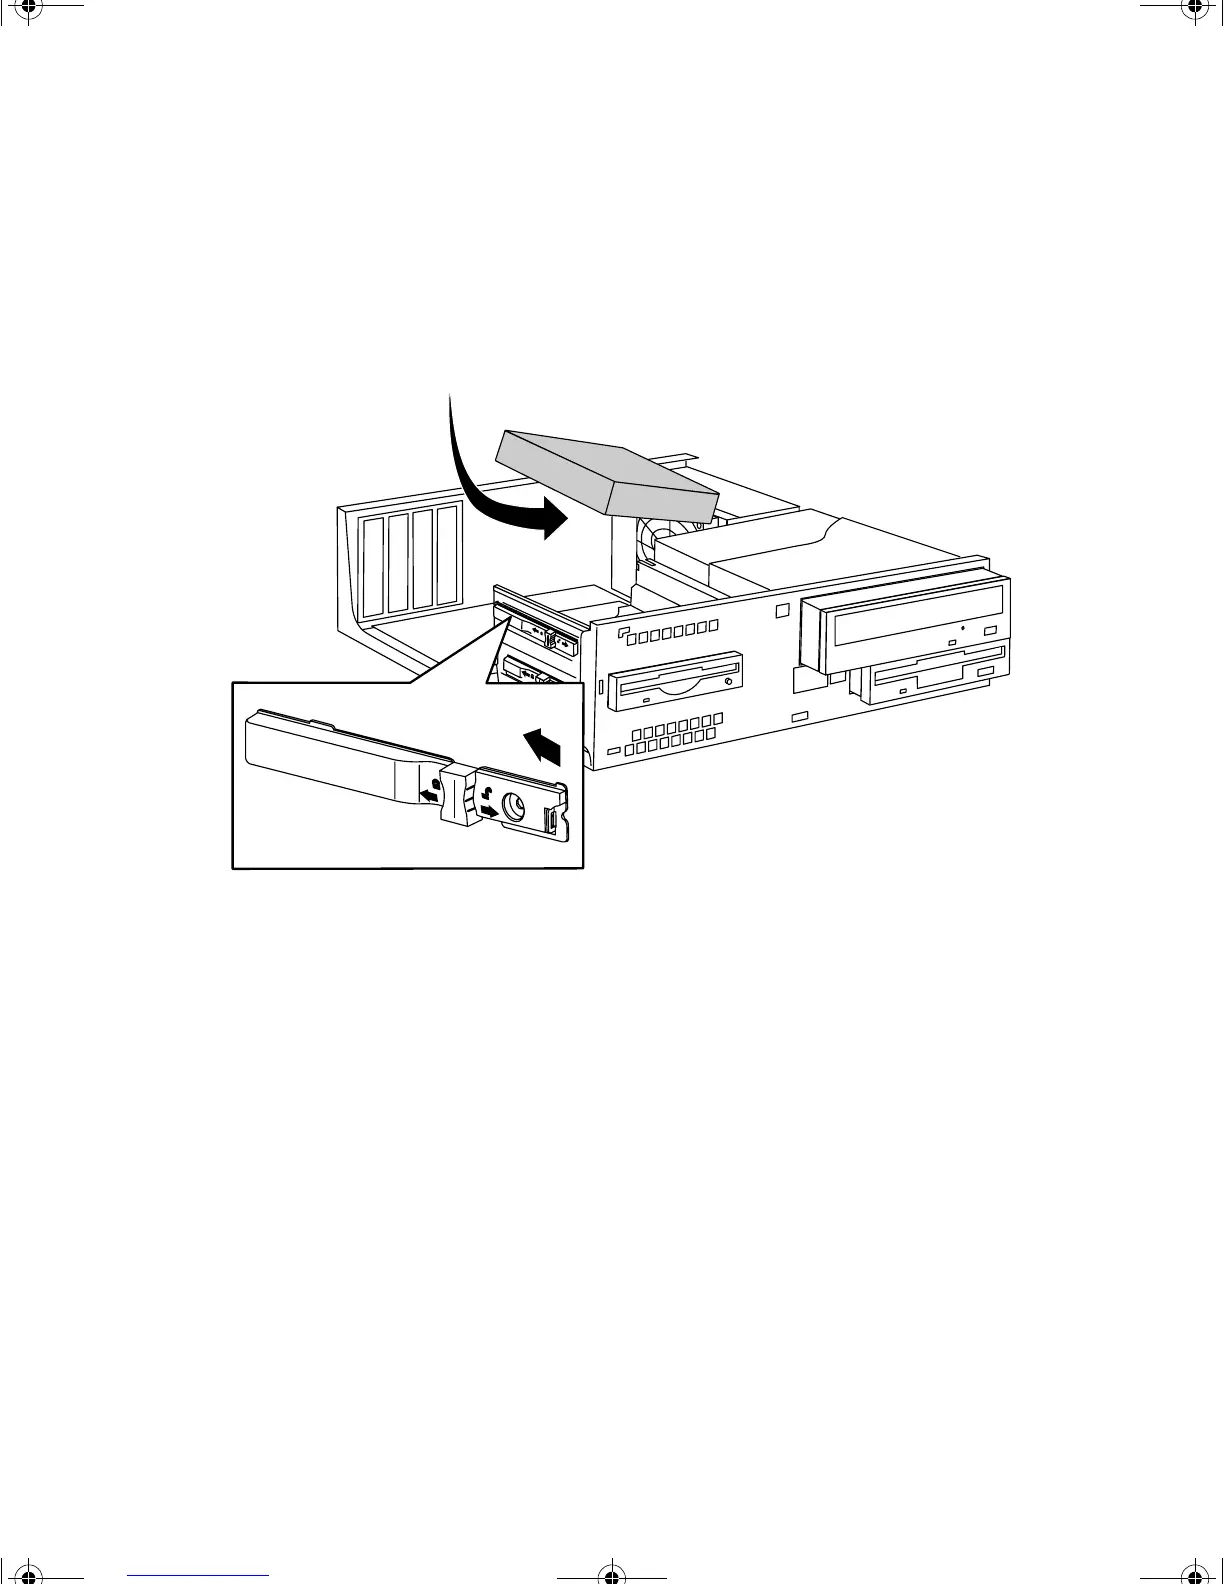
11 Slide the locking clip toward the back of the chassis to secure the drive
in place.
12 Connect the power and data cables to the drive.
13 Close the case by following the instructions on page 18.
14 Reconnect the peripherals, the modem cable, and the power cord, then
turn on the computer.
15 If necessary, install your operating system and other software.
8506999.book Page 29 Friday, December 15, 2000 8:22 AM