GE
D
IRECTION 5535208-100, REV. 2 LOGIQ E9 SERVICE MANUAL
Chapter 8 Replacement procedures 8 - 19
8-4-6-6 Loading the Application Software
1.) Insert the applicable disk labelled LOGIQ E9 Application SW.
2.) Wait about 30 seconds.
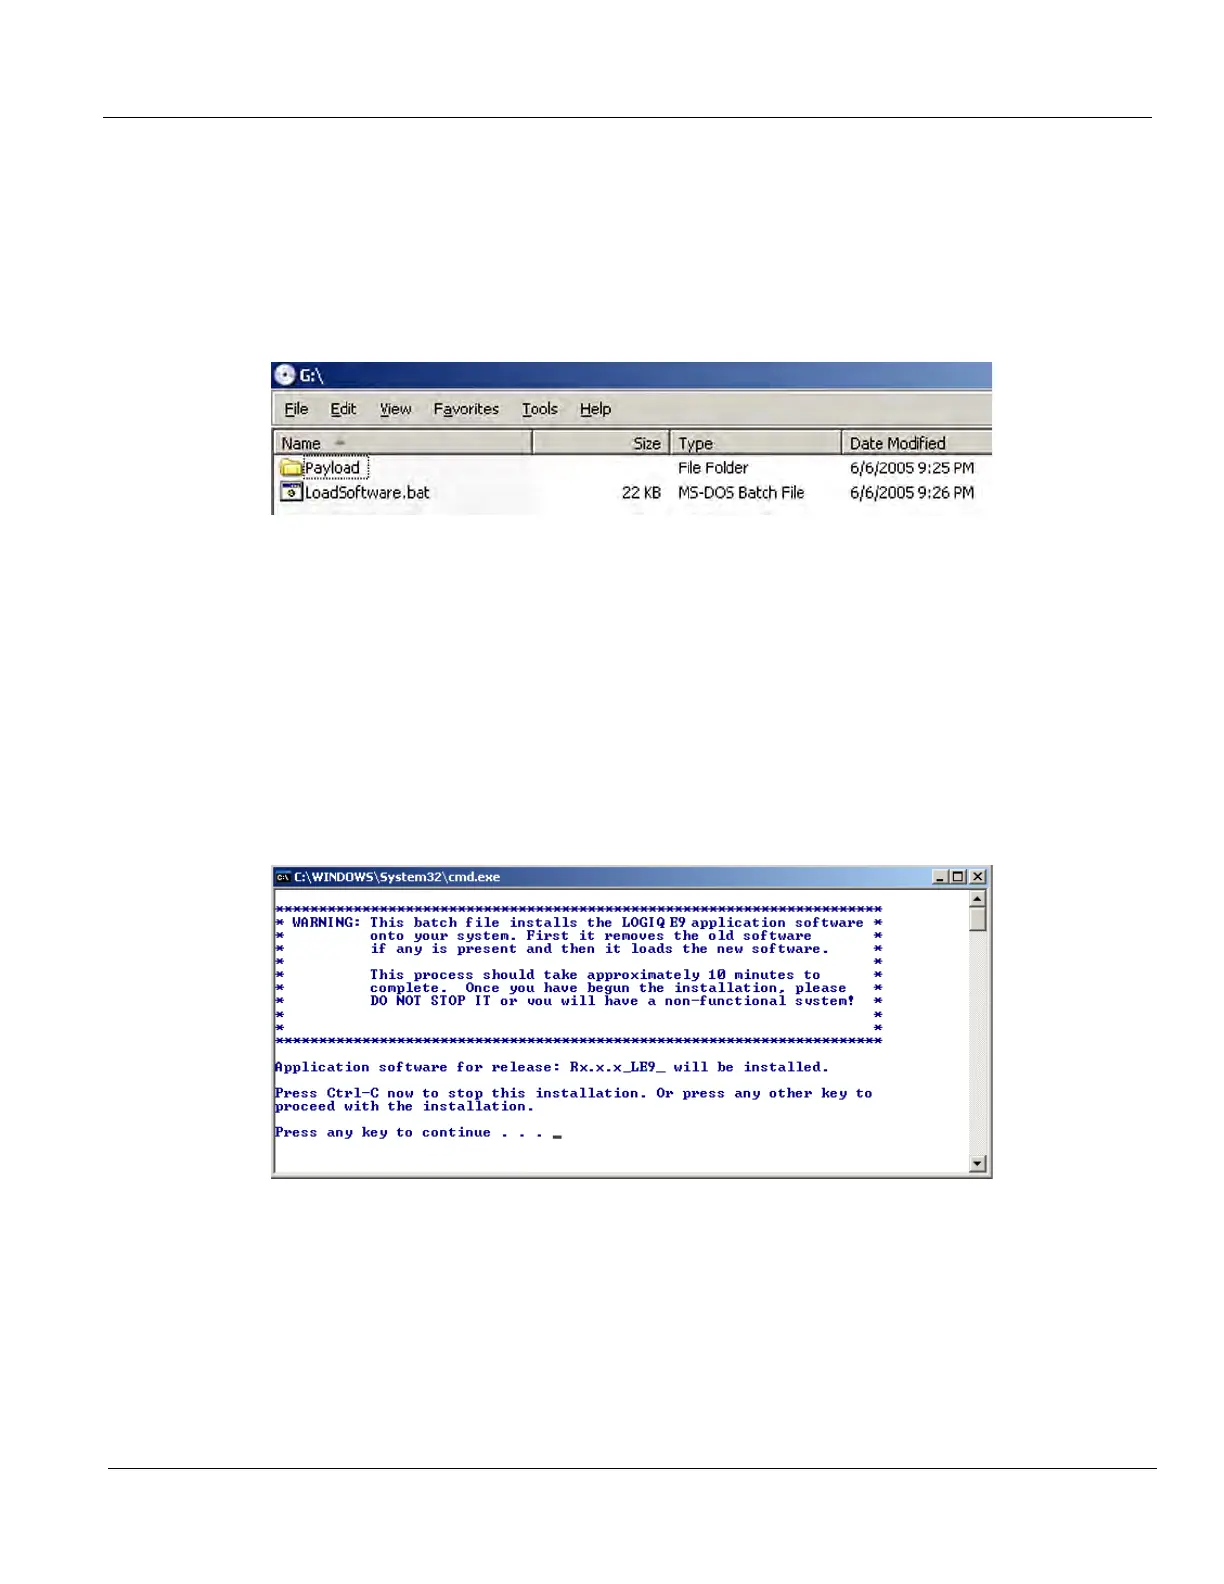
A window opens (see: Figure 8-8) showing the contents of the drive.
3.) Double-click on LoadSoftware.bat to load the software.
4.) If the pop-up window in Figure 8-8 does not open in a minute, perform steps A - C below.
A.) From the Desktop, select “My Computer.”
B.) Double-click the G:\ drive to open the pop-up window in above.
C.) Double-click on LoadSoftware.bat to load the software.
NOTE: If the base image does not match the part number and revision of the approved base image,
then the system notifies you of the required base image needed and does not run the software.
A Command window similar to the example shown in Figure 8-9 opens.
Figure 8-8 LoadSoftware.bat File
Figure 8-9 Command Window (Note: Window will reflect actual software version instead of “Rx.x.x”)