EasyManuals Logo

GE LOGIQ E9 Service Manual

GE LOGIQ E9
808 pages
To Next Page IconTo Next Page
To Previous Page IconTo Previous Page
Page #439 background imageLoading...
Page #439 background image
GE
D
IRECTION 5535208-100, REV. 2 LOGIQ E9 SERVICE MANUAL
Chapter 8 Replacement procedures 8 - 93
8-6-2-3 LCD Monitor V2 removal - R4.x
A cover at the rear side of the LCD Monitor assembly covers the cable to the monitor. To get access to
the cable connector, remove the Cable Cover.
Table 8-58 LCD Monitor V2 removal - R4.x
Steps Corresponding Graphic
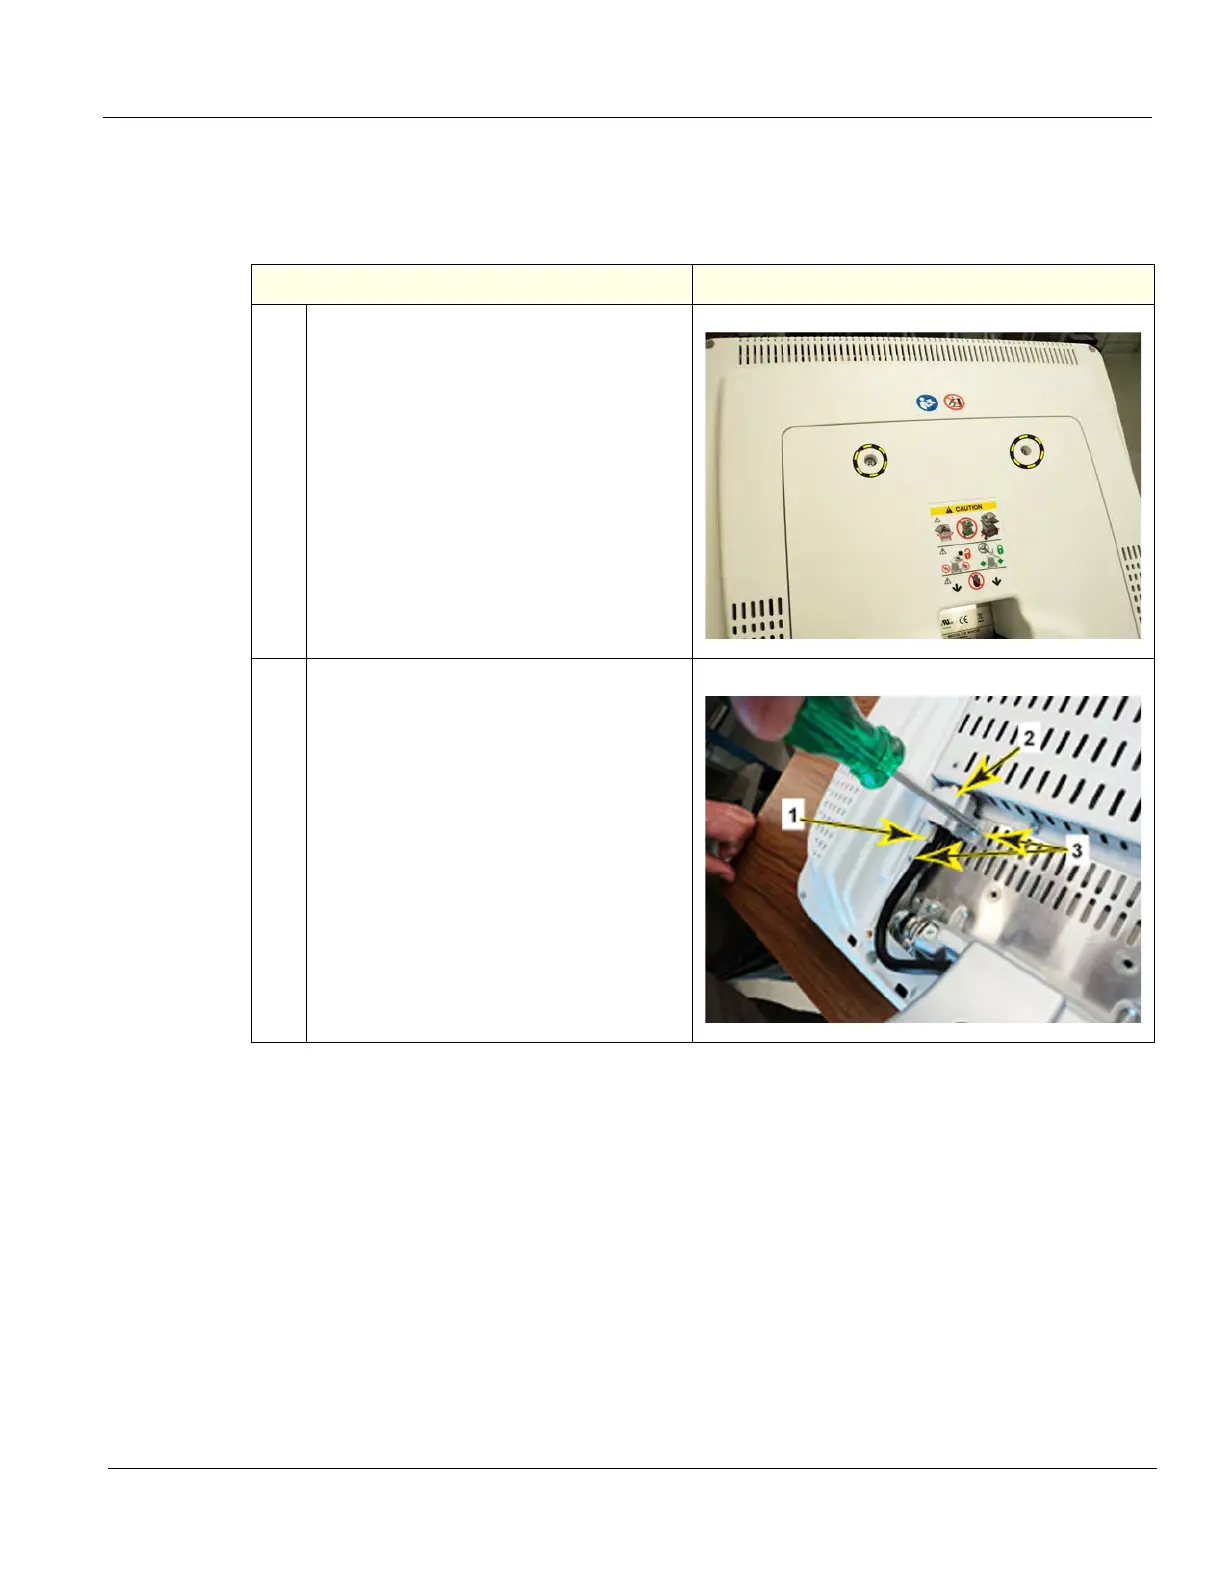
1.
Remove the LCD Cable Cover fixing
screws.
2.
The LCD Cable to LCD is secured to the
LCD with a retaining screw (1), an EMC
shielded retainer (2) and two phillips
screws (3).
Remove the screws and retainer.
Disconnect the Cable from the LCD.

Table of Contents

Other manuals for GE LOGIQ E9

Questions and Answers:

Question and Answer IconNeed help?

Do you have a question about the GE LOGIQ E9 and is the answer not in the manual?

GE LOGIQ E9 Specifications

General IconGeneral
TypeUltrasound System
3D/4D ImagingYes
Transducer Ports4 active ports
ConnectivityDICOM, USB, Ethernet
ApplicationsAbdominal, Vascular, Musculoskeletal, Small Parts, Urology, Pediatric, Cardiac, Obstetrics/Gynecology
TransducersLinear, Convex, Phased Array, Volume
Doppler ModesColor Doppler, Power Doppler, Pulsed Wave Doppler, Continuous Wave Doppler
ElastographyYes
Advanced FeaturesB-Flow, Volume Navigation
PortabilityCart-based system
Display19-inch high-resolution LCD monitor

Related product manuals