GE
D
IRECTION 5535208-100, REV. 2 LOGIQ E9 SERVICE MANUAL
Chapter 8 Replacement procedures 8 - 289
8.
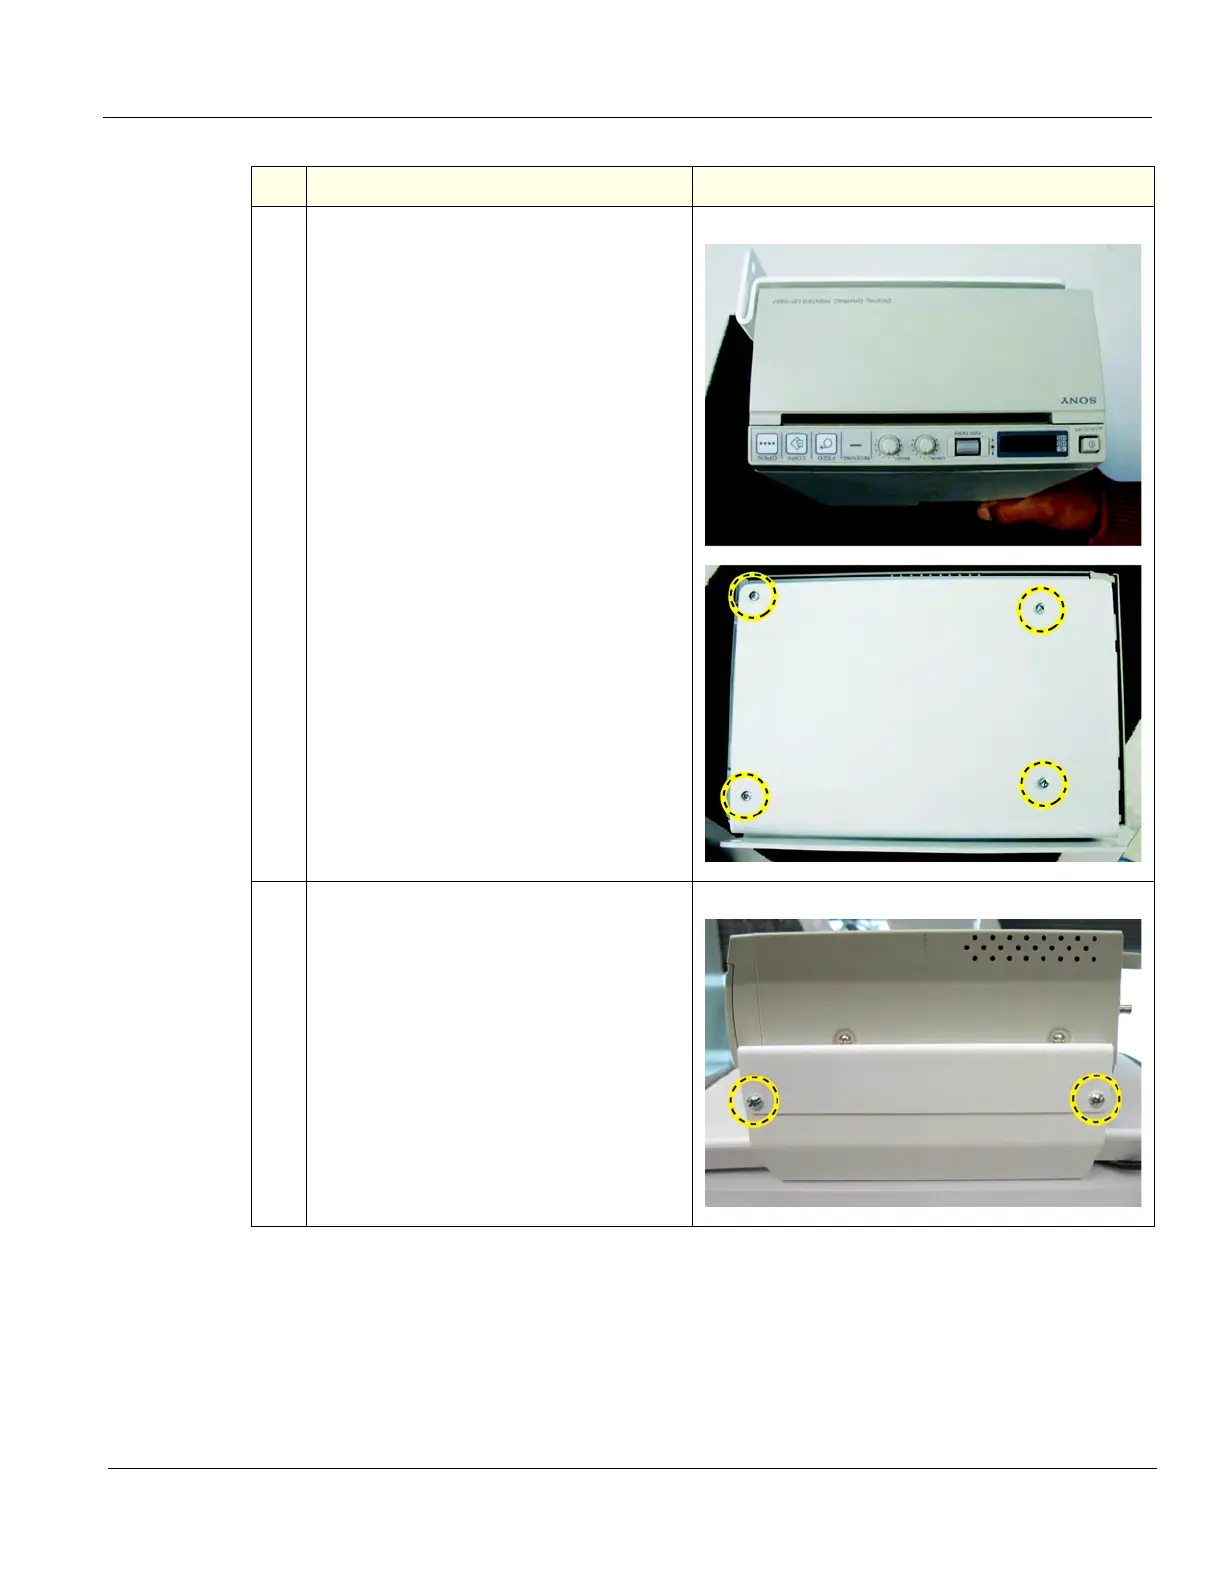
Position the Bracket - Printer to the Printer
as shown.
Attach the Bracket to the Printer using the
four M3-0.5, X6mm long screws and four
M3 internal tooth lock washers, provided in
the kit. Torque 0.55 Nm
(0.4 lbf-ft {4.9 lbf-in}).
9.
Insert the Bracket and Printer onto
Bracket - Printer Mount and secure with the
two M5-0.8, X10mm long screws and two
M5 internal tooth lock washers, provided in
the kit. Torque 3 Nm (2.2 lbf-ft {26.5 lbf-in}).
Table 8-180 Printer Bracket installation
Steps Corresponding Graphic