EasyManuals Logo

GE LOGIQ E9 Service Manual

GE LOGIQ E9
808 pages
To Next Page IconTo Next Page
To Previous Page IconTo Previous Page
Page #658 background imageLoading...
Page #658 background image
GE
D
IRECTION 5535208-100, REV. 2 LOGIQ E9 SERVICE MANUAL
8 - 312 Section 8-12 - V Nav Roll Stand and/or On-Board Stand Installation and/or Replacement
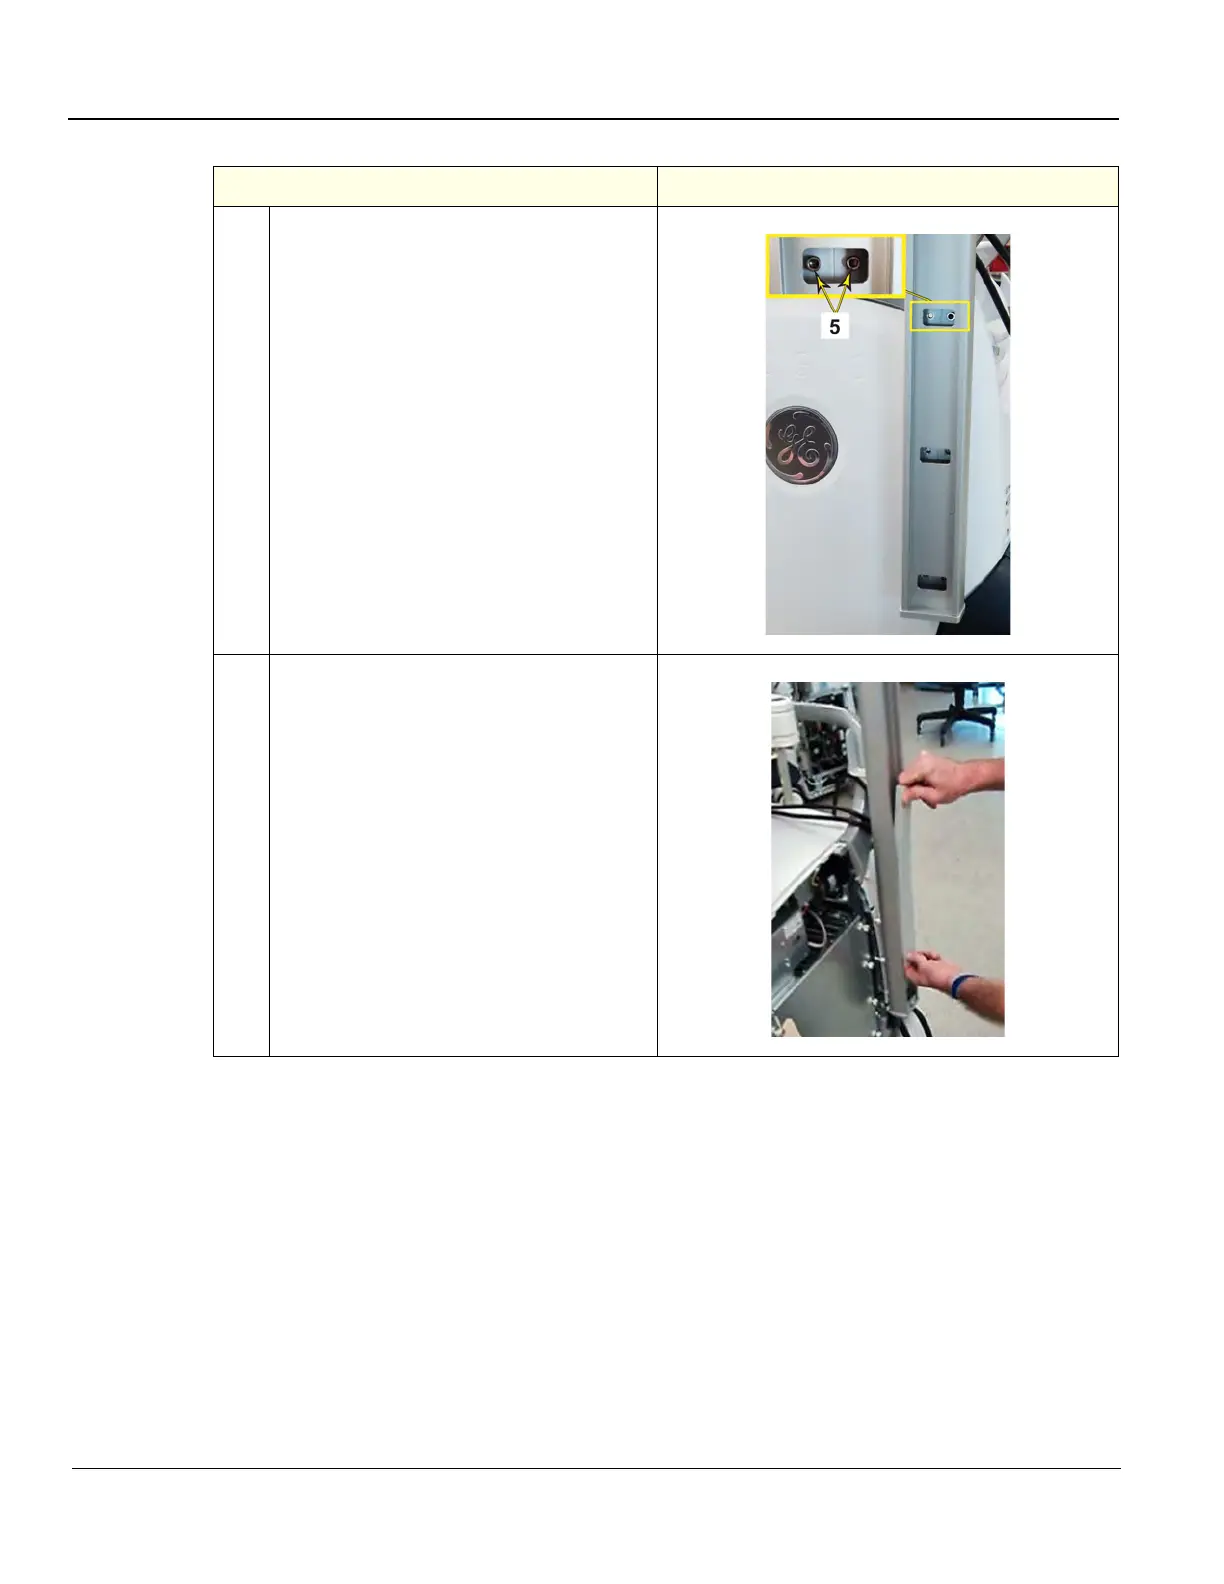
5.
Position the Arm Stand Post (1) onto the
Stand Mounting Plate (4). Install two of the
six screws (5), at the top first. DO NOT
tighten completely. Install the remaining
screws loosely.
Tighten in a sequence. Top front, bottom
rear and center. Then the remaining, in a
sequence. Torque: 9.8 Nm
(7.2 lbf-ft {86.7 lbf-in}).
6.
Insert the Track Cover into the Track Cover
groove and slide it the lowest position to
cover the Stand mounting access holes.
Table 8-193 Option Installation to LOGIQ E9
Steps
Corresponding Graphic

Table of Contents

Other manuals for GE LOGIQ E9

Questions and Answers:

Question and Answer IconNeed help?

Do you have a question about the GE LOGIQ E9 and is the answer not in the manual?

GE LOGIQ E9 Specifications

General IconGeneral
TypeUltrasound System
3D/4D ImagingYes
Transducer Ports4 active ports
ConnectivityDICOM, USB, Ethernet
ApplicationsAbdominal, Vascular, Musculoskeletal, Small Parts, Urology, Pediatric, Cardiac, Obstetrics/Gynecology
TransducersLinear, Convex, Phased Array, Volume
Doppler ModesColor Doppler, Power Doppler, Pulsed Wave Doppler, Continuous Wave Doppler
ElastographyYes
Advanced FeaturesB-Flow, Volume Navigation
PortabilityCart-based system
Display19-inch high-resolution LCD monitor

Related product manuals