223 Sample Changer User’s Guide 2-3
Installation
2
Vertical Arm Installation
Vertical Arm Installation
Before installing or changing the vertical arm, check that the power is turned off and the power cord is disconnected from the
power source. Also ensure that the arm locking screw has been removed and the horizontal arm can move.
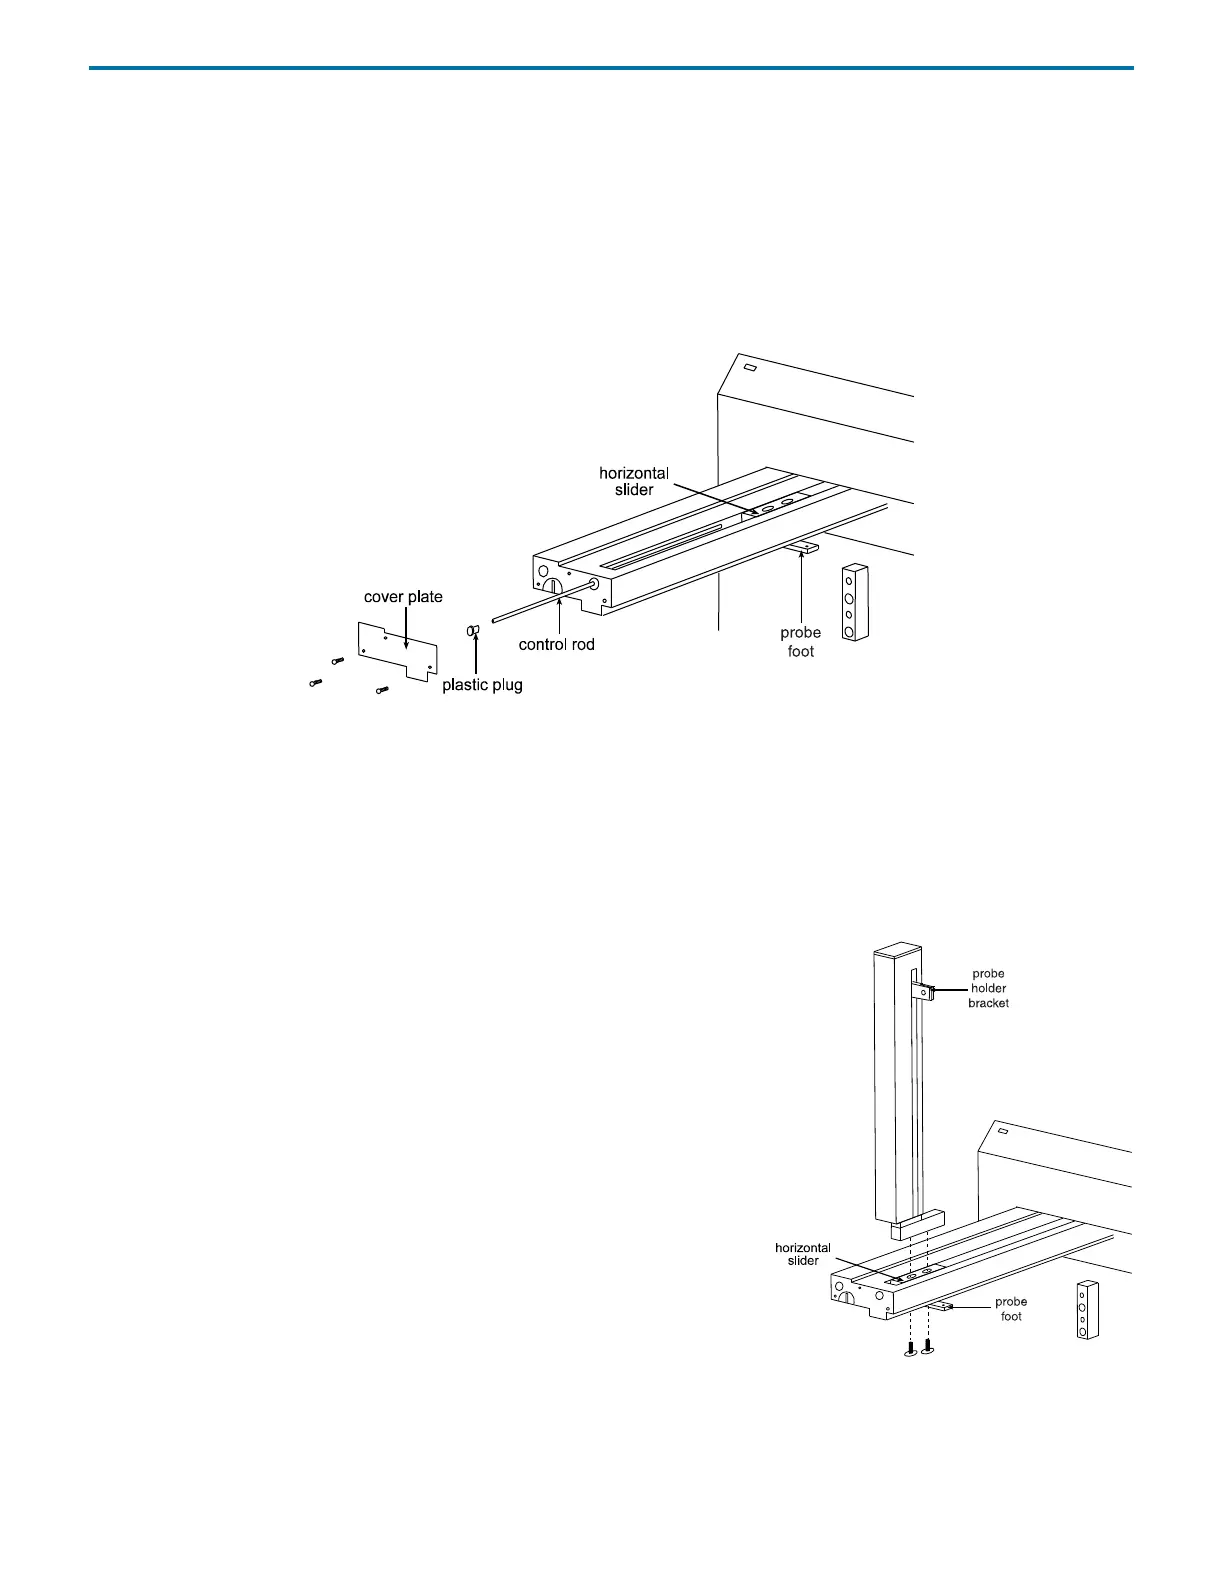
To install the vertical arm:
1 Remove the cover plate from the front of the horizontal arm by removing its three screws.
2 Locate the hexagonal-shaped control rod and horizontal slider by looking down into the horizontal arm.
3 Using your finger, press on the control rod where it passes through the horizontal slider. At the same time, pull the probe foot
towards the front of the horizontal arm. This causes the white plastic plug and control rod to move forward slightly. When
the white plastic plug is no longer flush with the front of the horizontal arm, remove it and the control rod from the
horizontal arm.
4 Pull the probe foot towards the front of the horizontal arm as far as it will go.
5 Position the vertical arm onto the horizontal slider. When viewed from the front of the sample changer, the vertical arm’s
probe holder bracket is on the right.
6 Use the supplied screws to secure the vertical arm to the horizontal slider. The
screws insert into the bottom of the mounting holes in the horizontal slider.
You may need to move the vertical arm back and forth slightly to align its
mounting holes with those in the horizontal slider.
7 Re-insert the control rod as far as it will go. While inserting the control rod, you
may need to rotate it back and forth slightly to get it to pass through the
gearing and motor drive socket in the horizontal slider.
8 Applying pressure at the vertical arm’s base, push the vertical arm to the back
of the horizontal arm.
9 While slightly moving the probe holder bracket up and down, push the
control rod until it clicks into position.
10 Re-insert the white plastic plug.
11 Re-attach the cover plate to the front of the horizontal arm.
 Loading...