Installation
2
2-10 223 Sample Changer User’s Guide
Accessory Installation
Accessory Installation
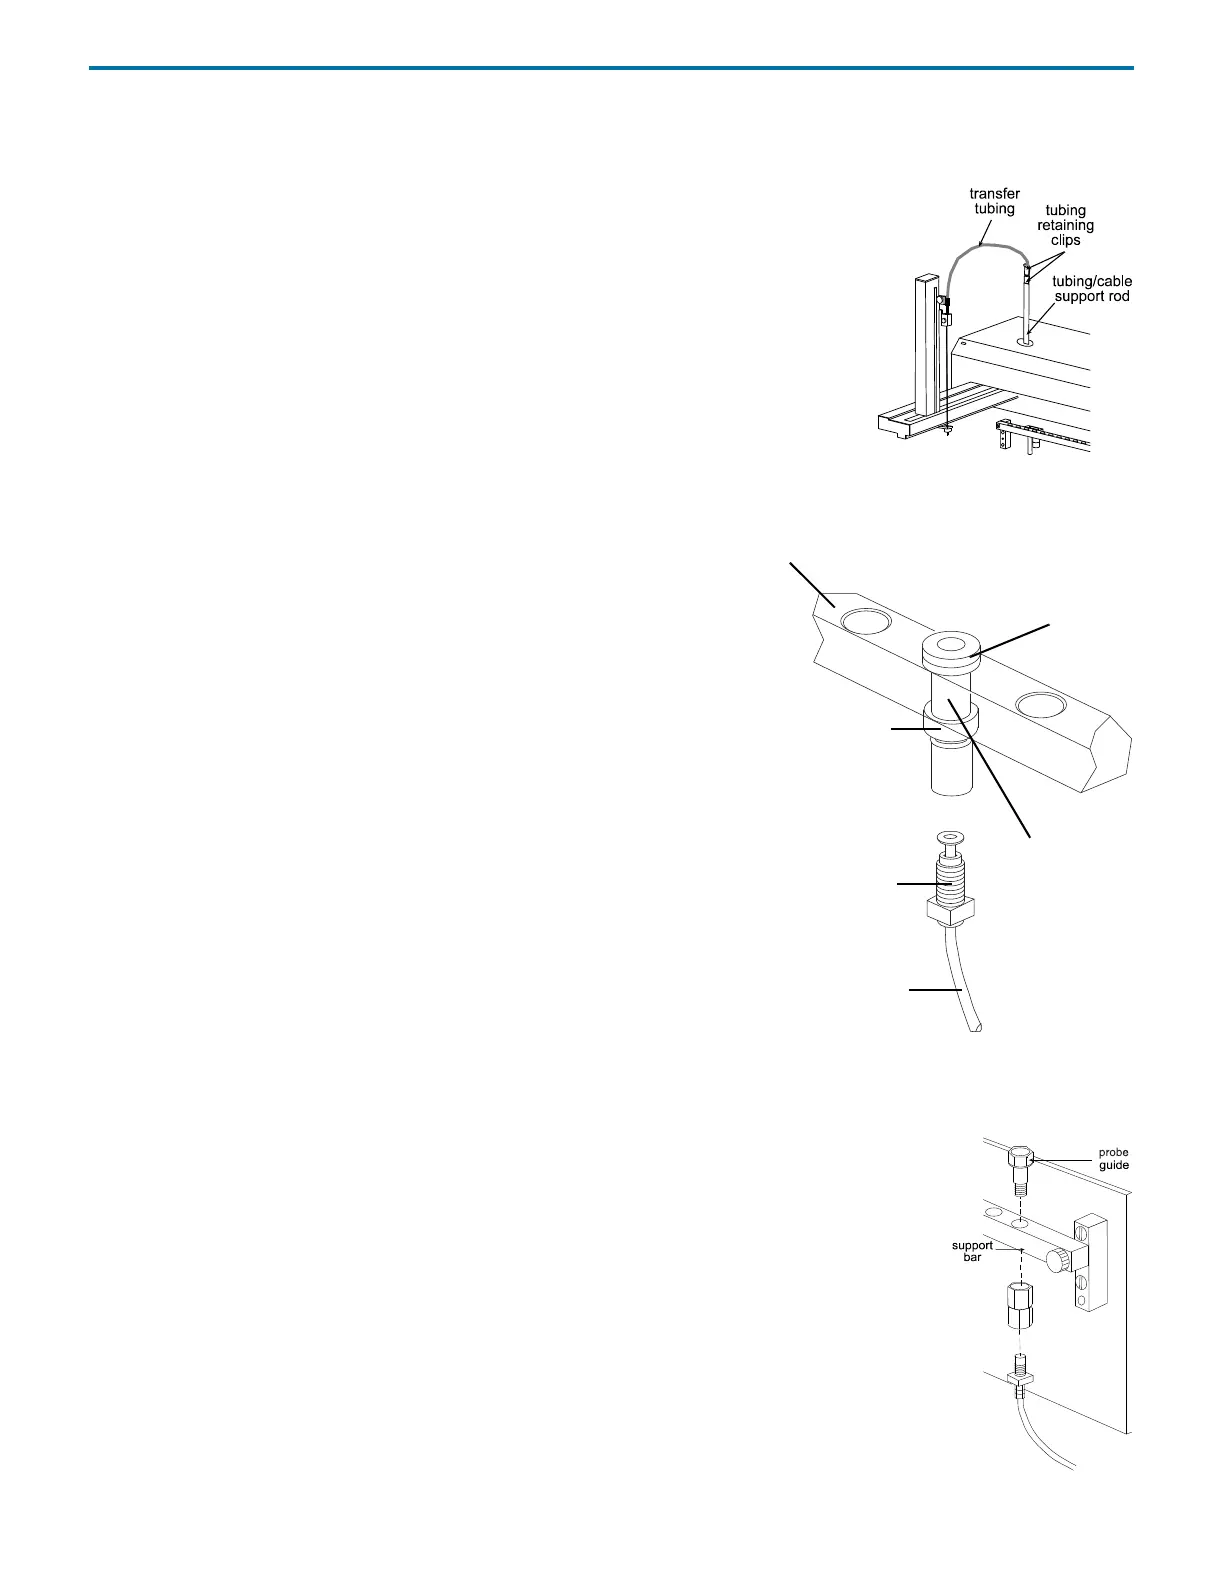
Tubing/Cable Support Rod
The tubing/cable support rod restrains excess transfer tubing. Place the tubing/cable support
rod on top of the sample changer. A magnet at the bottom of the rod holds it into place on top
of the sample changer.
Snap the transfer tubing between the probe and dilutor into the small grooves on the clips
installed on the tubing/cable support rod. (You may need to pry the grooves apart using a
flat-blade screwdriver before snapping the tubing into place.) Also remember to leave enough
tubing to allow for the movement of the probe.
Gather any excess transfer tubing into a coil to minimize the length of tubing and secure the
coil using a twist tie. Position the excess tubing in a convenient location near the rear of the sample changer.
Transfer Port
To install a transfer port:
1 Place the transfer port in any mounting hole on the port bar.
2 Screw the male tubing connector into the bottom of the transfer port.
3 Fit a yellow cap to the top of the transfer port.
4 Connect the other end of the tubing to a filter and place it in a solvent or
sample bottle. Make sure the solvent or sample bottle is at the same level as
or higher than the sample changer’s tray.
5 Fix the plastic clip onto the transfer port.
Using Transfer Ports
Be aware of the following when using transfer ports:
• Place the solvent or sample bottle at the same level as or higher than the
tray.
• Use a beveled-edge constricting probe.
• Prime each transfer port before use.
Filler Port
When a sample is prepared, it can be injected into a peripheral instrument via a filler port, which can be
installed on the port bar. Refer to the diagram when installing the filler port.
1 Separate the probe guide from the filler port assembly by unscrewing it. The probe guide has a
hexagonal head.
2 Insert the probe guide into a mounting hole on the port bar and tighten.
3 Attach the bottom portion of the filler port assembly to the probe guide.
port bar
yellow cap
plastic clip
transfer port
connector
tubing
 Loading...