223 Sample Changer User’s Guide 4-3
Maintenance
4
Part Replacement
Part Replacement
Probe
Refer to the appropriate instructions below depending on whether you are replacing the probe with one of the same type or one
of a different type.
Install Same Type of Probe
To install a replacement probe of the same type that is currently installed:
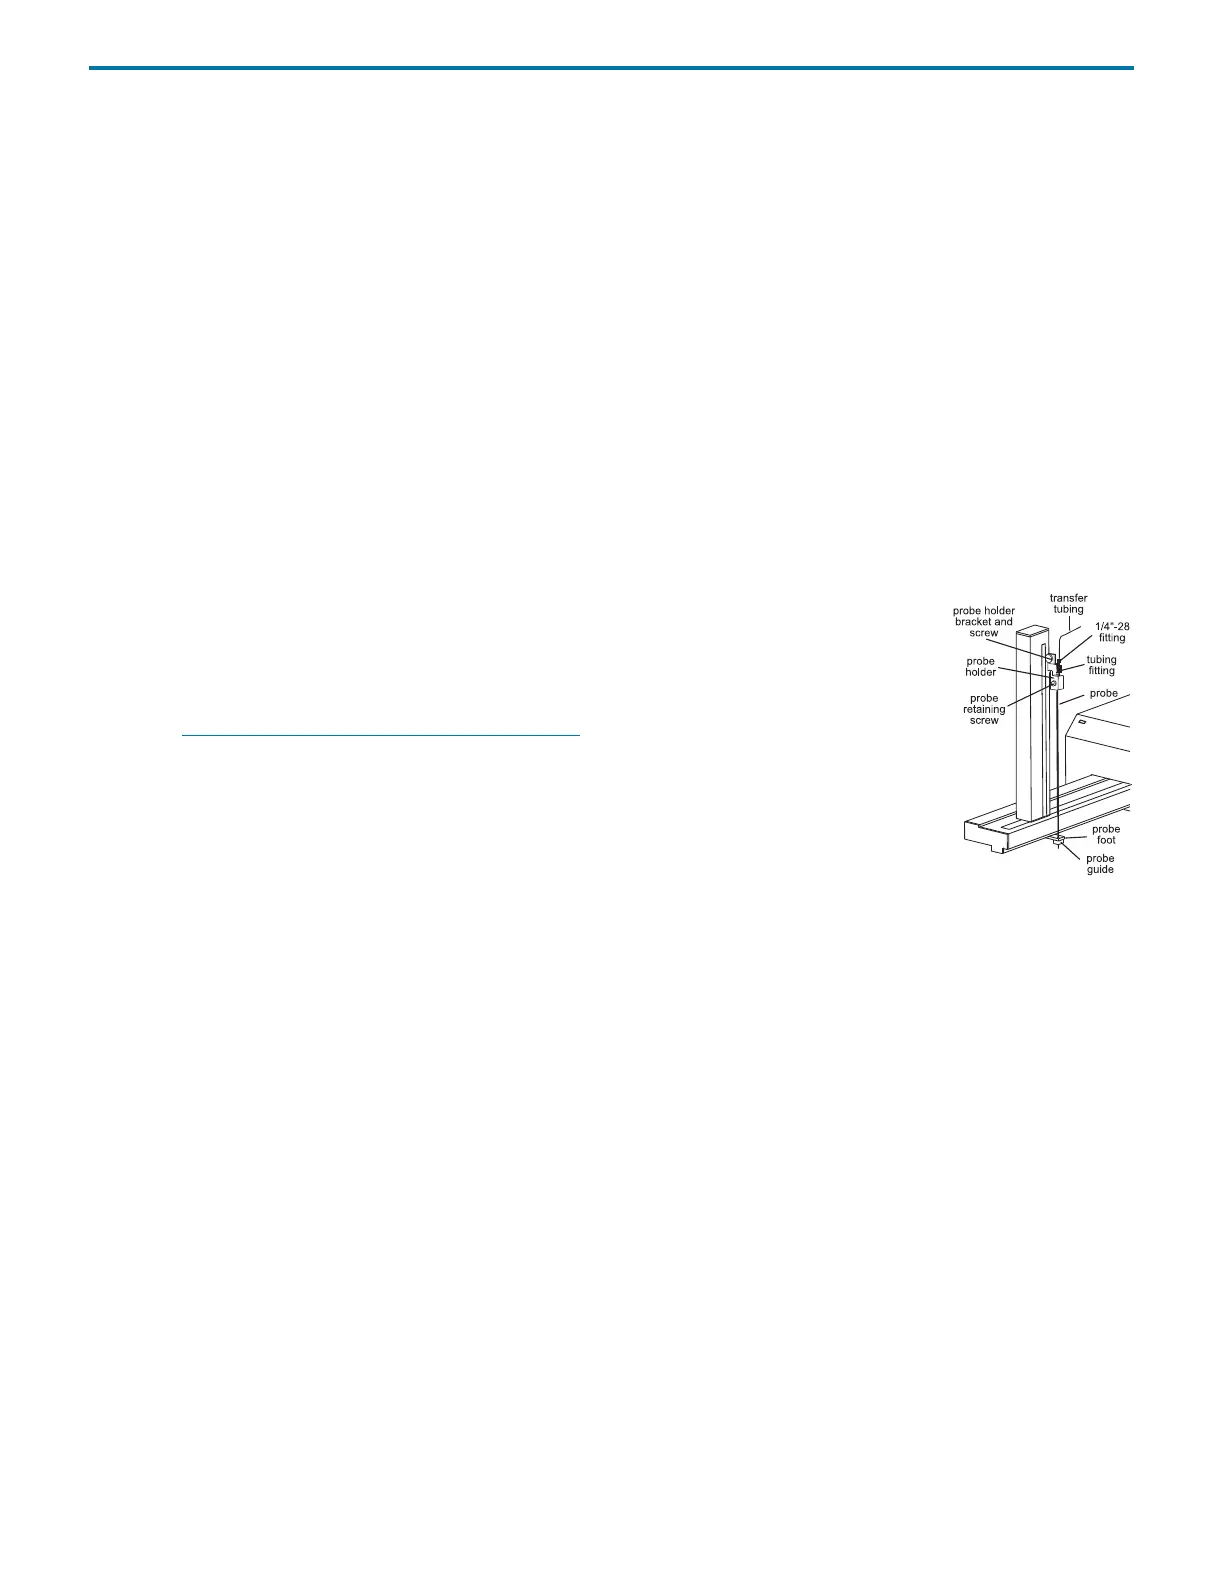
1 Remove the transfer tubing’s 1/4"-28 fitting from the tubing fitting.
2 Loosen the probe retaining screw and remove the probe and tubing fitting from the probe holder.
3 Remove the old probe from the tubing fitting and insert the replacement probe.
4 Slide the probe assembly into the probe holder making sure that the probe is centered over the probe guide.
5 Secure the probe by tightening the probe retaining screw.
6 Re-attach and tighten the transfer tubing’s 1/4"-28 fitting.
Install Different Type of Probe
To install a different type of probe, you may need to obtain a different probe holder and guide for the
probe. See Appendix A, Replacement Parts and Accessories
.
1 Remove the transfer tubing’s 1/4"-28 fitting from the tubing fitting.
2 Loosen the probe retaining screw and remove the current probe and tubing fitting.
3 Unscrew the current probe guide from probe foot. Then screw the new probe guide into place.
4 Remove the screw securing the probe holder to the bracket and then pull the probe holder from the
bracket. Insert the new probe holder into the bracket and secure using the screw.
5 Install the new probe into the tubing fitting. Slide the probe assembly into the probe holder making sure that the probe is
centered over the probe guide. Secure the probe by tightening the probe retaining screw.
6 Re-attach and tighten the transfer tubing’s 1/4"-28 fitting.
 Loading...