223 Sample Changer User’s Guide 2-7
Installation
2
Rack Installation
Rack Installation
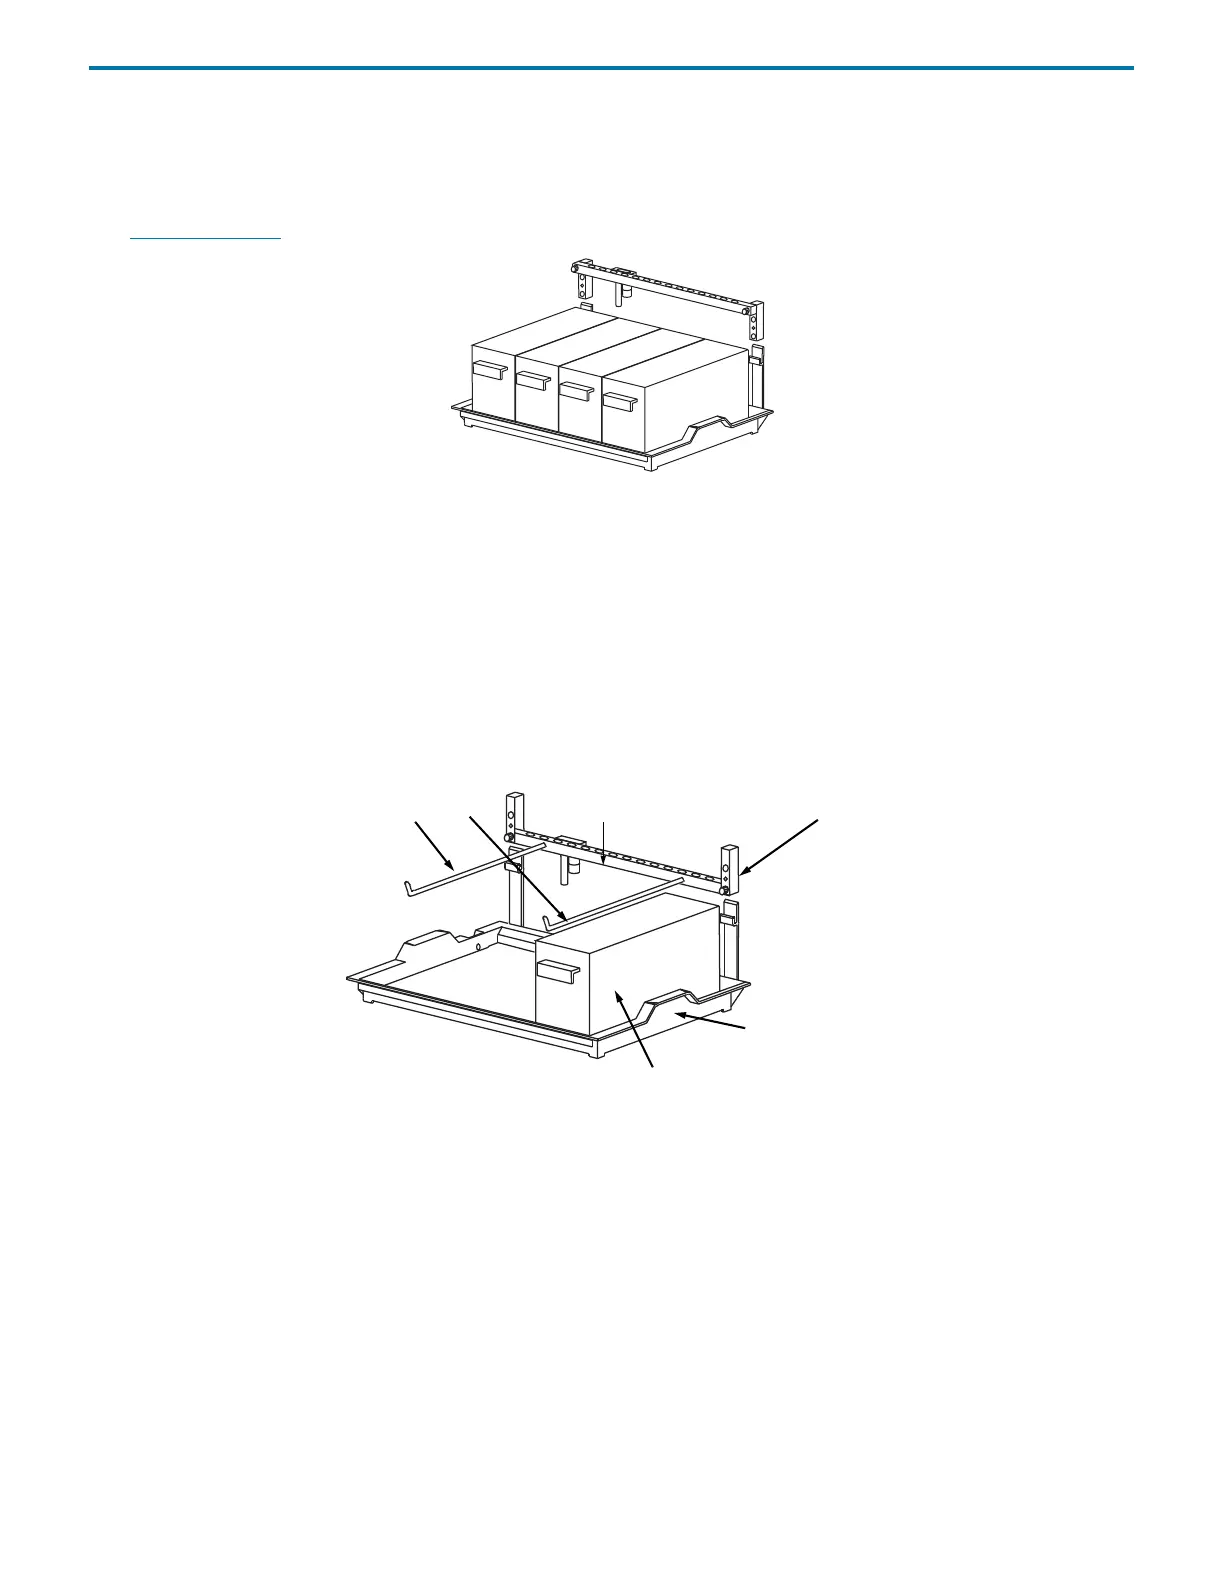
The sample changer is equipped to hold up to four Code 20-series or thermostated Code 30-series racks. Place each rack into the
tray so the rack is perpendicular to the front panel of the sample changer. The rack code assigned to the rack should face you.
(See Appendix B, Racks
for a list of racks available for the sample changer.)
Antlers for Code 0- or Code 30-Series Rack
Installing antlers enables you to position a single rack sideways within the sample changer’s work area. To use a Code 0, 7, 8, or
9 rack, you must install the port bar with antlers Code 0-series for one Code 0, 7, 8, or 9 rack (part number 1907143). To use a Code
30- or 30P-series rack horizontally, you must install the port bar with antlers Code 30-series (part number 1907142).
Before installing the antlers, you may need to remove the port bar from the sample changer. Then remove any rinse stations, filler
port, and transfer ports from the port bar and place each one in the corresponding location on the antlers’ port bar.
Connect the antlers’ port bar to the lower position of the front standoffs of the sample changer. Place the rack onto the antlers.
A Code 20- or 30-series rack can be placed on the tray in the far right position.
Microplate Holder
To use microplates with the sample changer, you must install the microplate holder (part number 1907151). You can use
standard or deep-well microplates.
A bracket must be attached to the microplate holder before the microplate is installed. Assembly and installation of the
microplate holder depends on the type of microplates to be used. Refer to the appropriate instructions on the next few pages.
port bar
antlers
front standoff
tray
additional rack
 Loading...