223 Sample Changer User’s Guide 2-5
Installation
2
Rinse Station and Port Bar Installation
Rinse Station and
Port Bar Installation
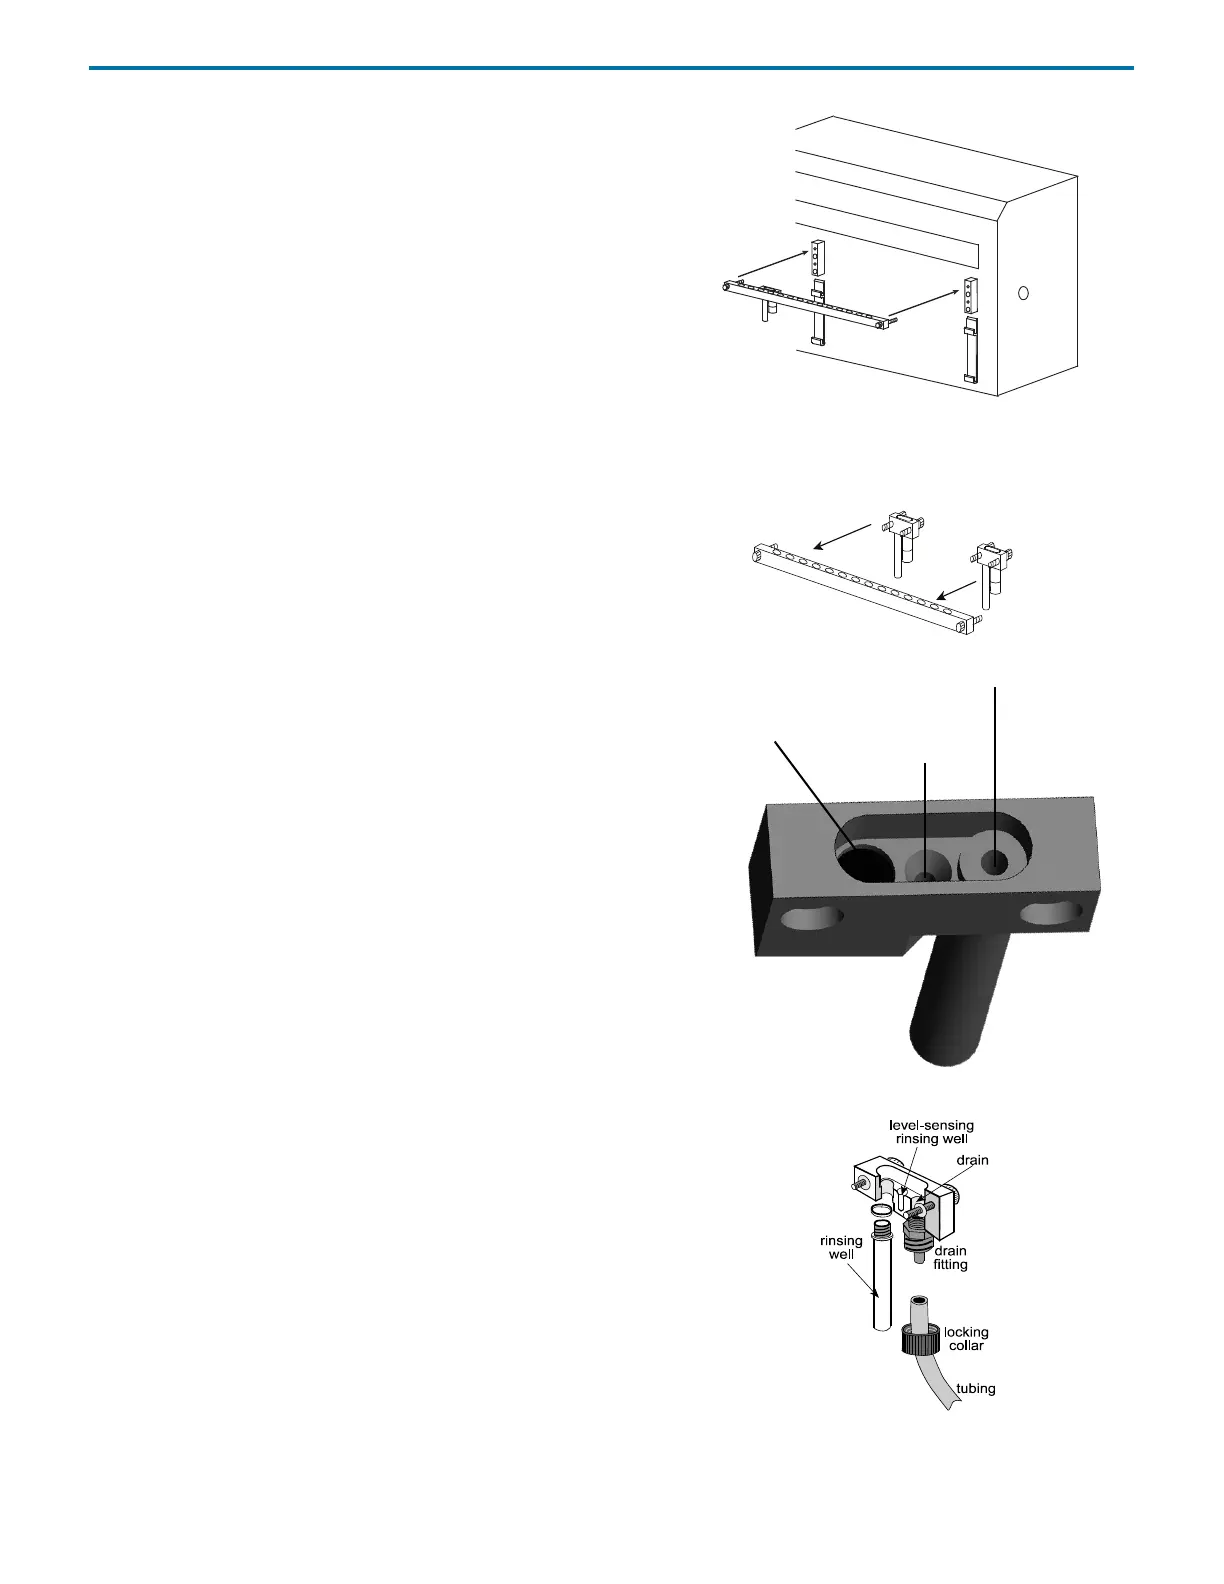
The port bar attaches to the upper position of the front standoffs of
the sample changer. Its rear contains mounting holes for rinse
stations and its top contains mounting holes for transfer ports and
filler ports.
Note: If you ordered the port bar with antlers for Code 30-series racks
(part number 1907142) or the port bar with antlers Code 0-series for
one Code 0, 7, 8, or 9 rack (part number 1907143), the port bar is part
of the antlers’ assembly. Attach any rinse stations, transfer ports, or
filler ports to the port bar with antlers.
1 Attach the rinse station(s) to the port bar. If using only one rinse
station, the default position for the rinse station is the left side of
the port bar when the bar is attached to the sample changer.
From left to right, the ports in a rinse station are the
inside rinse position/drain, outside shallow rinse position, and
outside deep rinse or flow-through rinse position.
The Inside Rinse position is for rinsing the inside of the probe and
as a drain. Liquid is purged out of the probe to the drain.
The Outside Shallow Rinse position is used for rinses after the
probe has only been immersed in a few millimeters of sample.
The Outside Deep/Flow-Through Rinse position allows for
deeper insertion of the probe into the rinse well, resulting in a
greater area of the outside of the probe to be rinsed. This position
is also used in applications where a rigorous wash of the probe’s
exterior is required. In those applications, an open-ended rinsing
well is used and is connected to a second source of liquid that is
pumped to the rinse station.
Note: When installing the rinse station on the right side of the
port bar, the positions are reversed (for example, the drain is on
the right).
To attach tubing to the drain, locate the drain tubing (part number
470321803). Remove the locking collar from the drain fitting. Slide
the tubing through the locking collar. Attach the tubing to the drain
fitting. Then screw the collar onto the drain fitting. Place the other
end of the tubing in a drain receptacle, located lower than the tray.
If you ordered a flow-through rinsing well (part number 2707252),
remove the deep rinsing well and attach the flow-through rinsing
well in its place. Then attach tubing (part number 470331206) to the
flow-through rinsing well and connect the other end to a liquid
source (a peristaltic pump, for example).
2 Attach the port bar to the upper position of the front standoffs on
the front of the sample changer using the knurled screws.
rinse
optional
rinse station
station
f
r
o
n
t
o
f
p
o
r
t
b
a
r
Inside Rinse/Drain
Outside
Shallow
Outside Deep/Flow-Through Rinse
Rinse
Rinse Positions (Left)
 Loading...