6.3 Preparations
Pos: 7.9 /KN2006- SM/nL.......... Seit enumbruch ....... ... @ 8\mod_114 1998334703_ 0.doc @ 75489
6.3.1 Startup
1.
Place the machine on a stable and level surface.
Risk of injury due to incorrect setup!
Setting the machine up improperly may lead to serious
Make sure there is sufficient room to operate the machine.
Plug the power plug into the designated socket.
Risk of electric shock when handling cables improperly!
. Check the cup grinding wheel
Always check the cup grinding wheel before starting up the machine!
Pos: 7.18 /KN2006-SM /Bedienung/0 07 1.1 Stillsetze n im Notfall --> A nlage und grösser e Maschine @ 9\mod_11444 32835796_1.doc @ 86788
In dangerous situations, the movements of the machine must be stopped and the power supply cut off as
Also make sure that the curved
rests safely against the end stop bolts.
Place the machine on a stable and level surface.
Risk of injury due to incorrect setup!
Setting the machine up improperly may lead to serious
Make sure there is sufficient room to operate the machine.
Plug the power plug into the designated socket.
Risk of electric shock when handling cables improperly!
. Check the cup grinding wheel
Always check the cup grinding wheel before starting up the machine!
In dangerous situations, the movements of the machine must be stopped and the power supply cut off as
Also make sure that the curved
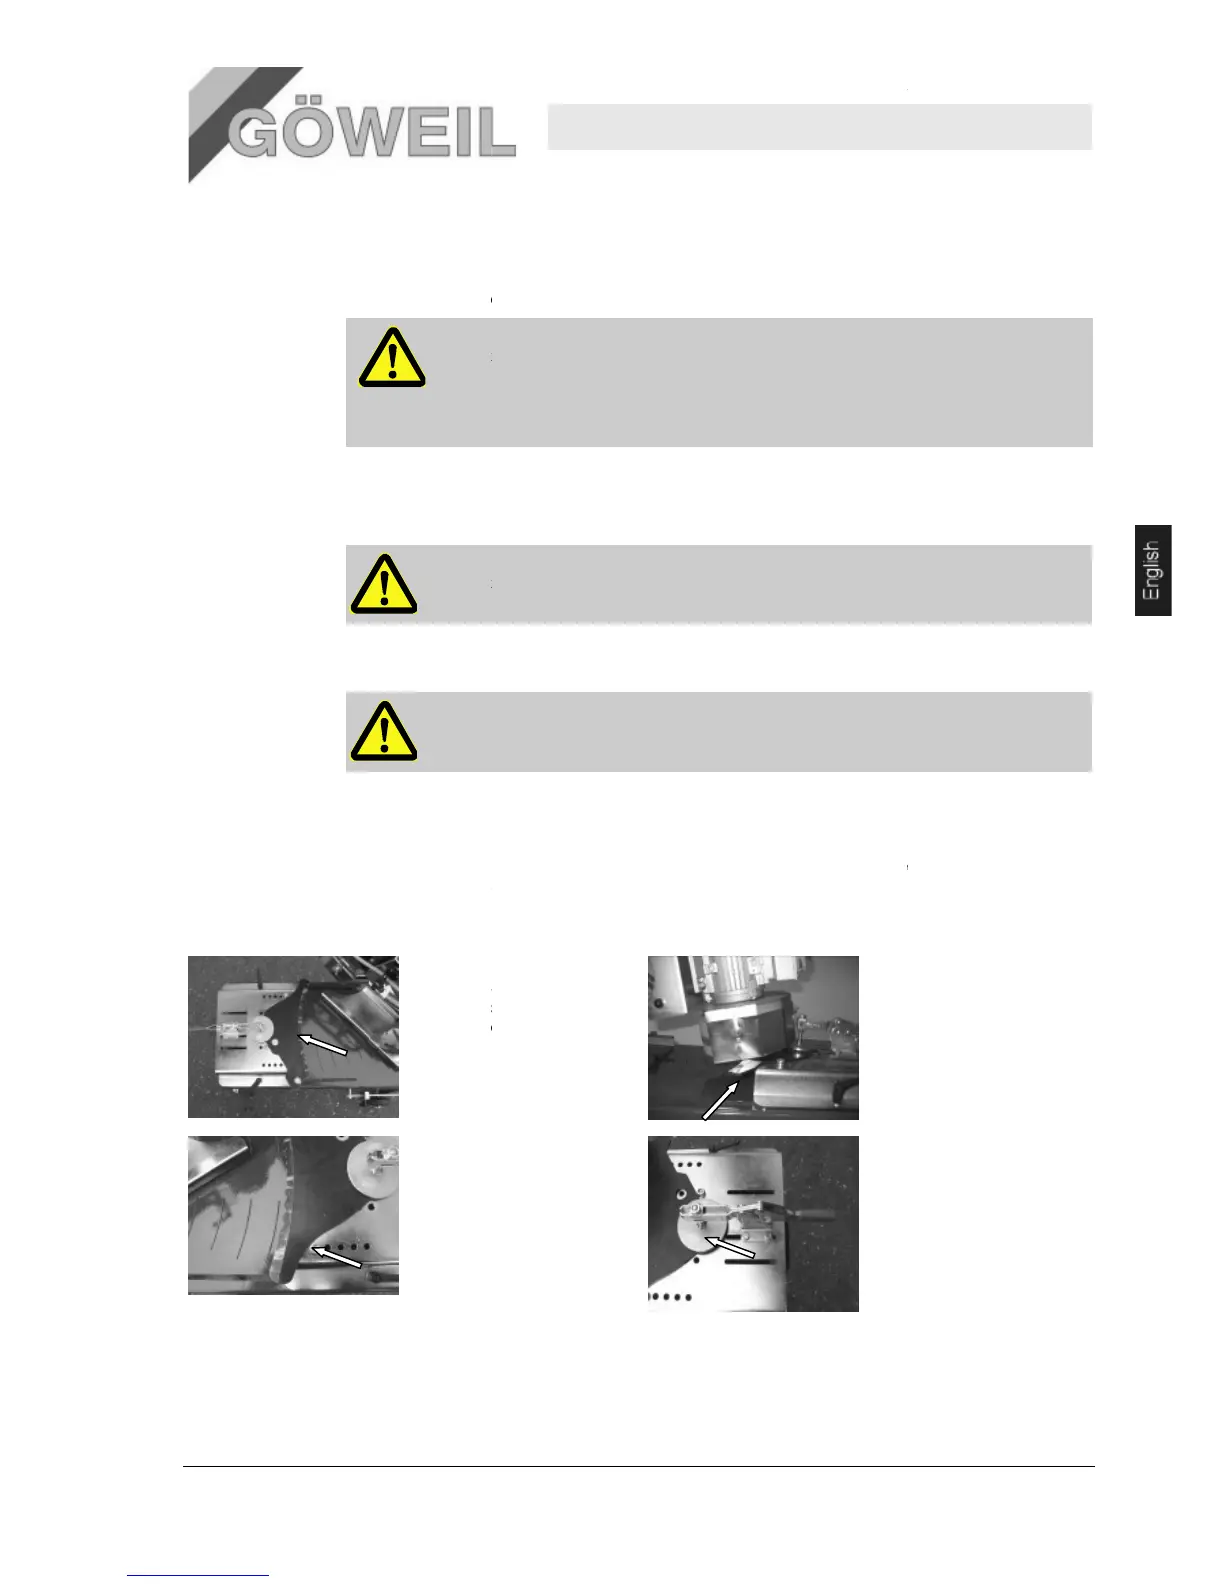
is securely clamped into the
rests safely against the end stop bolts.
Always check the cup grinding wheel before starting up the machine!
In dangerous situations, the movements of the machine must be stopped and the power supply cut off as
is securely clamped into the
The cutting surface must
protrude by approx. 0.79
in from the adjusting
plate.
Position the clamping
device in such a way that
the knife holder securely
clamps the curved knife
you want to sharpen
(approx. half of the
overlap)
 Loading...