14
5. Place the machine onto the bottom carriage
so that the tracks align with the wheels.
Tip: See your frame manual for bottom
carriage orientation.
5
Loosen two set screws on one side of the
machine (either the right side or left side)
with the 4 mm Allen wrench.
6
6. Slide the machine up and down the bottom
carriage tracks. The machine should move
smoothly.
7. Check that the machine is centered over
the wheels. If needed, loosen all four wheel
block set screws and shift the machine from
side to side.
7
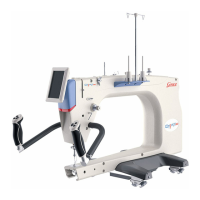
4. Use two M6 shoulder bolts and the 4 mm
Allen wrench to screw the wheel support to
the machine.
4
Shoulder Bolts
M6 (x2)
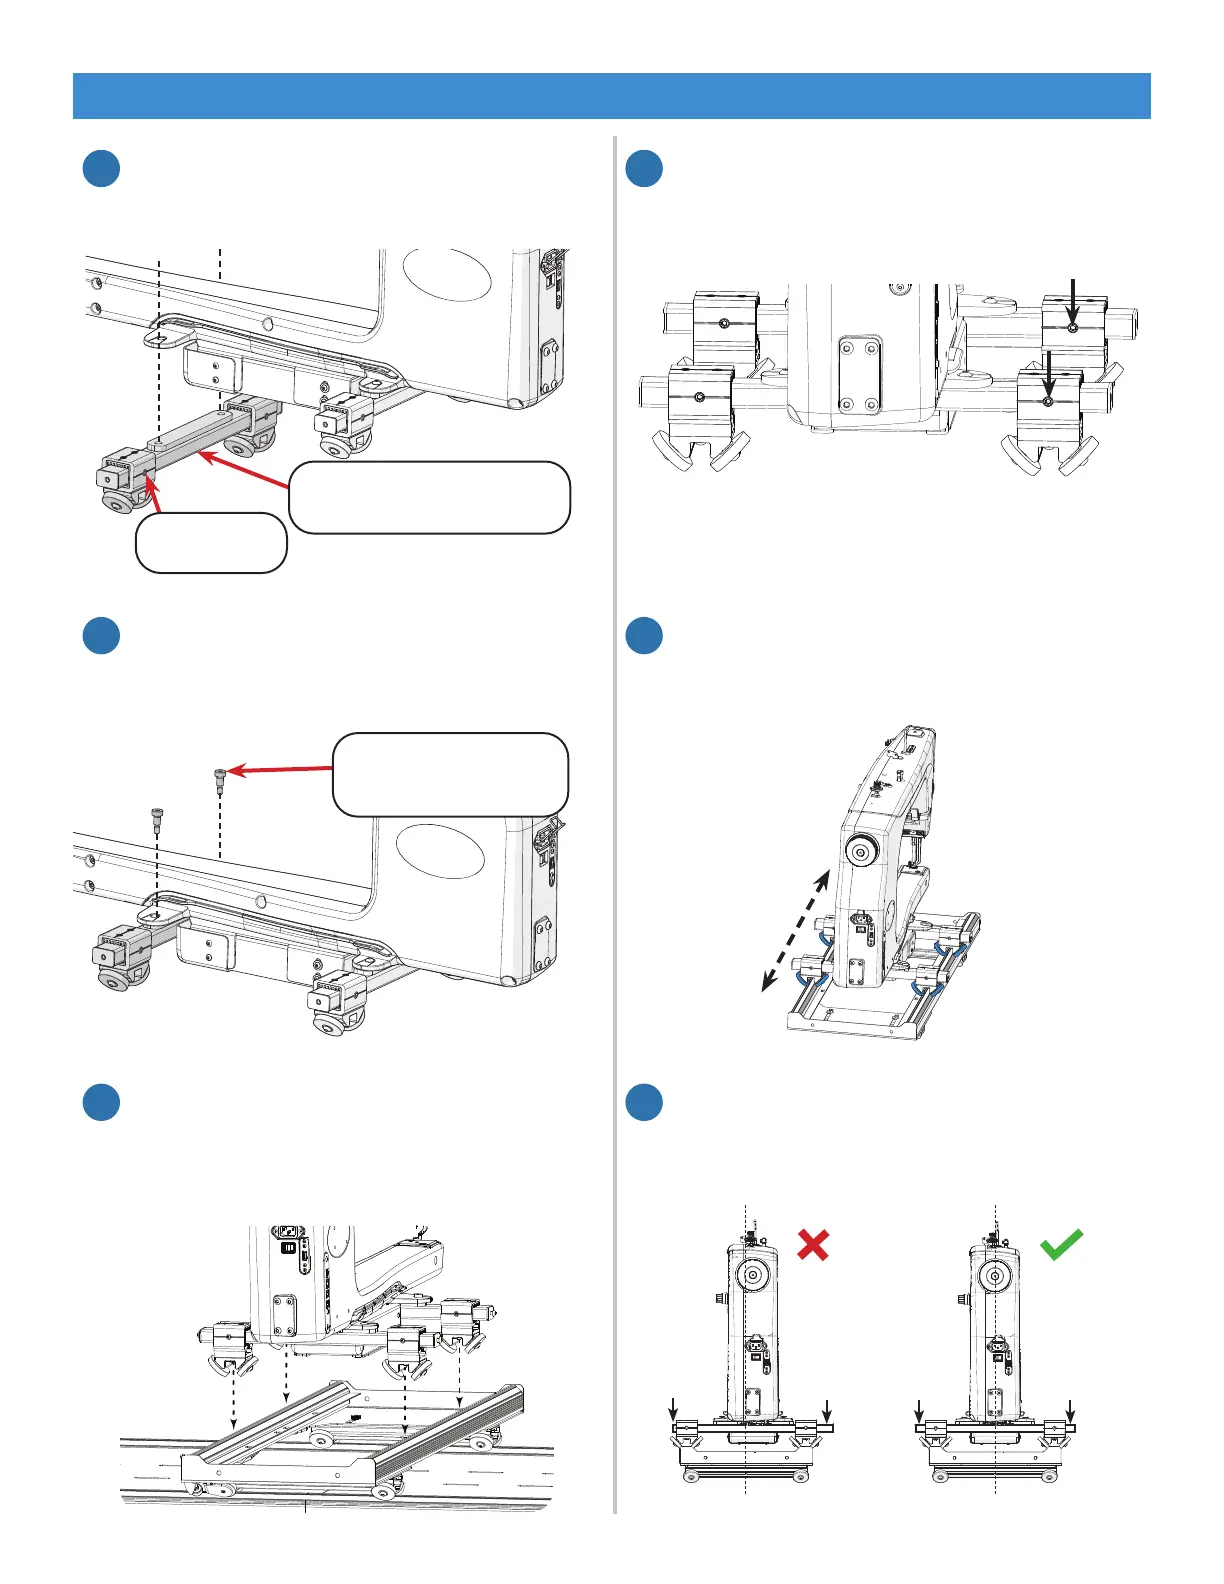
3. Place the front wheel support assembly
under the front of the machine, with the set
screws facing the rear.
3
Front Wheel Support
Assembly
Set Screw
Installing the Wheels (Continued)
Out-of-the-Box Assembly
8