77
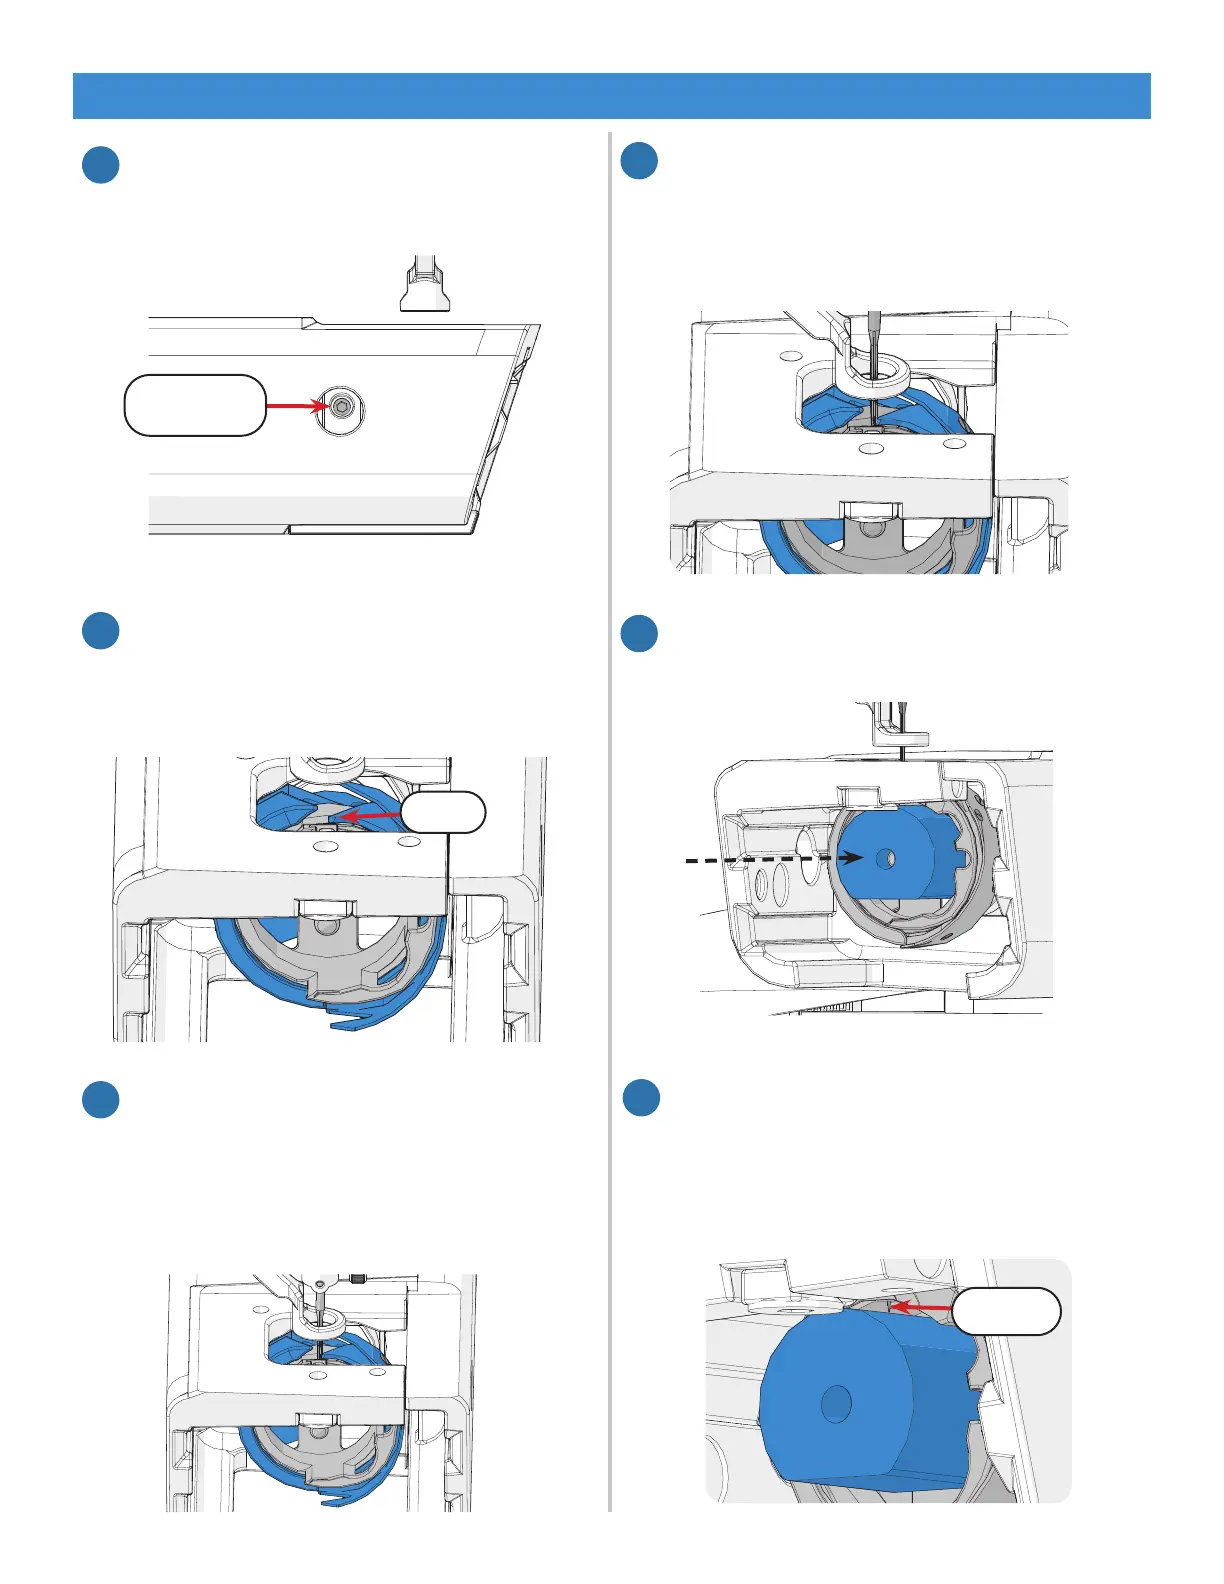
5. As each of the 3 set screws aligns with the
timing cut-out, loosen them with the 2 mm
Allen wrench.
Set Screw
(x3)
6
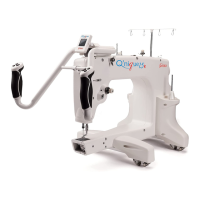
6. The outside part of the hook assembly
(shown in blue) now rotates by hand. Turn
the outside part of the hook assembly so
that the hook is at the top.
Hook
7
7. Carefully rotate the hand wheel clockwise
as seen from the front of the machine and
drop the needle (shown in gray) all the
way to the lowest point. Continue rotating
the hand wheel the same direction. The
needle should begin to raise up.
8
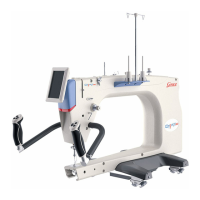
8. Stop raising the needle once the eye is about
level with the hook. Do not continue to raise
the needle. If the needle reaches the top
of its rotation (over the hopping foot), start
over at step 8.
9
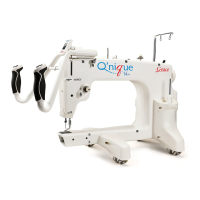
9. Slip the timing spacer (shown in blue) into
the hook assembly.
10
9. Turn the hand wheel the opposite direction
to bring the needle back down until it rests
on top of the timing spacer. Do not let the
needle rise to the top before bringing it back
down or you will need to repeat steps 8-11.
Needle
11
Timing the Machine (Continued)
Repairs and Diagnostics