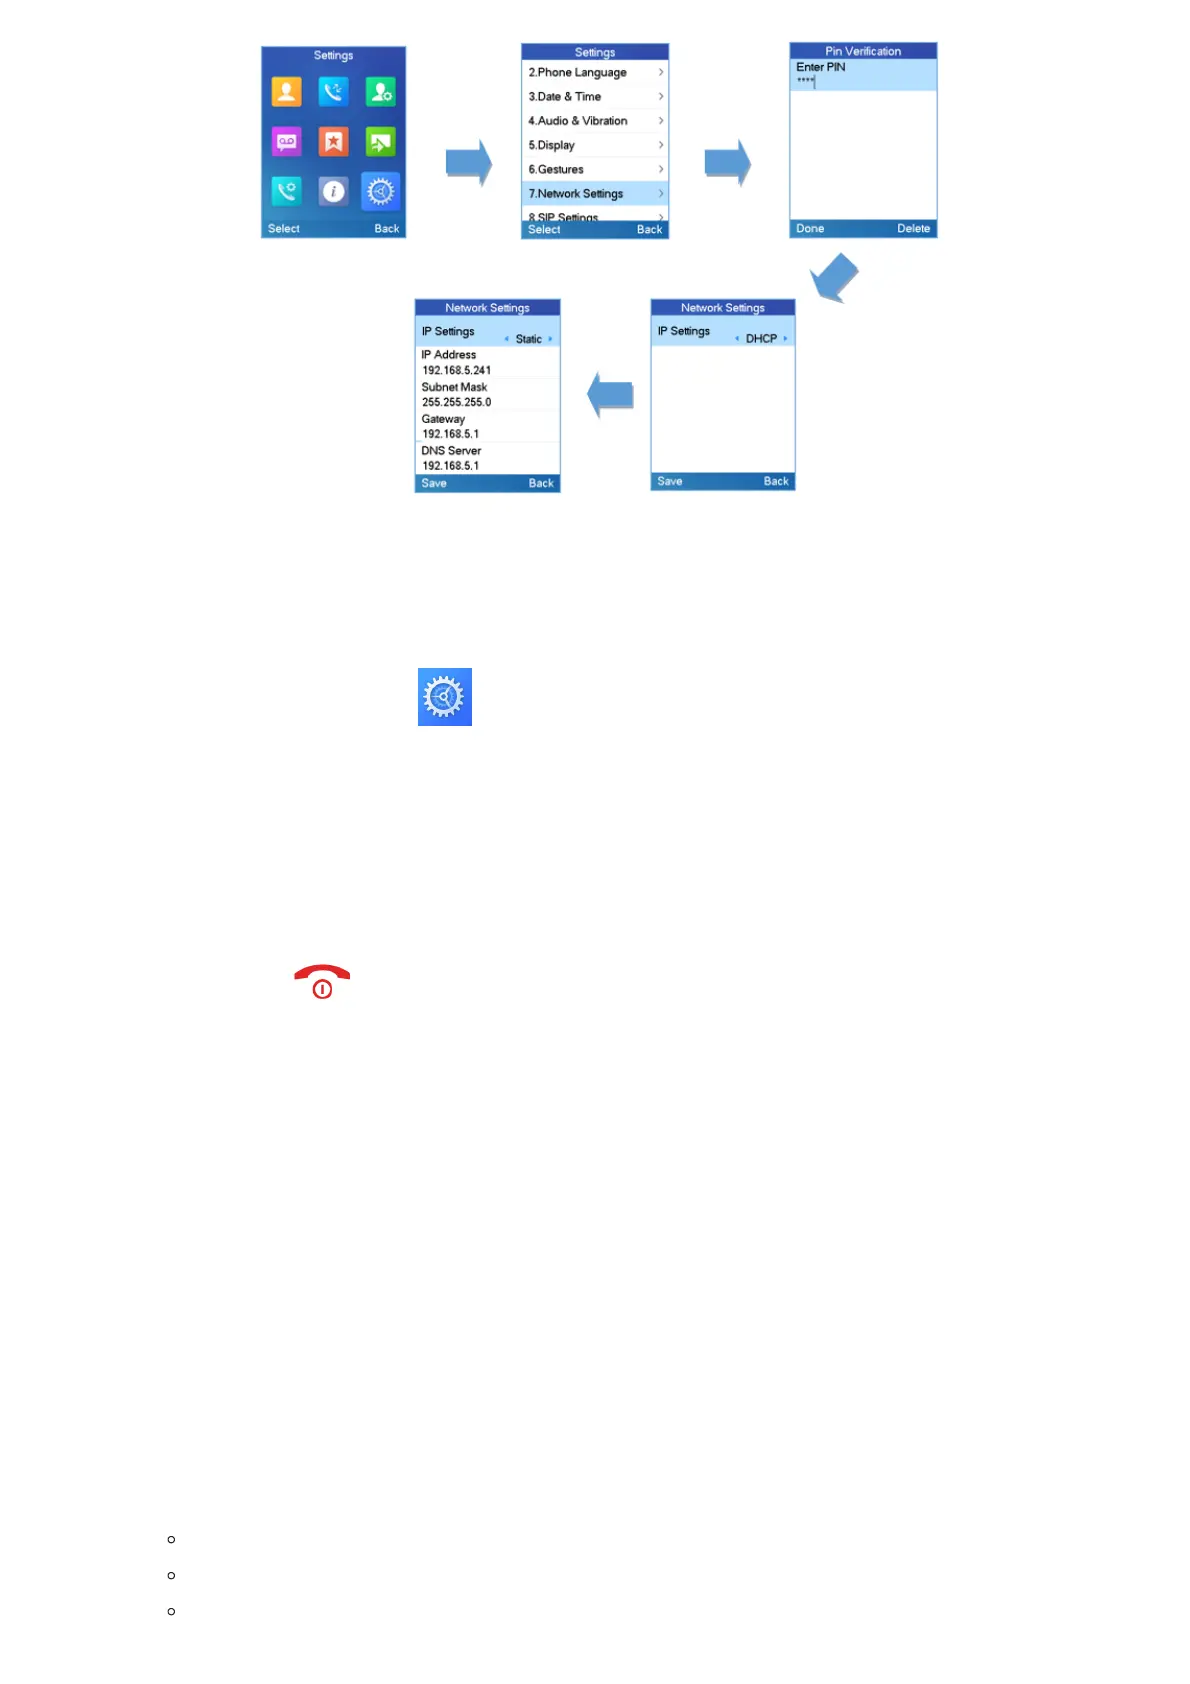
Figure 16: Network Settings Configuration
Change Menu and LCD Timeout
1. Press Menu to bring up operation menu.
2.
Use arrow keys to reach Settings .
3. Navigate to Display, and then press “Select” (left softkey).
4. Set desired time in seconds for Backlight timeout and for Menu timeout. Available value: 15 seconds, 30 seconds, 60
seconds or disabled. (Default is 30 seconds)
5. Press Save (left softkey) to save and apply the new settings.
Return to Idle Screen
Press the Power Key to quickly exit the menu and return back to the main idle screen.
If you do not press any key in a period of time, the LCD screen will automatically exit the menu and return to the idle screen as
well.
When you are navigating on the handset’s menu, and you receive an incoming call, the LCD screen will automatically exit the
menu and you can either accept or reject the call. When the call is terminated, the LCD screen will return back to the idle
screen.
Register SIP Account
Register Account via Web User Interface
1. Access the Web GUI of your DP752 using the admin’s username and password.
2. Press Login to access your settings and navigate to Profiles tab and select a profile to use.
Note: DP752 supports up to 4 profiles. A profile is a set of settings including general settings, network settings, SIP
setting, audio setting, call settings and ring tones, etc.
A profile can be used with different SIP accounts.
3. In General Settings, set the following:
Profile Active to Yes.
SIP Server field with your SIP server IP address or FQDN.
Failover SIP Server with your Failover SIP Server IP address or FQDN. Leave empty if not available.