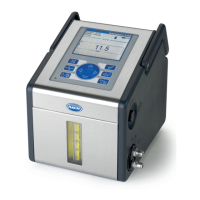
3.4 Step 2: Mount and plumb the analyzer
C A U T I O N
Only the tubing specified by Hach Company may be used with the instrument. Other
tubing may absorb chlorine that is in the sample water and have a negative effect on
chlorine readings (decrease the chlorine readings).
N O T I C E
Incorrect plumbing of the analyzer can cause damage because of excess sample pressure. Always
obey the instructions that follow to mount and plumb the analyzer.
1. Attach the analyzer (item 9) to a wall with four screws. Make sure that the analyzer is level.
Note: The user supplies the mounting hardware.
2. Attach the SC Controller (item 7) to a wall, panel or pipe. Refer to the SC Controller
documentation for instructions.
3. Assemble the Y-strainer. Refer to the instructions on the packing list.
4. Use the 1-inch conduit clamp to mount the Y-strainer assembly (item 5 in Figure 3 or Figure 4).
5. Install the external air break on the analyzer (item 2 in Figure 3 or Figure 4). Refer to the
instructions on the packing list.
6. Do step 7 or 8.
7. If a standpipe installation kit was selected at the time of purchase, install the standpipe as follows:
a. Assemble the standpipe. Refer to the instructions on the packing list.
b. Use the smaller conduit clamp to mount the standpipe assembly a minimum of 61 cm (24 in.)
above the top of the analyzer. Refer to item 10 in Figure 3.
c. With the black tubing, install the sample bypass tubing (item 8). Push the tubing behind and
then into the standpipe. Put the tubing 10–13 cm (4–5 in.) in the top of the standpipe.
d. Cut a length of tubing from the sample drain tubing (item 3). Use the tubing to plumb the
bottom of the standpipe to an open drain (item 11 in Figure 3). Refer to Drain line guidelines
on page 12.
8. If a pressure regulator installation kit was selected at the time of purchase, install the pressure
regulator (item 10 in Figure 4).
9. With the black tubing, connect the Y-strainer inlet (item 5) to the sample source.
Refer to Sample line guidelines on page 12 and Sample requirements on page 12.
10. With the black tubing, connect the Y-strainer outlet (or the outlet of the pressure regulator) to the
sample inlet fitting (item 1) on the bottom of the analyzer. Make the tubing as short as possible
and a maximum of 2.5 m (8 ft).
11. If a pressure regulator was installed, install the sample bypass tubing (item 8 in Figure 4).
12. Assemble and plumb the grab sample assembly (item 4) as follows:
a. Assemble the grab sample assembly.
b. Plumb the tee fitting between the Y-strainer and the analyzer. Refer to Figure 3 or Figure 4.
13. Plumb the sample drain tubing (item 3) to an open drain. Refer to Drain line guidelines
on page 12.
English
9
 Loading...