916LE005550A
Starting, commissioning, operation
4.5 Connecting the PTA and OAC output contacts
4.5.1
Connecting the PTA contact
The PTA output contact is connected using the HTC130H adapter available as an
option and compatible with LSI, LSIG and Energy circuit breakers.
PTA wiring
Here is the procedure to follow to connect the PTA contact:
Action Note/Illustration
1 Remove the transparent
sticker covering the PTA
connector.
The PTA connector is located on the right-hand side of the
circuit breaker.
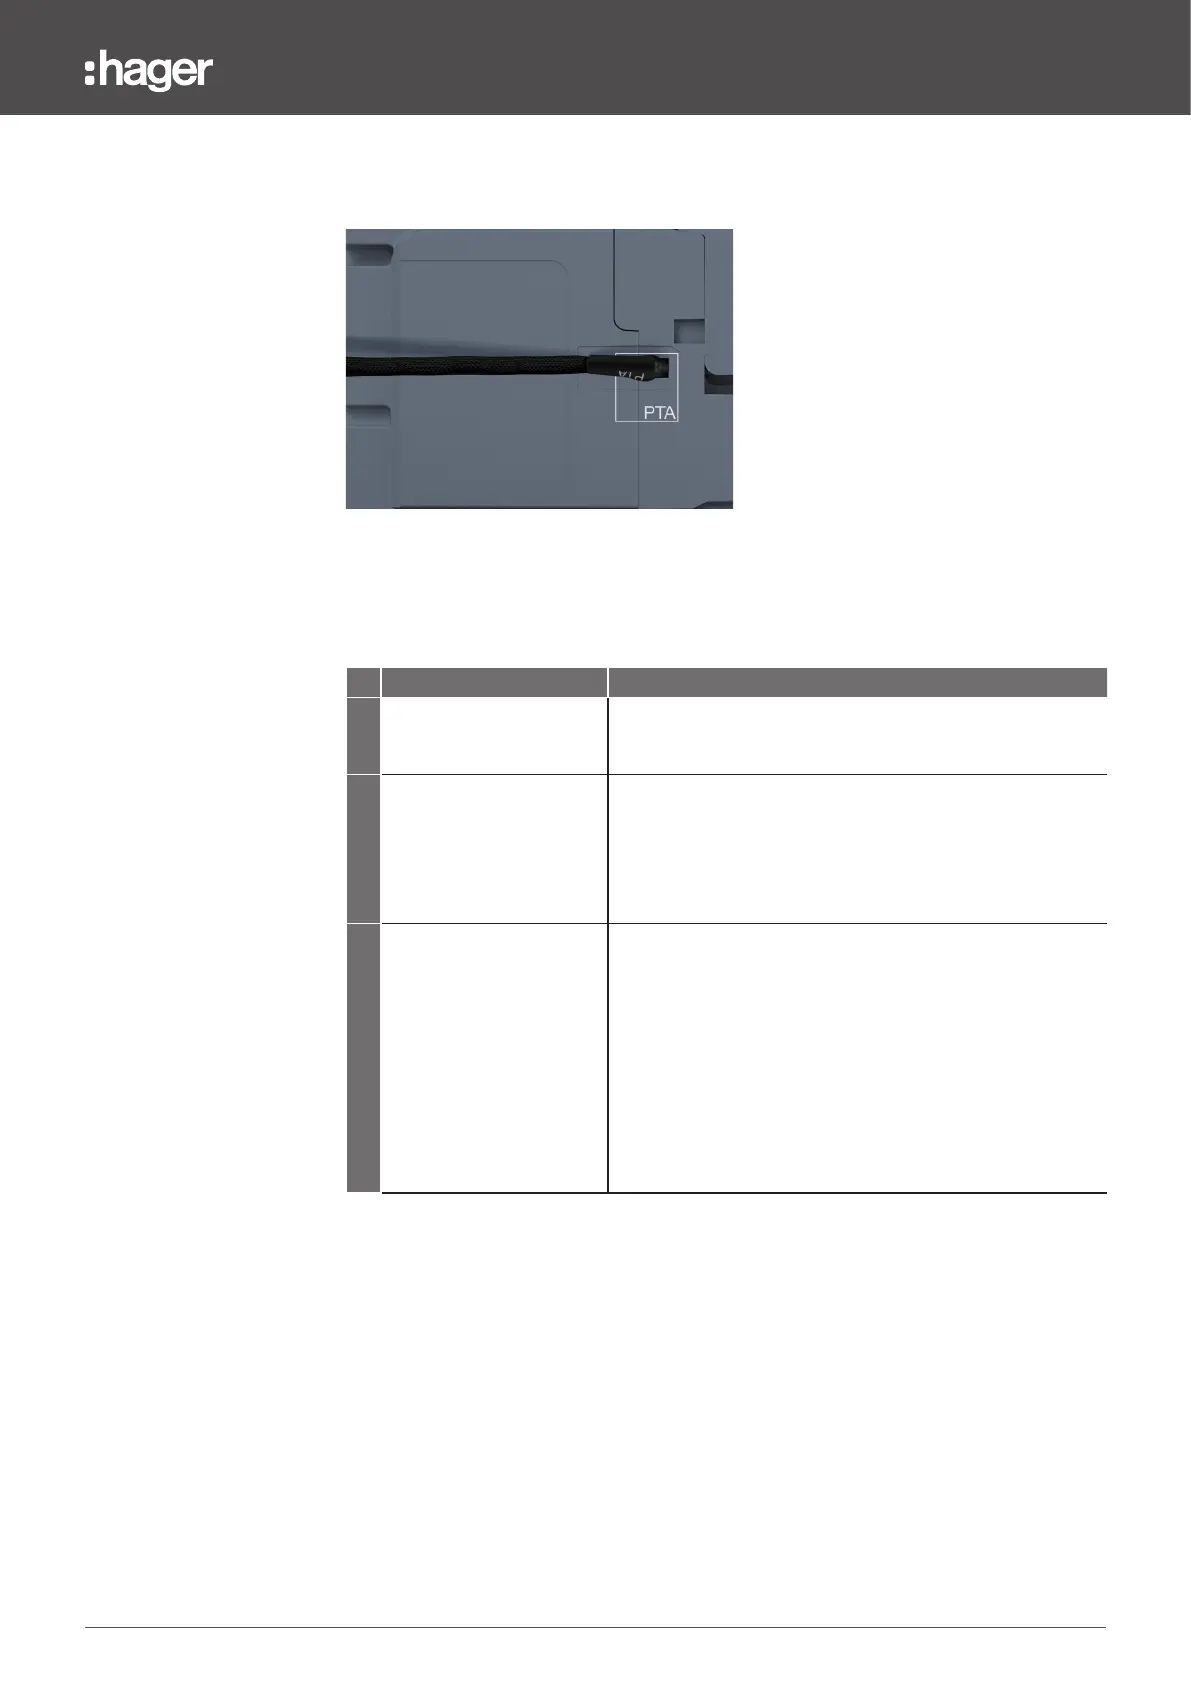
2
Insert the part of the
HTC130H adapter marked
PTA in the PTA connector.
Risk of damaging the PTA connector.
Respect the direction of insertion for the connector: The part
of the adapter marked PTA must be pointing downwards and
the adapter cable must be facing the rear of the circuit breaker.
Avoid forcing the connector when inserting.
3
Route the cable for the PTA
adapter towards the rear of
the circuit breaker. Attach
the cable to the circuit
breaker using adhesive
tape.
It is recommended to provide a connection terminal near
the circuit breaker to connect the + and - wires for the PTA
adapter. The wiring of the 24 VDC circuit (max. 100 mA) may
be extended from this terminal up to the 24 VDC supply
terminals.
+ wire: Brown colour
- wire: White colour
Please respect the wiring rules in force in switchboards:
- Separate the routing of the power cables and that of the
low-level signal cables
- Secure the cable along the routing.