71
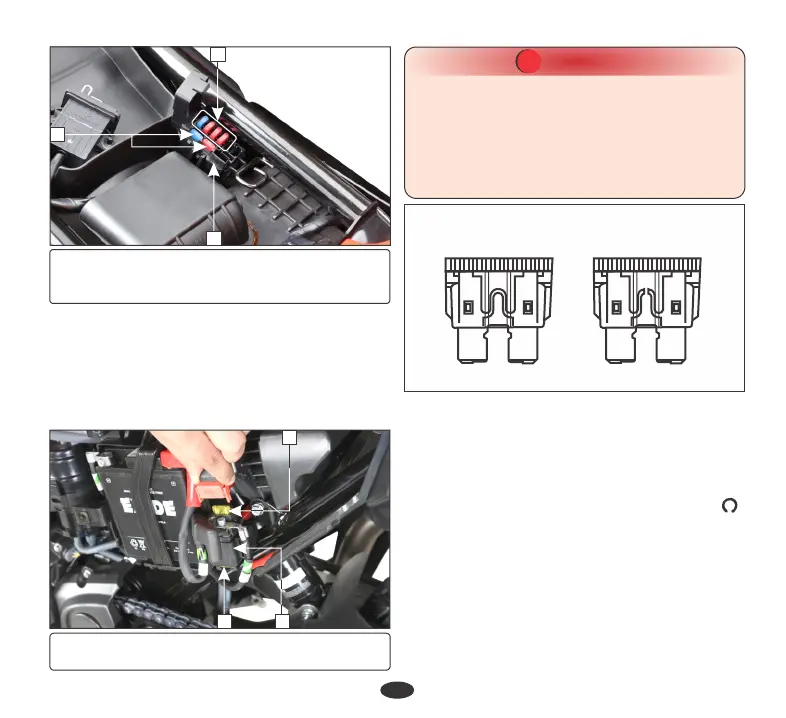
(1) Fuse box
(2) Main fuse :15A, 10A, 10A and 10A
(3) Spare fuse:15A and 10A
3
Fuse type: Blade fuse
Main fuse (5) :20A
Spare fuse (6) :20A
Starter magnetic switch (4)
Location: Inside left side cover, below the
starter magnetic switch.
1
2
(4) Starter magnetic switch
(5) (6) Spare fuse:20AMain fuse:20A
6 4
5
The stop lamp switch (1) must be adjusted so
that stop lamp glows when rear brake is
applied. The procedure for adjusting stop
lamp is as follows :
STOP LAMP SWITCH
•
Turn the ignition switch to the “ON” ( )
position.
•
Turn the adjusting nut (2) to position stop
lamp switch at a point where the stop lamp
glows once the brake pedal is depressed.
Turn the adjusting nut in direction (A) to
advance switch timing or in direction (B) to
retard switch timing.
CAUTION
!!
•
Turn the ignition switch "OFF" before
checking or replacing the fuse to prevent
accidental short-circuiting.
•
Do not attempt to start or ride the vehicle
without a charged battery, it can cause
fusing of the bulbs and permanent damage
to certain electrical components.