46
anticlockwise to increase the slack of the
chain.
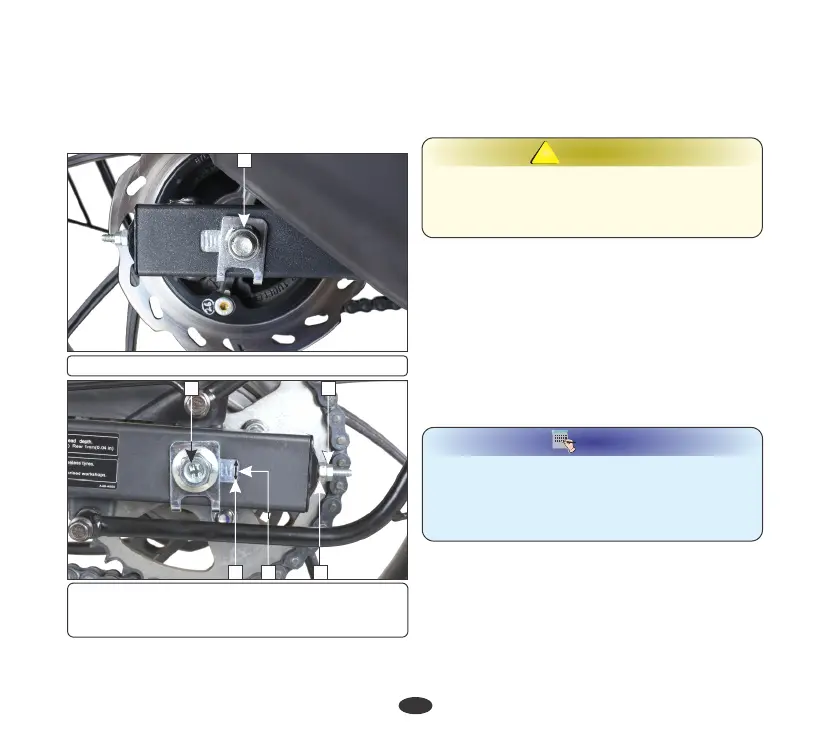
• Align the chain adjuster index mark (4) with
the rear edge (5) of the adjusting slots on
both sides of the swingarm equally.
(1) Rear axle nut
1
(2) Drive chain lock nut
(3) Drive chain adjusting nut (4) Index mark
(5) Axle (6) Rear edge of adjusting slot
25
364
Torque: 6.8 kgf-m
• Tighten the rear axle nut.
WARNING
!!
If a torque wrench is not used for installation,
see your Authorised Hero MotoCorp workshop
as soon as possible to check for proper
assembly.
• If after adjustment of drive chain slack, axle
(5) touches to the rear edge of adjustment
slot (6). Chain kit has to be replaced.
• Check the drive chain slack again.
• Spray a commercially available chain
cleaner for cleaning the drive chain over its
entire length.
Cleaning and Lubrication
• park the vehicle on its Turn the engine off,
main stand and shift the transmission into
neutral. Open side stand to facilitate
cleaning.
Lubricate every 00 km or sooner if the 10
chain appears dry.
O-ring chain, otherwise the O-rings may
deteriorate, fail and lose their sealing
properties.
Ensure that the chain cleaner and lubricant
used is the one recommended for use on an
NOTE
• Let the spray dry for about five minutes.
• To remove stubborn dirt, scrub the rollers
and side plates with soft nylon brush.
• Rotate the rear wheel backwards to expose
the next section of the drive chain and
repeat second step until all of the drive chain
is cleaned.