IRP40.02 Operation
41
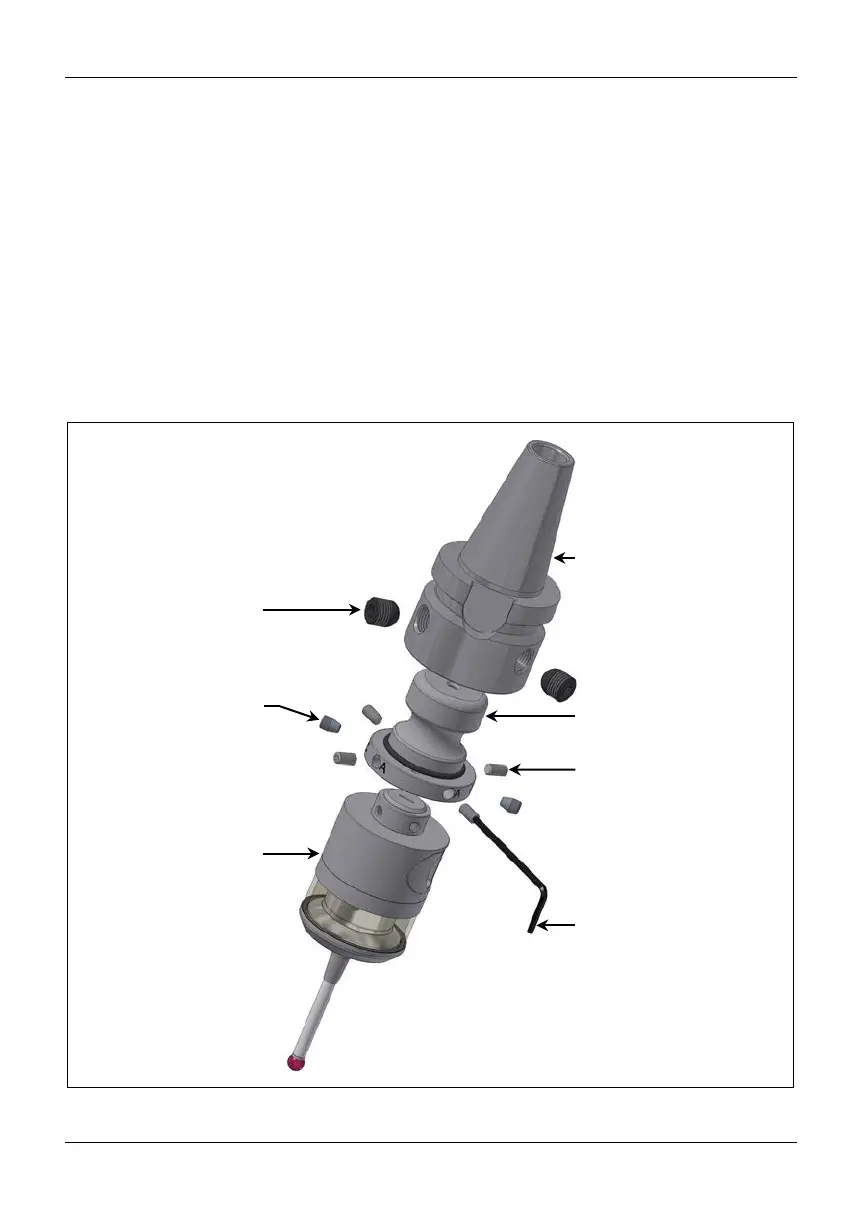
2.3.2 Mounting shanks Ø28
1. Dismounting the shank:
1.1. Remove clamping screws from the shank.
1.2. Remove shank.
1.3. Remove all „A“ and „C“ screws from the modular adapter (refer to Fig. 8).
1.4. Remove modular adapter from touch probe.
2. Mounting the shank:
2.1. Carefully slide the modular adapter onto the probe body. Align the „C“ threads with the conical bores.
2.2. Insert both clamping screws „C“ and tighten lightly.
2.3. Insert adjustment screws „A“ and tighten lightly.
2.4. Slide the shank onto the modular adapter.
2.5. Insert the clamping screws and tighten to the torque specified in Fig. 8.
3. Align the stylus to spindle center (refer to chapter 2.5).
4. Calibrate the probe.
Fig. 8 Mounting/dismounting the shank
AF2.5 m
AF2 mm (1097)
AF2.5 mm (1346)
SW4 mm (3489)
DIN913 M4x8 AF2 mm (4x)
(1352)
AF4
mm (2x)
(0506)
M=10 Nm (7 lbf.ft)
Modular adapter (D20-MO-B)
 Loading...