28
Configure Record Settings
There are multiple ways to setup your DVR for recording. They include setting up a recording schedule, triggering a
recording by motion detection and/or a sensor alarm, and manually starting the recording.
Before Record Settings
Before configuration, please make sure your DVR has been installed with HDD and has completed its initialization,
otherwise, access Menu > HDD Management to install the HDD and perform initialization first.
Note: Please refer to Initializing HDDs for specific instructions for initializing HDD.
Initializing Record Settings
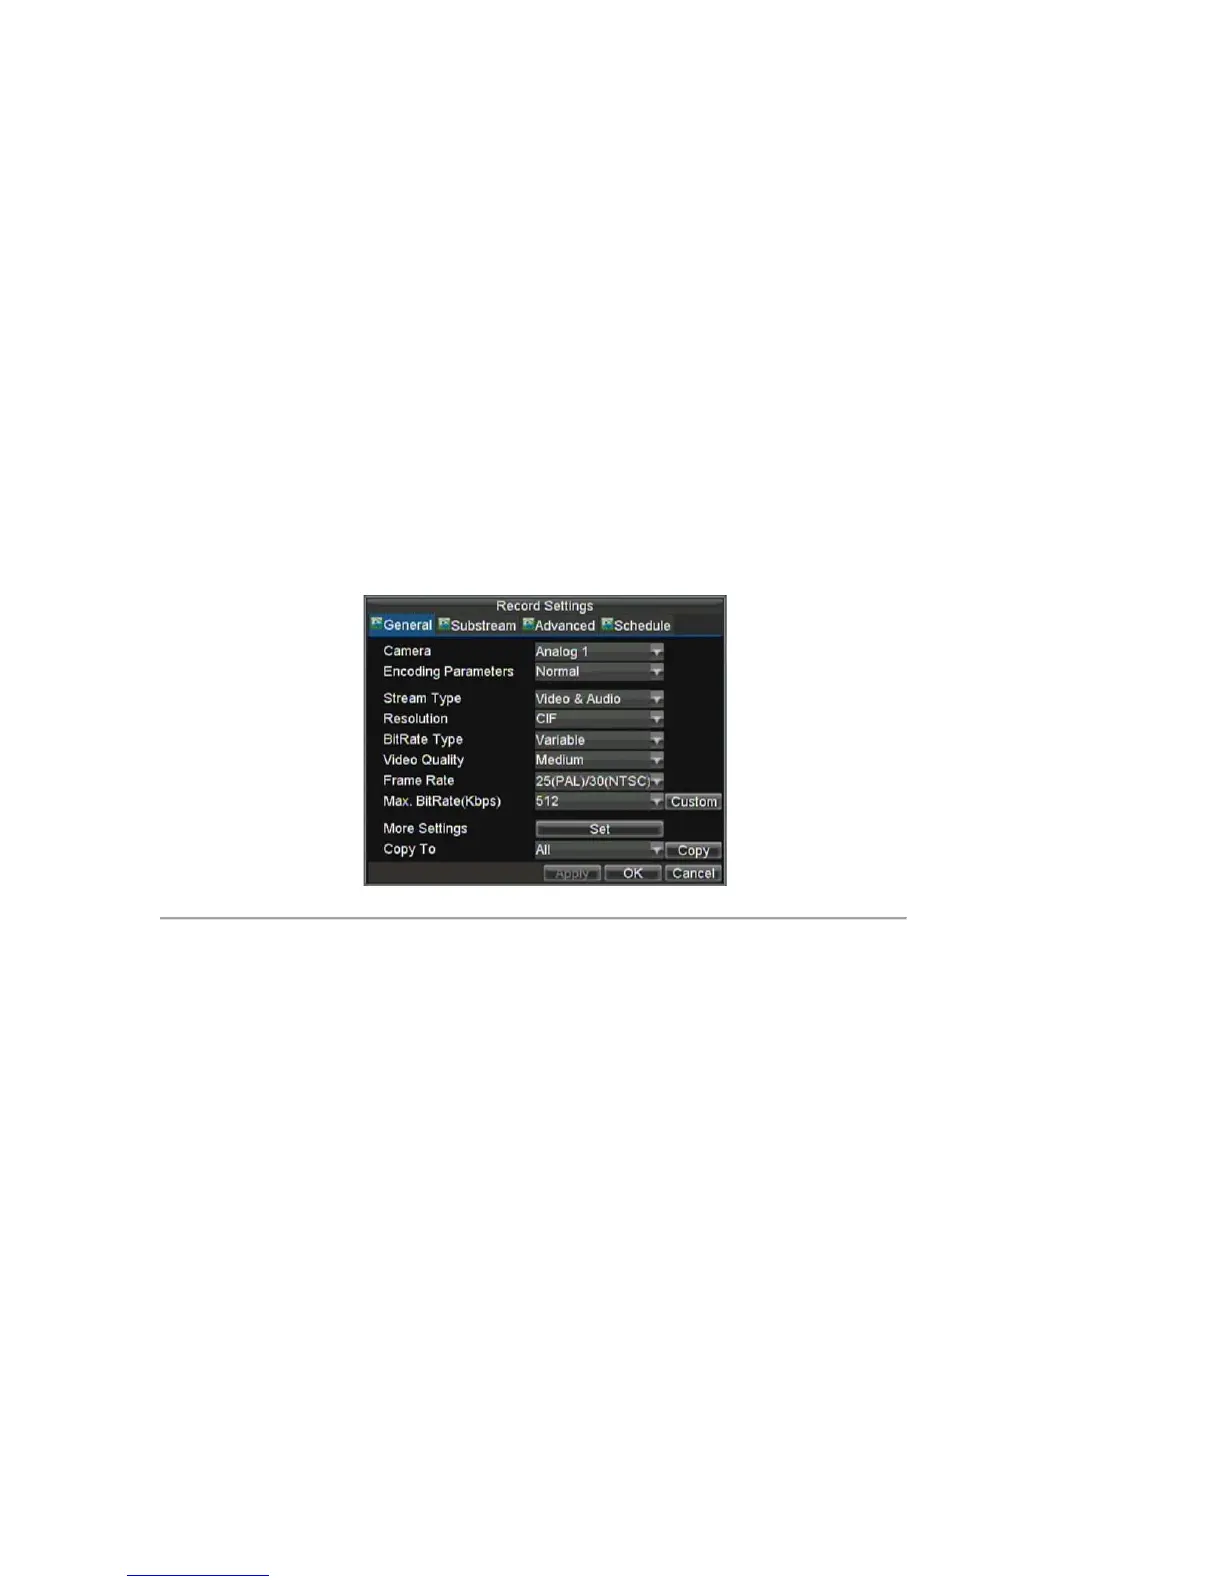
1. Click Menu > Setting > Record to access the Record Settings dialog box, shown in Figure 1.
Figure 1. General Record Settings
2. Select the camera you want to configure.
Note:
DS-7604NI-S/M and DS-7604NI-S models provide no analog camera connection; please
select IP Cameras for configuration.
3. Configure the following settings:
• Encoding Parameters: Set the encoding parameters to be Normal or Event.
• Stream Type: Set the stream type to be Video or Video & Audio.
• Resolution: Set recording at resolution of 4CIF, DCIF, 2CIF, CIF or QCIF selectable.
• Bit Rate Type: Set the bit rate type to be Variable or Constant.
• Video Quality: Set the video quality of recording, with 6 levels configurable.
• Frame Rate: Set the frame rate of recording.
• Max Bit Rate: Select or customize the maximum bit rate for recording.
4. Click the Set button under More Settings to configure more recording settings, as shown in Figure 2.
 Loading...