20
12. Click the OK button. This will take you back to the Schedule tab. To copy the schedule to a different
channel, select the channel or all under Copy To and click the Copy button.
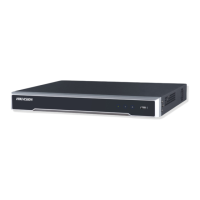
13. Click Next button to access the Network Settings dialog box, shown in Figure 8.
Figure 8. Network Settings
16. To configure network settings, click the Enter button.
17. Enter the IP Address, Subnet Mask and Default Gateway settings.
18. Click OK button to return to the Setup Wizard.
19. If all the settings have been entered, click Done to finish and exit the Setup Wizard.
You’ve completed the Setup Wizard. The next step in the initial setup process is to setup the system date and time.
After completion of Setup Wizard, enter the Live View window.
Setting Date & Time
It is extremely important to setup the system date and time to accurately timestamp recordings and events.
To setup date and time:
1. Open the Menu window by clicking the MENU button on the remote or front panel. You can also go
to the Menu window by right clicking with the mouse and clicking the Menu button.
2. Click the Setting icon.
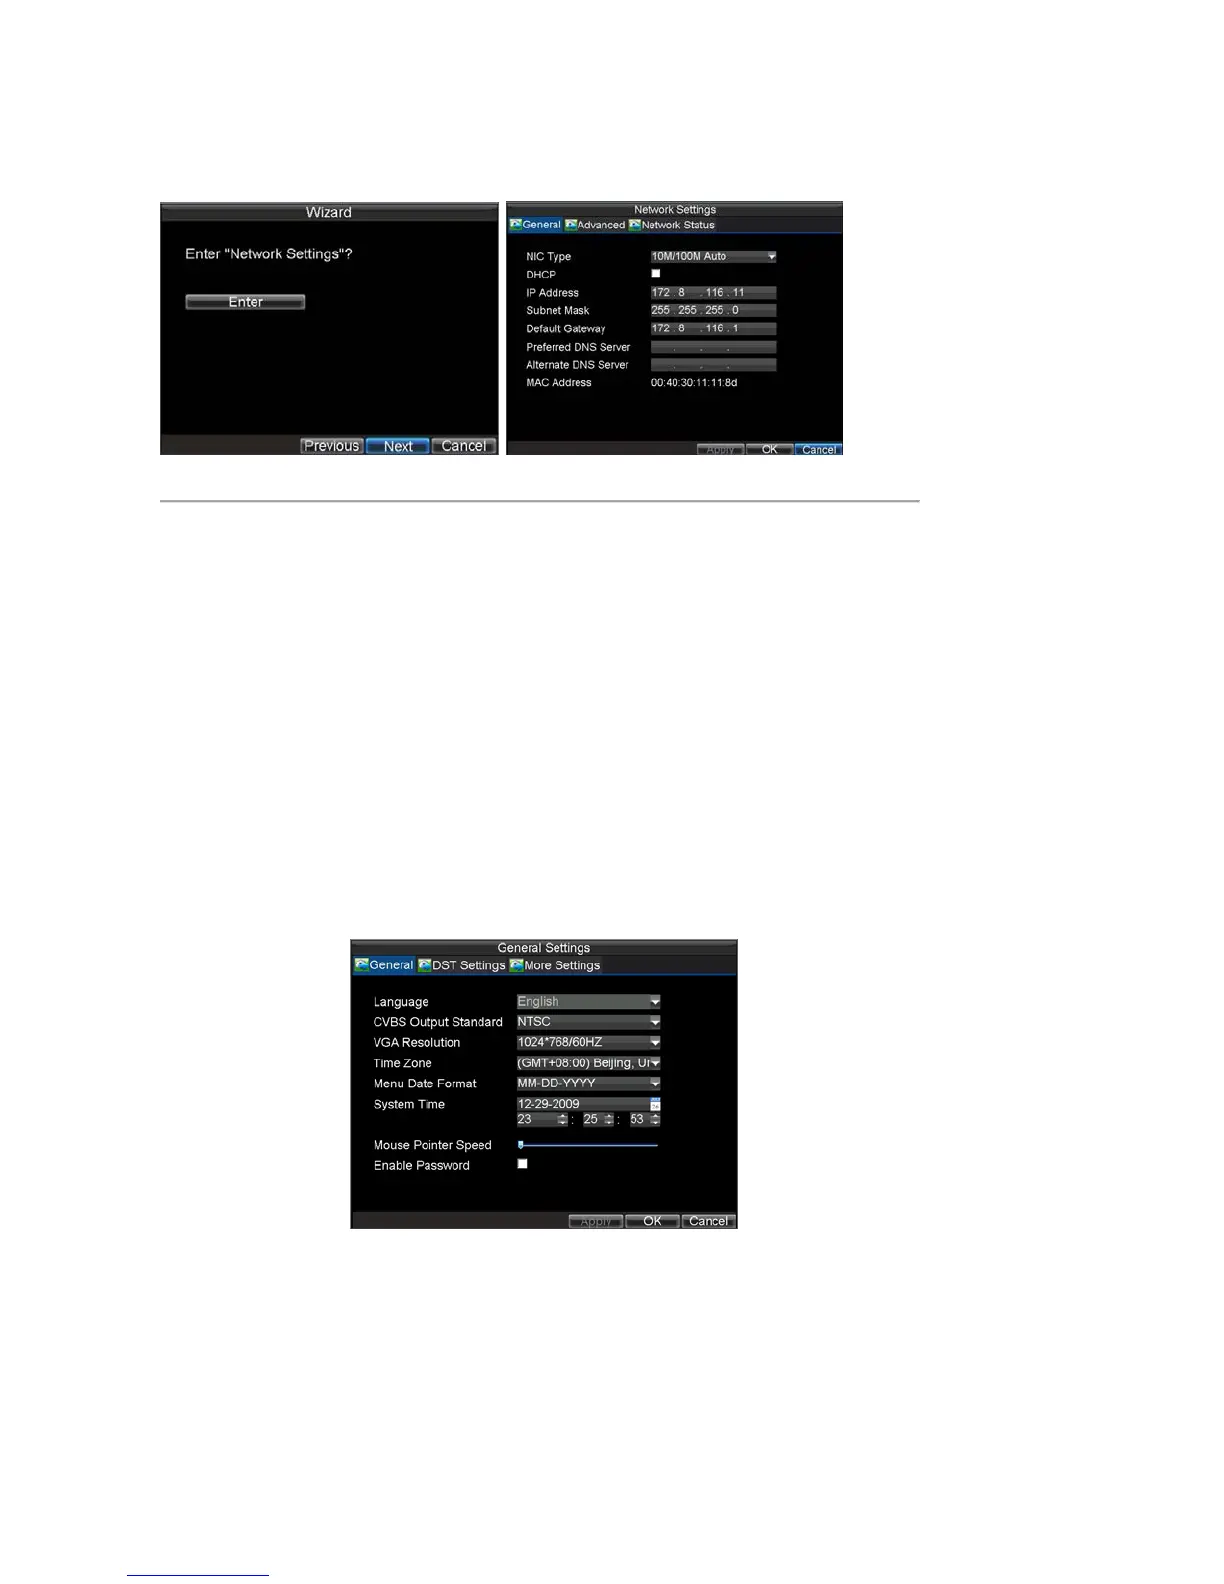
3. Click the General icon. You will be taken to the General Settings window, as shown in Figure 9.
Figure 9. General Settings
 Loading...