CHASSIS
5-19
Note:
The hole for the parking brake arm
shaft has multiple threads. If the punch
mark (a) on the parking brake arm shaft
is not between the alignment marks (b)
when the parking brake arm shaft is
screwed in completely, remove the
parking brake arm shaft and screw it in
from a different starting position.
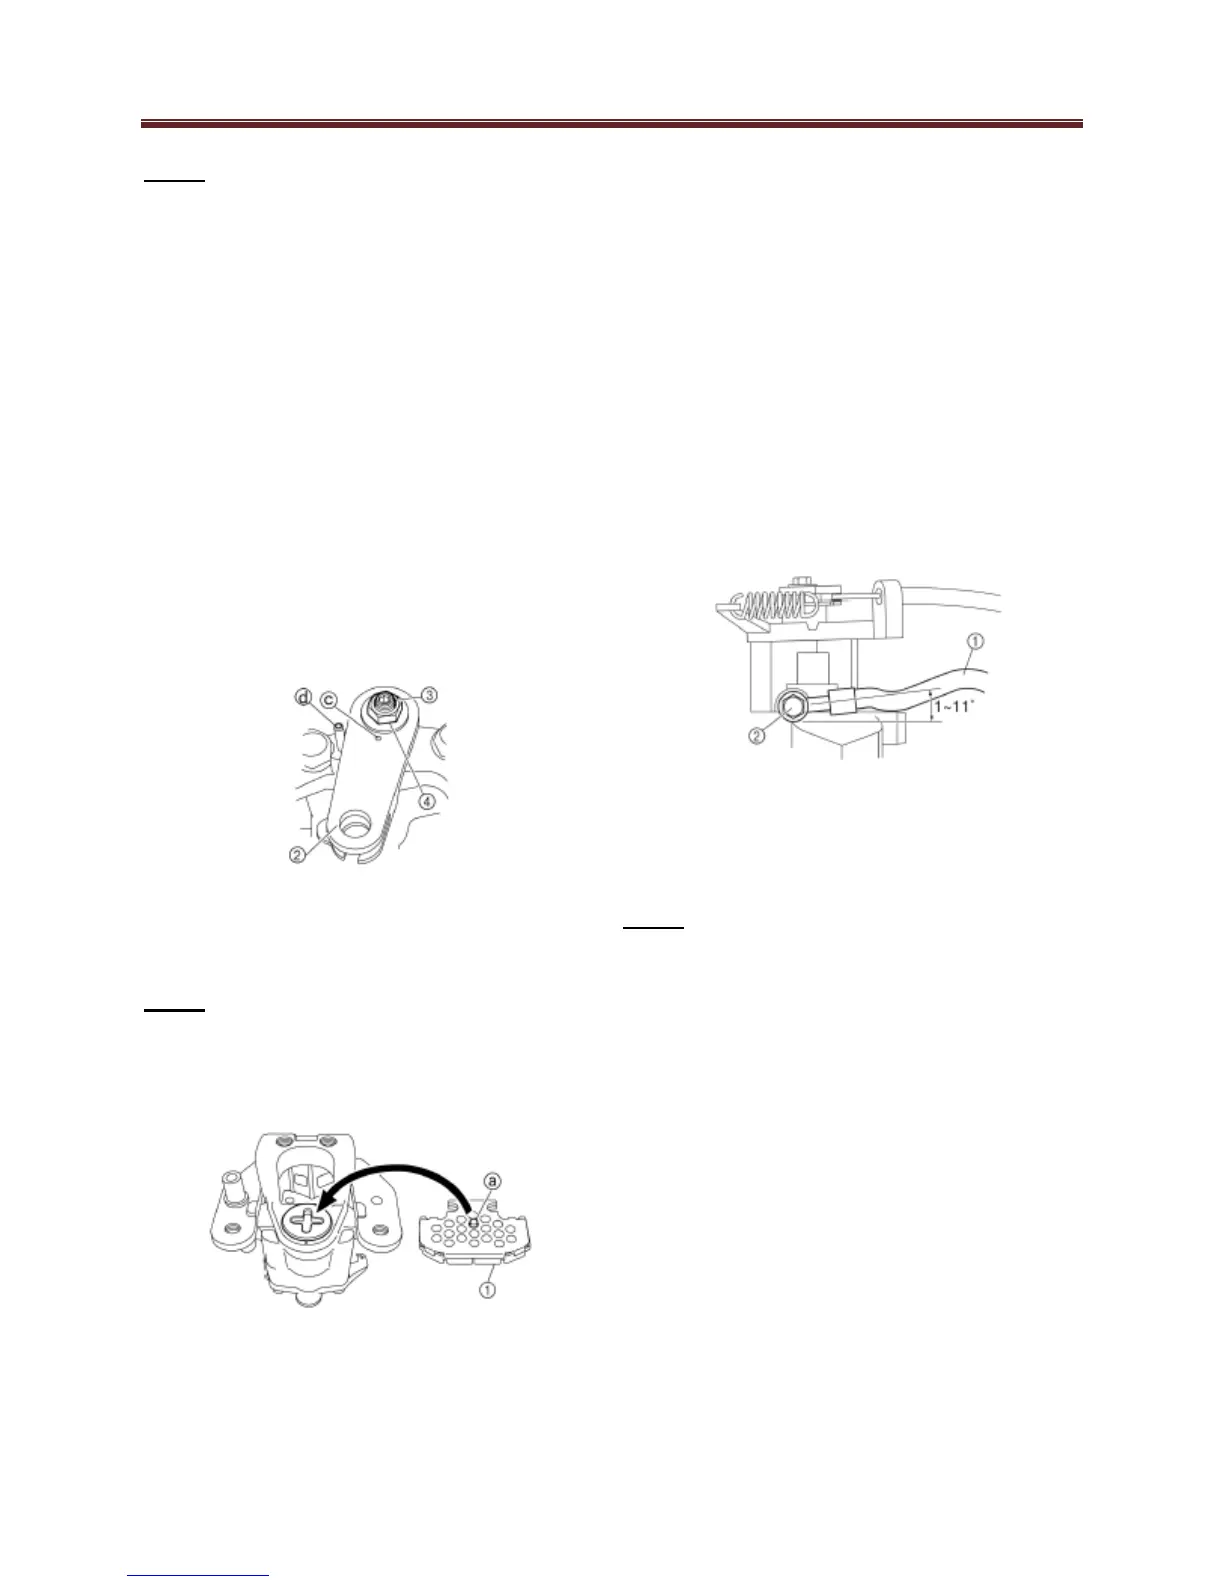
Turn the parking brake arm shaft
approximately 60⁰ clockwise and install the
parking brake arm so that the punch mark
(c) is aligned with the punch mark (a) on
the parking brake arm shaft. Turn the
parking brake arm until it contacts the pin
(d) and finger tighten the set bolt. Tighten
the parking brake arm nut.
Install the brake pad (piston side) (1) with
the insulator and pad shim.
Note:
Align the projection (a) on the piston
side of the brake pad with the groove in
the brake caliper piston.
Install the brake pad holding bolts.
17Nm (1.7 m · kg,12 ft · lb)
Install the brake caliper assembly with the
mounting bolts.
40Nm (4.0m · kg,29 ft · lb)
Install the brake line (1) sandwiched
between 2 new crush washers with the
banjo bolt (2) and align as shown.
48Nm (4.8m · kg,35 ft · lb)
Fill the brake reservoir.
Must use DOT4 Brake Fluid
Note:
Brake fluid may damage painted
surfaces or plastic parts. Always clean
up spilled brake fluid immediately.
Bleed the brake system and refill the
reservoir to between the minimum and
maximum level.
Adjust the parking brake cable free play.
Check that the brake system is functioning
correctly before operation of the utv.
 Loading...