- Hot air from a heater, etc. aects directly to the motion
sensor kit.
- Blower device such as ceiling fan or ventilating fan
aects the airow from the indoor unit.
- Ambient temperature changes drastically.
- Excessive force or vibration is applied to the motion
sensor kit.
- Fluid or corrosive gas exists on the installing site.
- Continuous use of the indoor unit in a high humidity
environment.
- Weather aects directly to the surface of the motion
sensor.
- Static electricity or electromagnetic wave is generated on
the installing area.
- Moving object with temperature dierent from
surrounding.
Pay attention that the detecting function is decreased if the lens
for sensor smudges.
In this case, wipe o smudges by a cotton swab soaked alcohol
(Isopropyl alcohol is recommended.) or a soft cloth.
(When wiping o smudges on the lens for sensor, do not apply
excessive force. If excessive force is applied, the resin lens
may be damaged so that may cause malfunctions such as
misdetection or undetectable of the motion.)
! CAUTION
• Perform securely the installation work referring to this installation
manual.If theinstallation isnot completed, it may cause injury by
fallingdownthemotionsensorkit.
• Donotinstallthemotionsensorkitwheretheammablegasesmay
generateorenter.
• Turn OFF the power source completely before performing the
installationworkandtheelectricalwiringworkformotionsensorkit.
Ifnot,itmaycauseanelectricshock.
• Do not apply excessive force to remove the corner pocket cover.
Otherwise, it may cause of deformation or damage of the plastic
hook,ormayresultinjury.
• Holdtheairpanelsecurelybyhandstopreventitfromfallingwhen
itisremoved.
• Performsecurelytheelectrical wiring work.Iftheelectricalworkis
notcompleted,heatgenerationattheconnection,areoranelectric
shockmayoccur.
• Makesurethattheelectricalwiresaresecurelyxedinordernotto
applyanexternalforcetotheterminalconnectionsofthewirings.If
xingisnotcompleted,itmaycauseheatgenerationorare.
! CAUTION
Pay attention to perform the installation work at high-place using a
stepladder,etc.
? NOTE
• Donotmovethelouvrebyhand.
• Ifmoved,thelouvremechanismwillbedamaged.
• Inaddition,donotapplyanexcessiveforcetotheairoutletpartto
preventthebreakage.
1 The suspension height of the indoor unit should be referred
to “Installation & Maintenance Manual” of the indoor unit.
2 Do not touch the louvre during the installation work.
3 Remove the air inlet grille from the air panel.
While pushing both ends of knobs at the air inlet grille
toward the arrow direction, open the air inlet grille until the
angle of approximately 45° from the air panel surface. After
lifting the air inlet grille keeping it inclined, draw the air inlet
grille forward.
(Remove the lament tape (4 portions) xing the air lter.)
45°
Air inlet grille
Air panel
Corner pocket
cover (4 portions)
Knob
? NOTE
Althoughtheairinletgrillecanbeopeneduntiltheangleof90°fromthe
airpanelsurface,itcannotberemovedfromtheairpanel.
4 Remove the corner pocket covers.
The corner pocket covers can be removed pulling Ⓐ part
toward the arrow direction in the gure below.
5 Check to ensure that the distance between the indoor unit
undersurface and the false ceiling undersurface is 16
+3
0
mm
as shown in the gure below.
3
False ceiling
Indoor unit
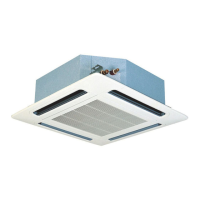
AIR PANEL P-AP56NAMS
PMML0570 rev.0 - 01/2021
10

 Loading...