7.0 DESCRIPTION, CONTINUED
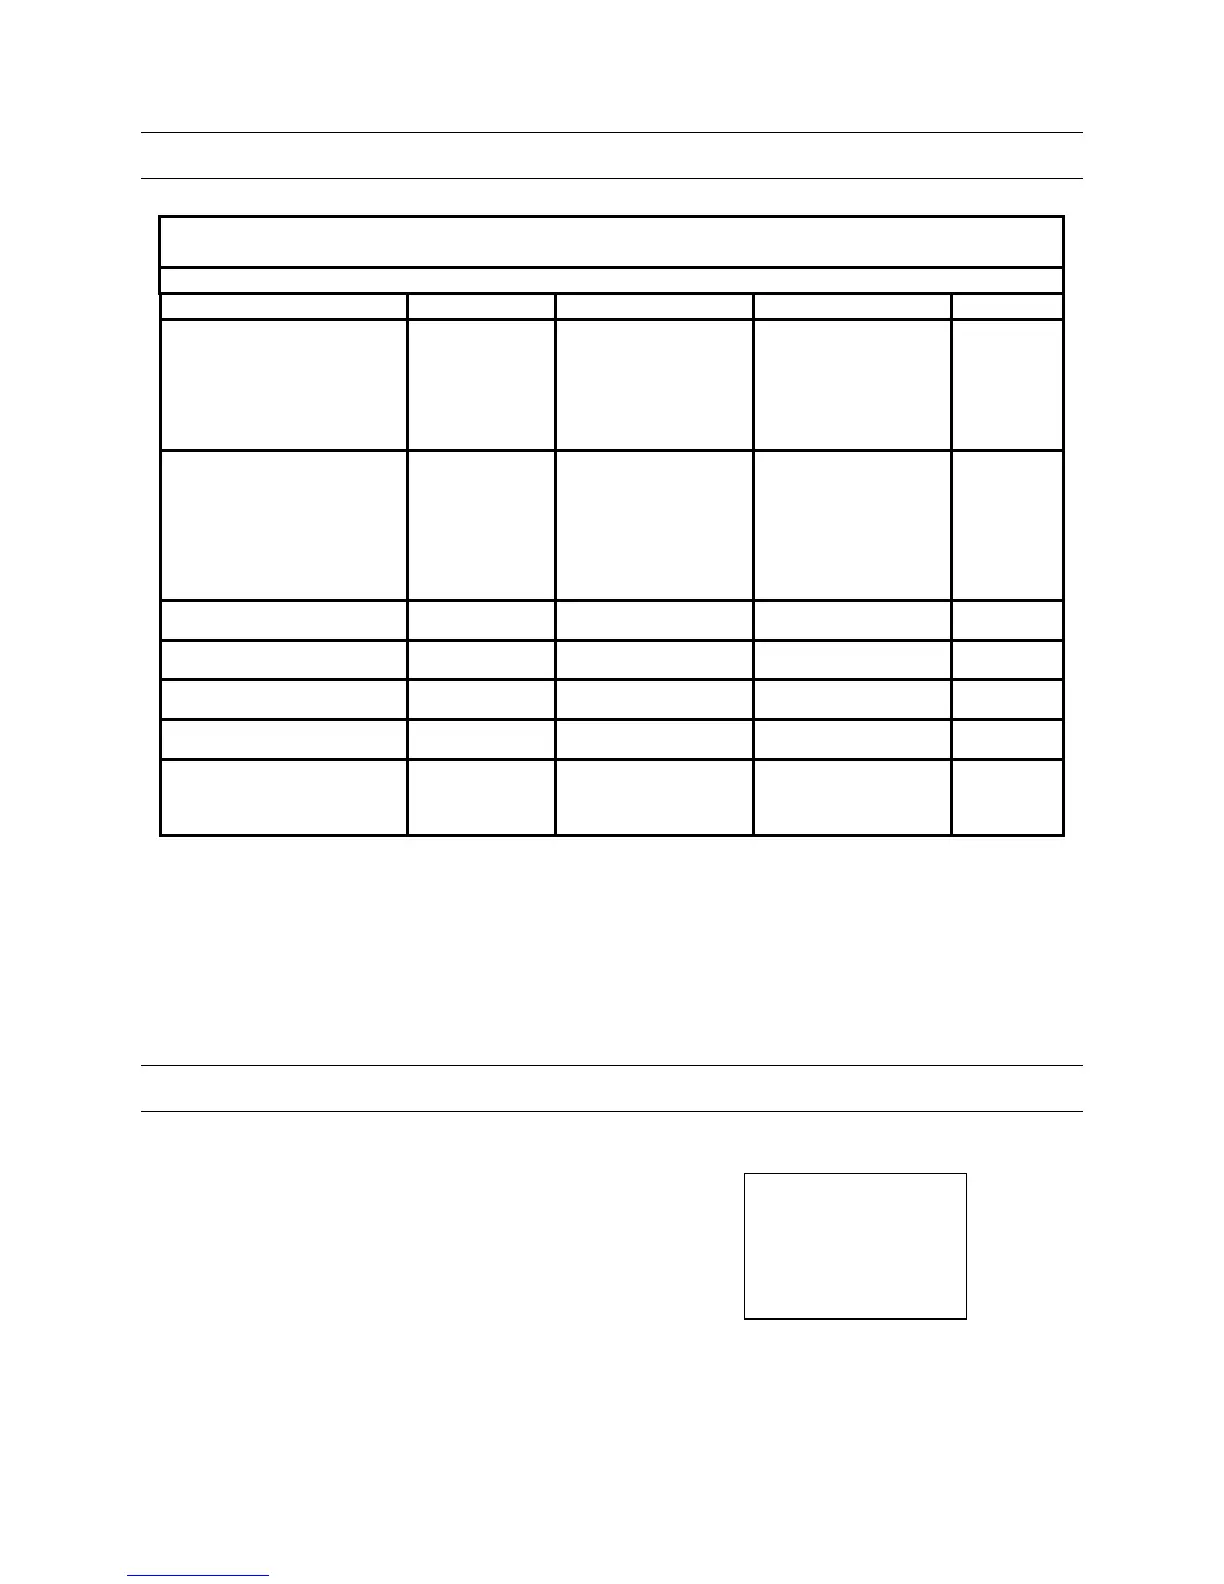
Table 3. Menu Setup Tree
Main Menu ( 9 0 9 0 lock)
1 Cameras 2 Monitors 3 System 4 Alarms 5 Software
1 Titles
1 Camera
2 Preset
3 Sector
1 Auto-sequence 1 Time/Date Setting 1 System Alarms
1 Settings
2 Actions
3 Contact Tables
(not available at this time)
4 Messages
(not available at this time)
2 Settings (Select Camera 1-16)
IR Lamps (Present/Absent)
Auto 180 (Enabled/Disabled)
Digital Zoom (Enabled/Disabled)
Home Setting (preset 0/tour
1/disabled)
Home Timer (000 to 100) min.
2 Partitioning (not
available at this time)
2 Time/Date Format
Clock (12-/24-hour)
Date (Day/Month/Year)
(Month/Day/Year)
(Year/Month/Day)
Month (2 numbers)
(3 letters)
2 Camera Alarms
(not available at this time)
3 Tours (Select Camera 1-16) 3 Text Brightness 3 Monitor Control
RS485/RS232
3 Alarm Properties
4 Synchronisation 4 Universal Sequences (not
available at this time)
5 Privacy Zones
Presets 100–127 (privacy/standard)
5 Language (not available at
this time)
6 Sector Zones (1-16)
6 Event Timers (not available
at this time)
7 Remote Reset
1 Power-up Reset
2 Camera Reset
3 Factory Reset (WARNING!)
7 Salvo Switching (not
available at this time)
To select options within the menus, press the corresponding number button (if
applicable), move the joystick stick up or down to move up one line or down one line
respectively, or move the joystick left or right to move between columns.
Press the lock button to exit a menu (Exits the current menu and returns the user to the
previous menu. If the user is at the main menu, pressing the lock button exits the menus
and returns the operator to normal operation.)
7.1 CAMERAS
To access the cameras menu:
MAIN MENU
1 CAMERAS
2 MONITORS
3 SYSTEM
4 ALARMS
5 SOFTWARE
1. Access the main menu by pressing the 9
button, the 0 button, the 9 button, the 0
button, and then pressing the lock button.
2. Access the camera menu, by pressing the 1 button.
Rev. 1 18 900.0560
18-July-2005
 Loading...