Sensepoint XCD Technical Manual SPXCDHMANEN Issue 15
18
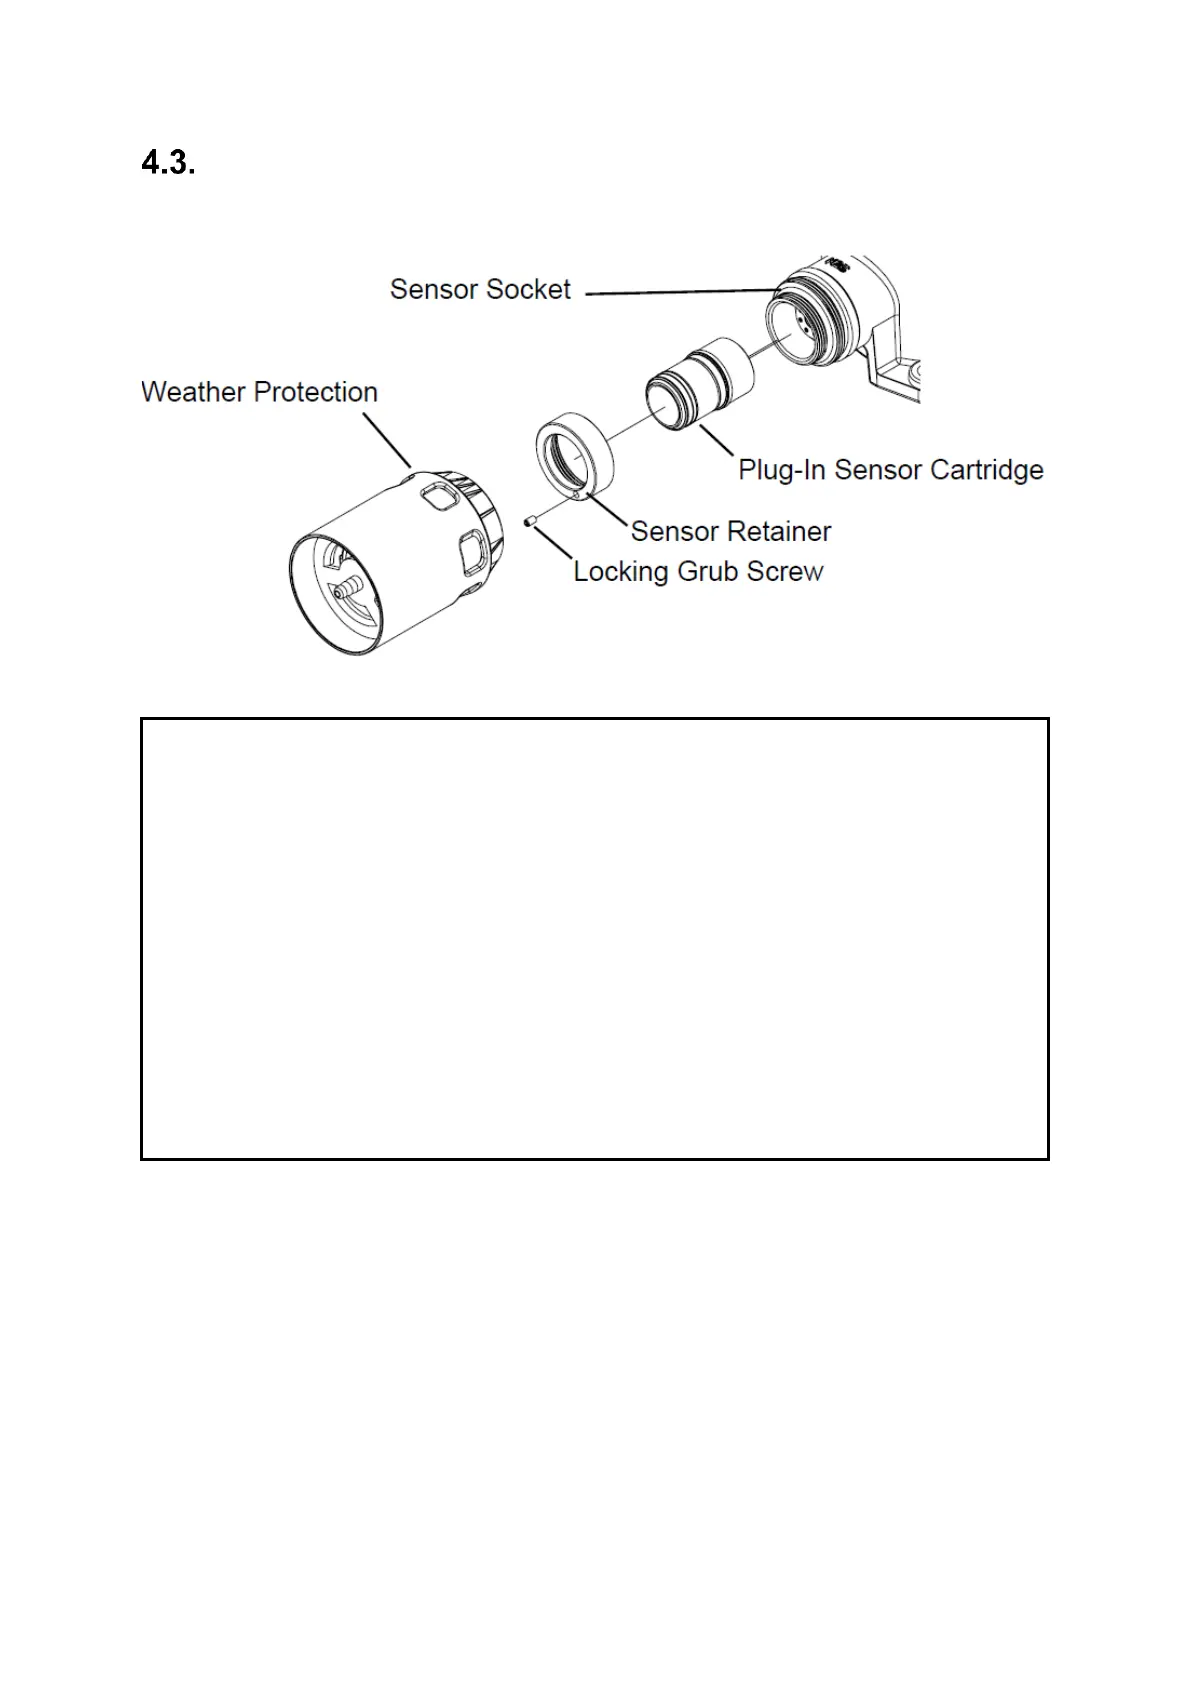
Installing the sensor
The XCD gas sensor cartridge plugs into the XCD Sensor Socket.
Diagram 6 Installing the Sensor
To install the Sensepoint XCD Sensor Cartridge to the transmitter Sensor Socket:
1. Remove the weather protection (if fitted) from the sensor.
2. Use a 1.5 mm Allen key (hexagonal wrench-included) to loosen the Locking Grub Screw on
the Sensor Retainer.
3. Unscrew and remove the Sensor Retainer.
4. Remove the XCD Sensor Cartridge from its packaging and plug it into the XCD Sensor
Socket, taking care to align the sensor pins with the connector.
5. Refit the Sensor Retainer and tighten the Locking Grub Screw.
6. Refit the weather protection (as required) to the Sensepoint XCD sensor.
WARNINGS
Care should be taken when removing and refitting the Sensepoint XCD plug-in Sensor to
the Sensor Socket so that damage to the connection pins can be avoided.
If using an anti-seize compound, the threads should be thinly coated with an approved silicone
free compound e.g. petroleum jelly.
Take care when handling old sensors as they may contain corrosive solutions.
Take care when removing or replacing the Sensor Retainer as there may be sharp edges
present on the adjoining threads.
The equipment is designed and constructed as to prevent ignition sources arising, even in the
event of frequent disturbances or equipment operating faults.
The sensor head must be fitted with the supplied weather protection, and mounted so that
the sinter is pointing downward to provide ingress protection IPX6.
The weather protection is a potential electrostatic charging hazard. The manufacturer’s
instructions should be observed.
 Loading...