Revision 10 ST 800 SmartLine Pressure Transmitters User’s Manual Page 67
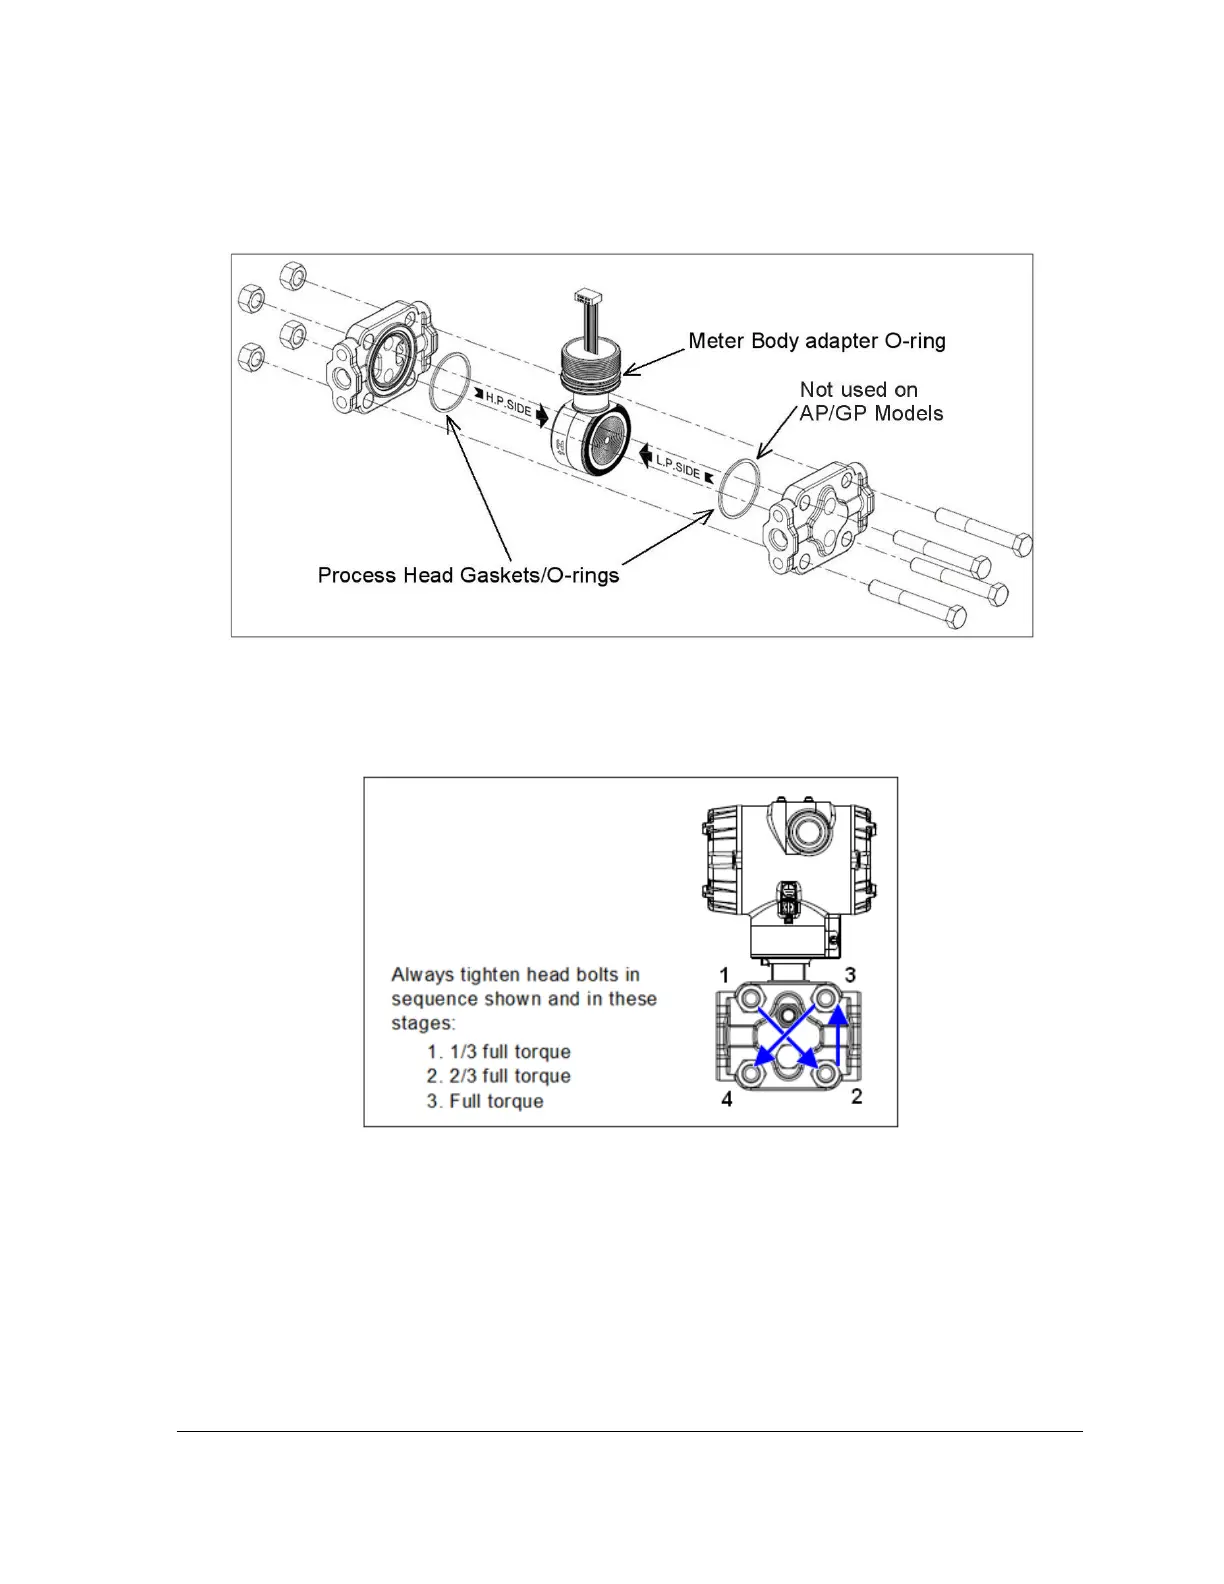
15. Refer to Figure 26. Apply Dow Corning #33 silicone grease to the meter body adapter O-ring
and carefully assemble the O-ring to the meter body. Assemble the process head(s) and bolts
to the new meter body. For now, make the bolts only finger-tight.
Figure 26 – Meter Body Reassembly
16. Use a torque wrench to gradually tighten nuts to torque rating in sequence shown in Figure 27.
Tighten head bolts in stages of 1/3 full torque, 2/3 full torque, and then full torque.
Figure 27 – Head Bolt Tightening Sequence
17. Feed the ribbon cable on the new meter body through the neck of the housing.
CAUTION
To prevent damage to the ribbon cable, use care when assembling the Meter
Body to the electronics housing.
18. Screw the new meter body into the housing until the bottom of the Meter Body adapter is
flush with the neck of the electronics housing.

 Loading...