45
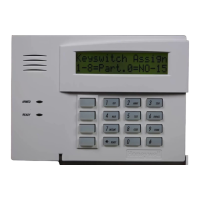
SECTION 3: DATA FIELD DESCRIPTIONS
PROMPT EXPLANATION
001 Tamper Option
none 0
If you selected input type 1, 6, 7, or 8, this prompt displays.
If the zone has a tamper switch wired in the loop in addition to a sensor contact, enter the tamper
option
Enter 1 = The tamper switch is normally closed (wired in series) with the EOL resistor. A short
causes a trouble and a short causes a fault.
Enter 2 = The tamper switch is normally open (wired in parallel) with the EOL resistor. An open
causes a trouble.
Enter 0 = The tamper switch is not being used in the loop
NOTE: Does not apply when the control is Armed and cannot be used with 24 hour zone types or
zone type 05 (it will have no effect).
010 V-PLEX RELAY?
1 = YES 0 = NO
If you select input type 6, this prompt displays.
Enter 1 = Using a 4101SN Relay Module for this zone
Enter 0 = NOT using a 4101SN for this zone
Press [∗] to continue.
010 CONS ECP ADDR
(00-30) 01
If you select input type 09, this prompt displays.
Enter the ECP address of the keypad that is being used for entry/exit for this access point (00-30).
Press [∗] to continue.
010 ACCESS POINT
(01-15) 01
If you select input types 06, or 11 – 13, this prompt displays.
Enter the access point (01-15) to be controlled by the input type.
NOTES:
• For input type 06, the selected address must be 00.
• If you are using the VistaKey module, the access point must match the address that was set in the
module.
Press [∗] to continue.
010 INPUT S/N: L
AXXX-XXXX 1
For Serial Number entry and Loop Number entry, do one of the following:
a. Transmit two open and close (or close and open) sequences. For a button-type transmitter, press
and release the button, wait approximately 4 seconds, then press and release the button a second
time.
b. Manually enter the 7-digit serial number printed on a label on the transmitter, using the Alpha
keypad. Then press the [∗] key, the cursor moves to the “L” position. You can edit the loop number, if
necessary. When the loop number is acceptable, press [∗].
c. Press key [C] to copy the last serial number enrolled (used when programming a
transmitter with several input loops).
010 INPUT S/N: L
A022-4064 1
The cursor moves to the Loop column (L) with the previously entered/transmitted serial number
displayed.
Enter the loop number (refer to 5800 Series Transmitters Loop Designations below).
To Delete an Existing Serial Number, enter “0” for the loop number field. The serial number will change
to “0”s.
If “0” was entered in error, simply re-enter the loop number or press [#], and the serial number will return
to the display.
Press [∗] to accept.
010 INPUT S/N: L
A022-4064 1
The system will then check for a duplicate serial/loop number combination.
• If a duplicate serial/loop number combination is found, the keypad will emit a single long beep, and
display the serial number along with a “?” for the loop number, allowing you to re-enter the correct
loop number.
• If the serial/loop number combination is not a duplicate in the system, a display appears showing
the serial number and loop number entry.
Press [∗] to continue.

 Loading...