EasyManuals Logo

HP ProLiant ML110 G7 Maintenance And Service Guide

HP ProLiant ML110 G7
96 pages
To Next Page IconTo Next Page
To Previous Page IconTo Previous Page
Page #41 background imageLoading...
Page #41 background image
Removal and replacement procedures 41
10.
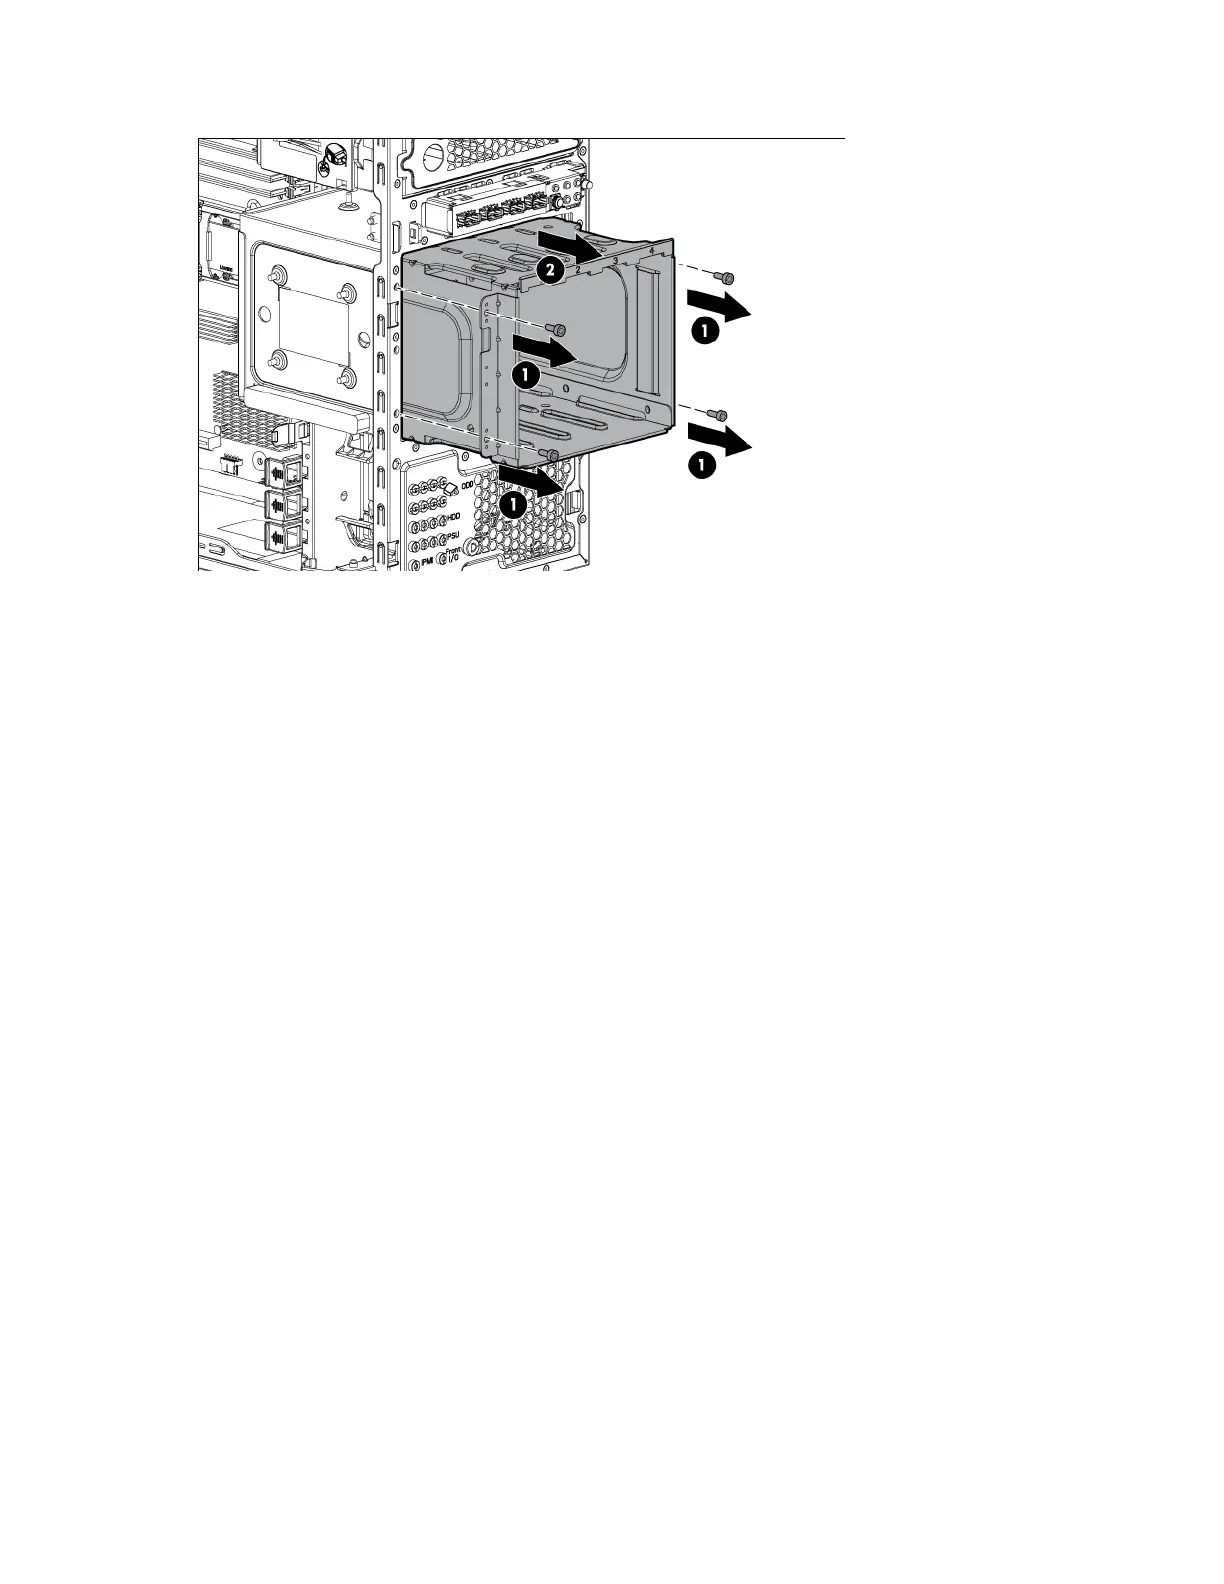
Remove the four screws, and then loosen the drive cage.
11. Route and connect the redundant power supply cables to the system board ("Power cabling" on page
73).
12. Insert the four screws to tighten the drive cage.
13. Install any device originally in the upper media drive bay.
14. Install the access panel ("Installing the access panel" on page 24).
15. Install the front bezel ("Installing the front bezel" on page 25).
16. Power on the server.
Optical drive option
1. Power down the server (on page 23).
2. Remove the front bezel ("Removing the front bezel" on page 25).
3. Remove the access panel ("Removing the access panel" on page 24).

Table of Contents

Other manuals for HP ProLiant ML110 G7

Questions and Answers:

Question and Answer IconNeed help?

Do you have a question about the HP ProLiant ML110 G7 and is the answer not in the manual?

HP ProLiant ML110 G7 Specifications

General IconGeneral
Product TypeServer
Form FactorTower
Processor Sockets1
ChipsetIntel C202
Memory TypeDDR3 UDIMM
Maximum Memory16 GB
Memory Slots4
ProcessorIntel Xeon E3-1200 series
StorageSAS or SATA
Drive Bays4 LFF or 8 SFF
Hard DrivesOptional
Optical DriveOptional
Network ControllerHP NC112i Gigabit Ethernet Adapter (1 port)
Operating System SupportMicrosoft Windows Server, Red Hat Enterprise Linux, SUSE Linux Enterprise Server
Storage ControllerHP Dynamic Smart Array B120i

Related product manuals