Removal and replacement procedures 51
11.
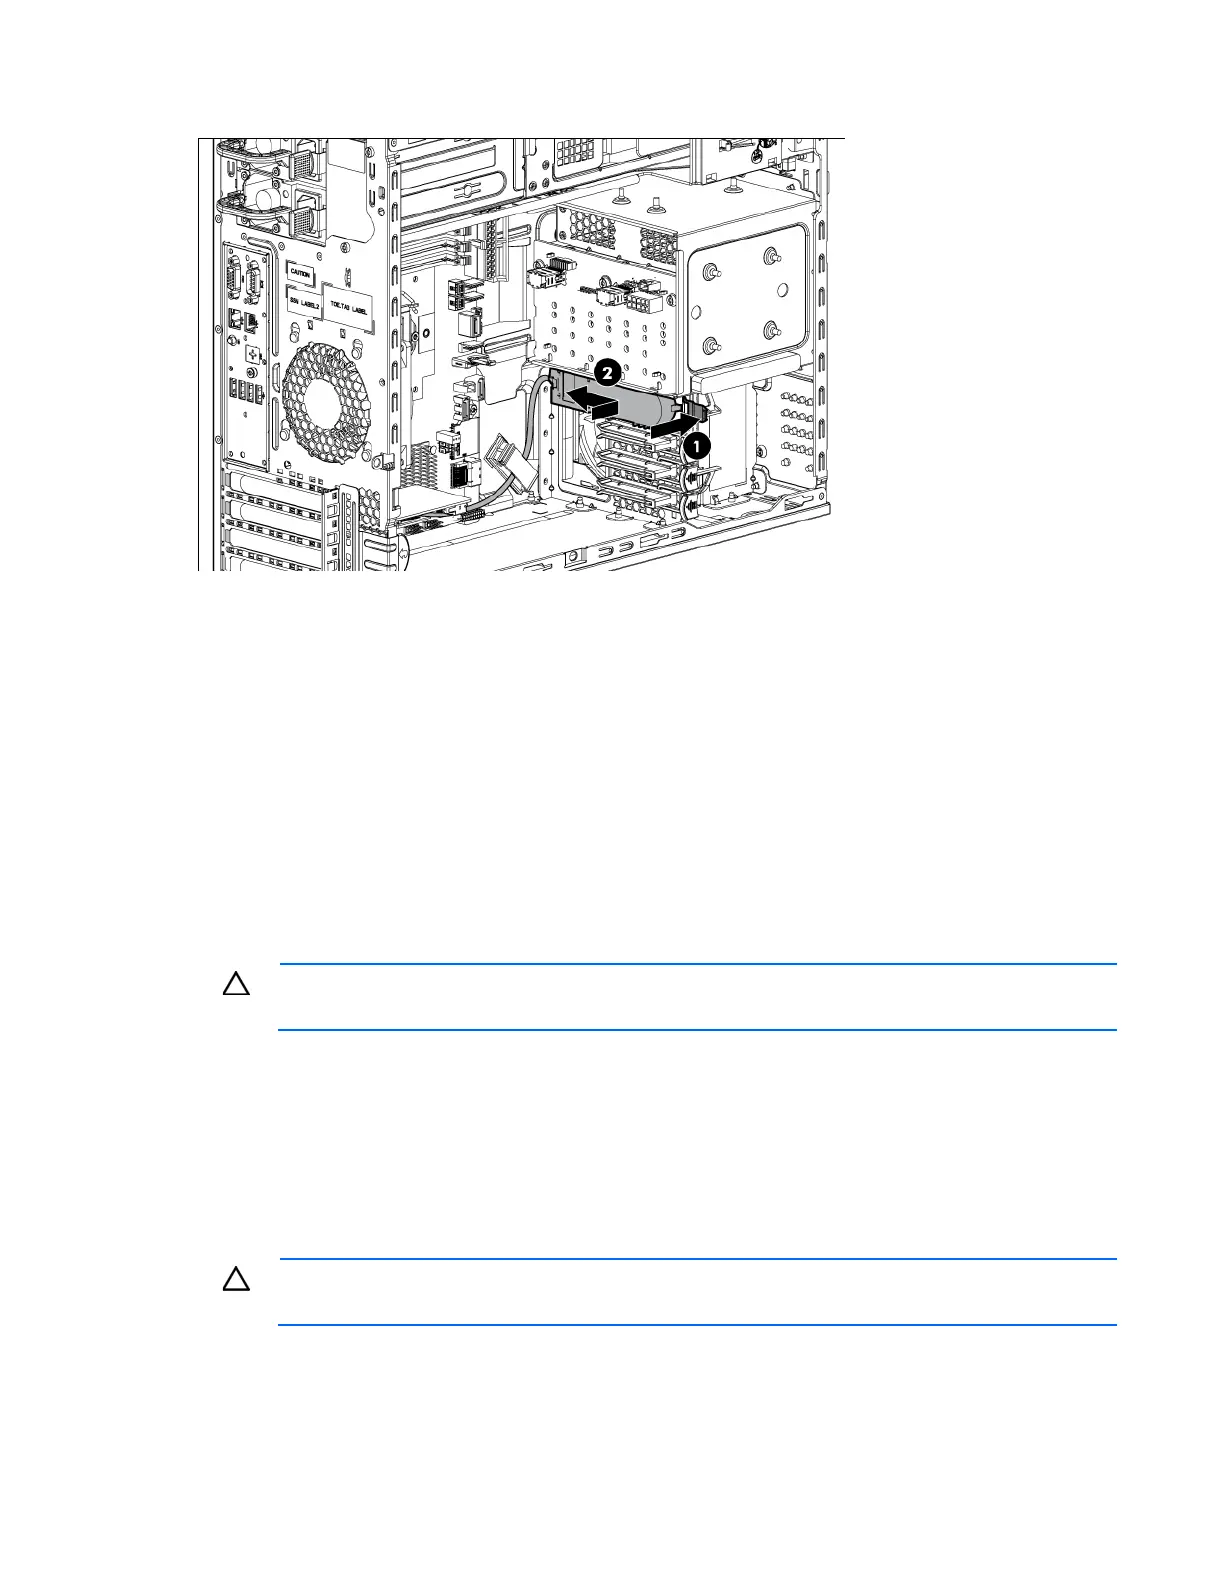
Insert the battery pack into the chassis.
12. Connect the battery pack cable to the pack.
13. Route the cable.
14. If you removed any full-length expansion boards, then first install the full-length expansion board
retainer ("Installing the full-length expansion board retainer" on page 44) .
15. Install the air baffle ("Installing the air baffle" on page 27).
16. Install the access panel ("Installing the access panel" on page 24).
17. Install the front bezel.
18. Power on the server.
Recovering data from the battery-backed write cache
If the server fails, use the following procedure to recover data temporarily stored in the BBWC.
CAUTION: Before starting this procedure, read the information about protecting against
electrostatic discharge ("Preventing electrostatic discharge" on page 23).
1. Perform one of the following:
o Set up a recovery server station using an identical server model. Do not install any internal drives or
BBWC in this server. (HP recommends this option.)
o Find a server that has enough empty drive bays to accommodate all the drives from the failed server
and that meets all the other requirements for drive and array migration.
2. Power down the failed server ("Power down the server" on page 23). If any data is stored in the cache
module, a green LED on the module flashes every 2 seconds.
CAUTION: Do not detach the cable that connects the battery pack to the cache module.
Detaching the cable causes any unsaved data in the cache module to be lost.
3. Transfer the hard drives from the failed server to the recovery server station.
4. Perform one of the following:

 Loading...