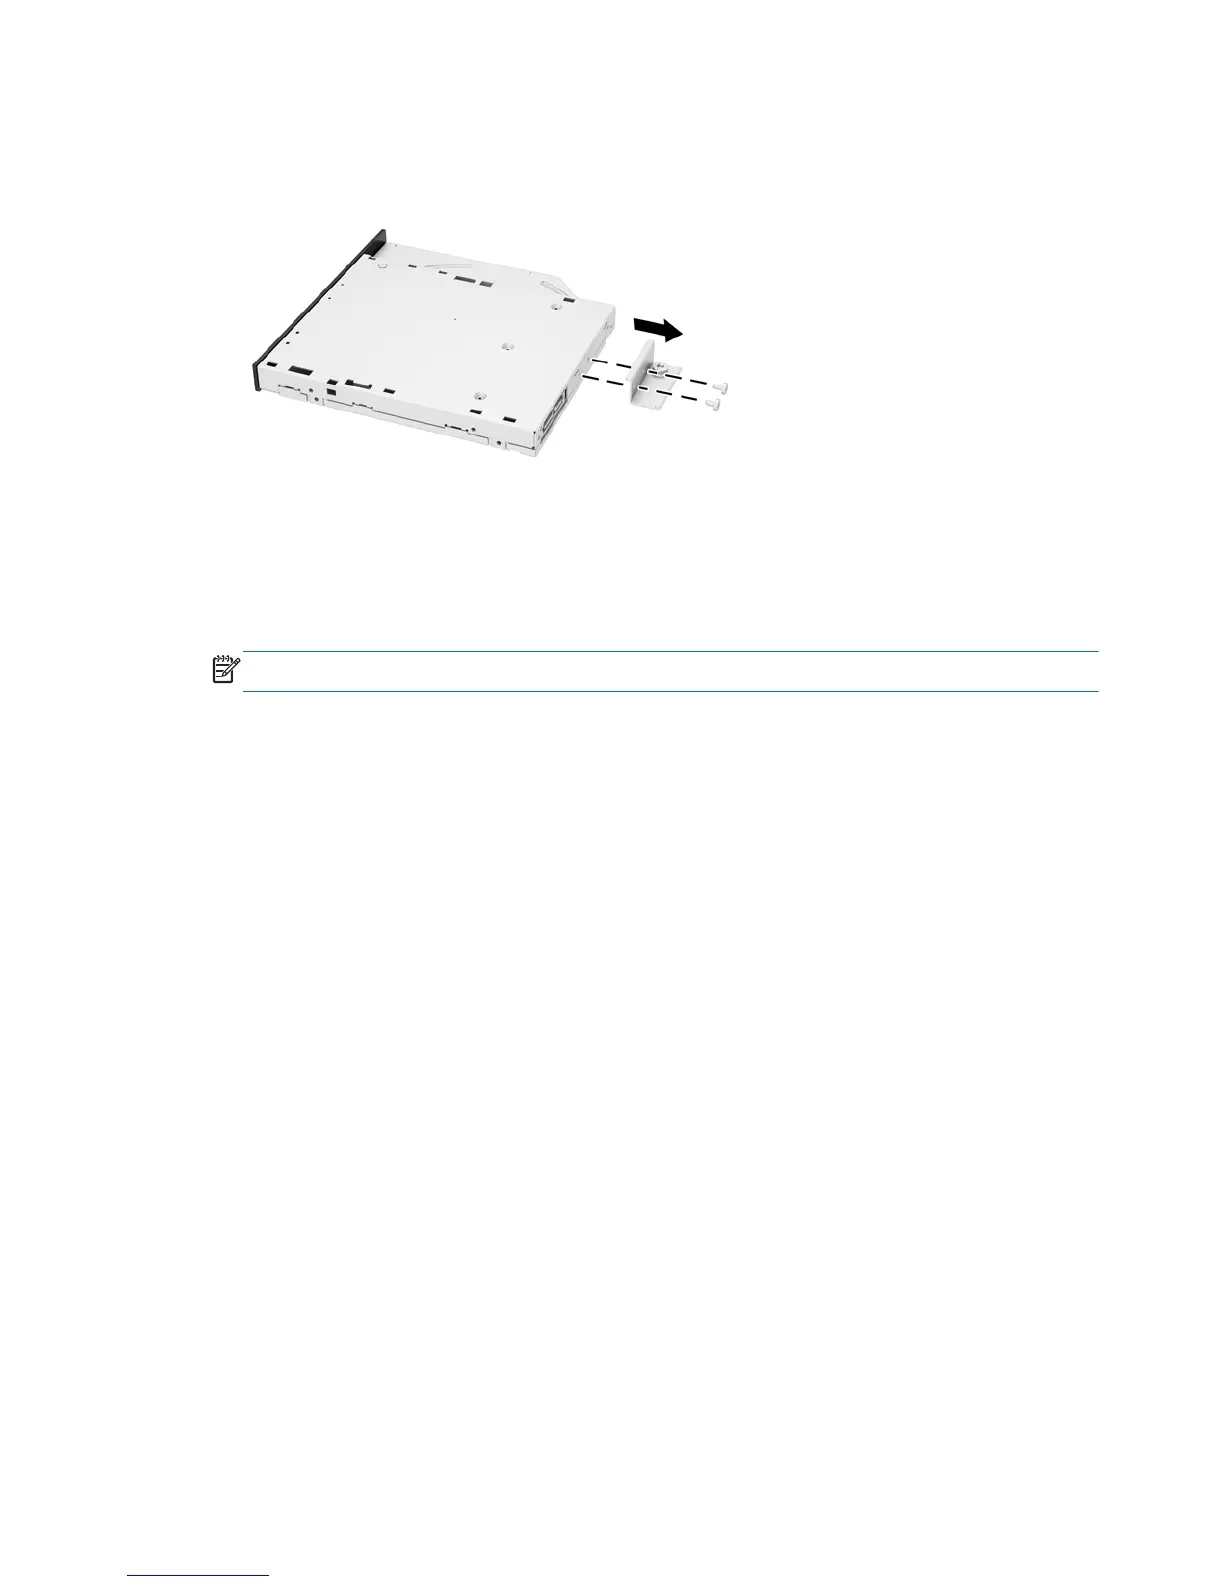
5. Remove the two screws attaching the optical disc drive bracket to the optical disc drive.
6. Place the new optical disc drive into the chassis and push the drive in firmly until it snaps into
place.
NOTE: The optical disc drive can be installed in only one way.
7. Tighten the captive screw through the optical disc drive bracket to secure the drive to the chassis.
42 Chapter 5 Removal and Replacement Procedures All-in One (AIO) Chassis

 Loading...