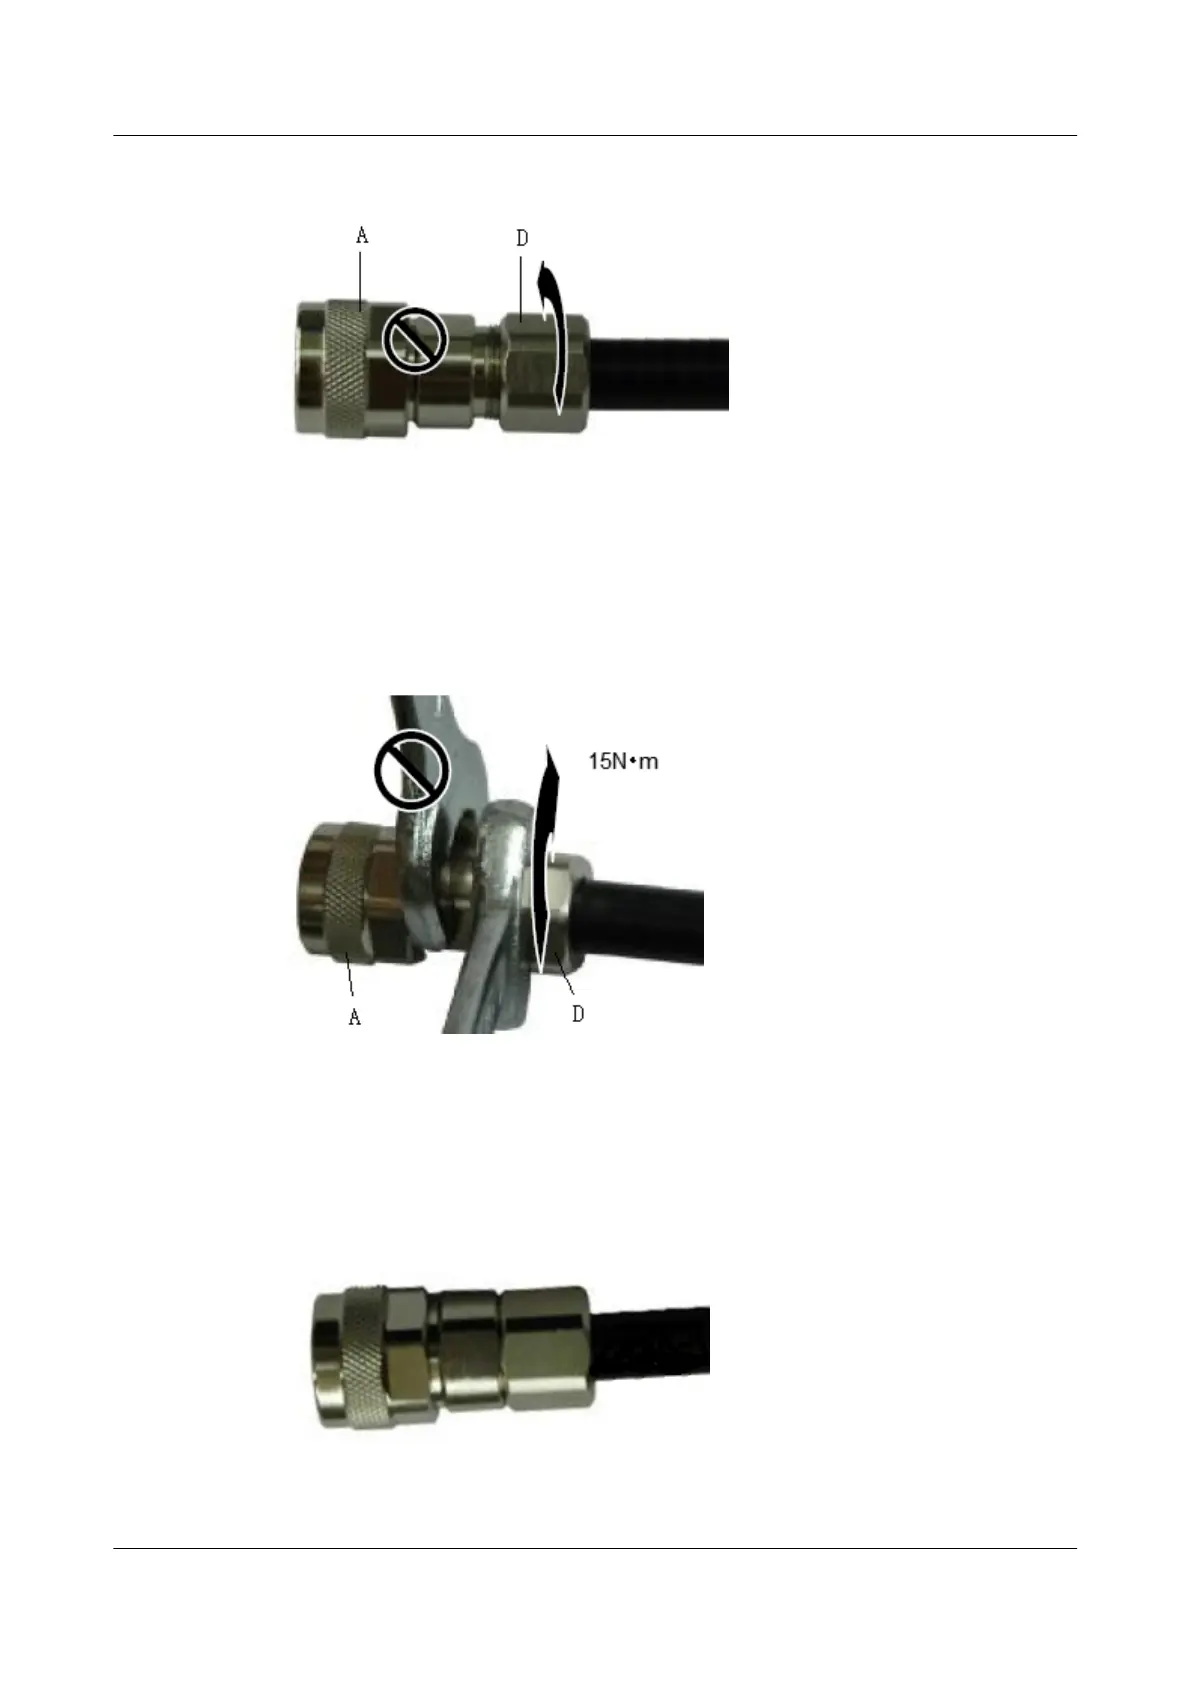
Figure 5-105 Installing the connector's main body
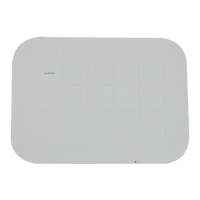
Step 10 Use a wrench to fix the nut (D) to connector's main body (A) with recommended tightening
torque 15 N•m, as shown in Figure 5-106.
Figure 5-106 Fixing the nut to the connector shell body
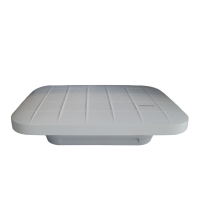
Step 11 Figure 5-107 shows the effect drawing after the assembling is complete.
Figure 5-107 Effect drawing of the straight male coaxial N connector
AP4050DN-E
Hardware Installation and Maintenance Guide
5 Appendix
Issue 05 (2018-02-02) Huawei Proprietary and Confidential
Copyright © Huawei Technologies Co., Ltd.
93