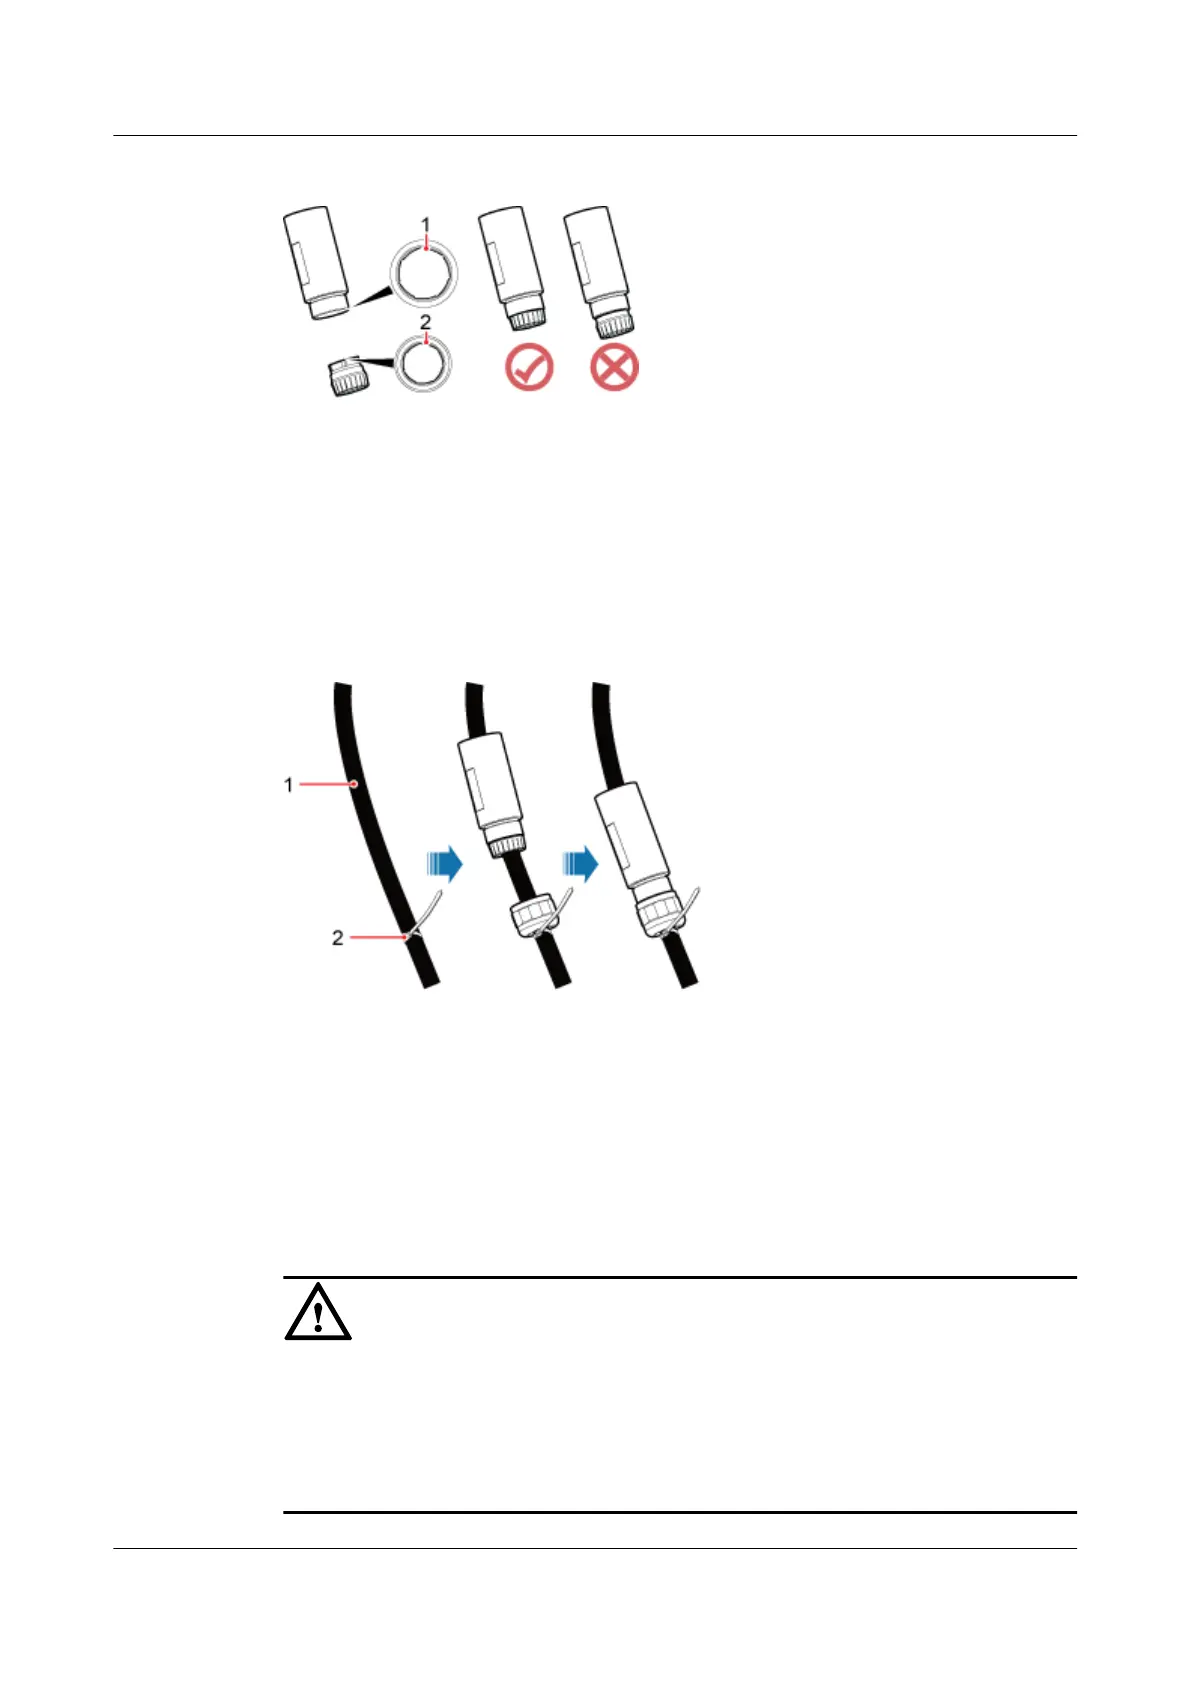
Figure 5-13 Correct operation for replacing a clamping jaw
1. Groove 2. Boss
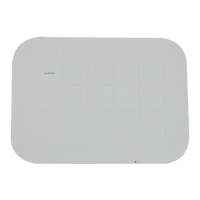
Step 2 Reserve the cable length at the assembly end, bind the plastic cable tie, install the nut,
clamping jaw, and socket on the cable and pre-tighten them, as shown in Figure 5-14.
Figure 5-14 Pre-tightening
1. Cable 2. Plastic cable tie
Step 3 Use the stripping ruler card to measure required lengths, strip the outer jacket (48 mm) on the
head of the cable to be connected and the outer jacket (17 mm) of each core wire, twist the
shield layers into one strand, as shown in Figure 5-15.
NOTICE
l The stripping ruler card is delivered with the components of the connector.
l Cut the padding using diagonal pliers.
l Gently strip the insulation sheath to avoid damage to the conductor metal.
l Ensure that the edge of core wires is not split.
AP4050DN-E
Hardware Installation and Maintenance Guide
5 Appendix
Issue 05 (2018-02-02) Huawei Proprietary and Confidential
Copyright © Huawei Technologies Co., Ltd.
43