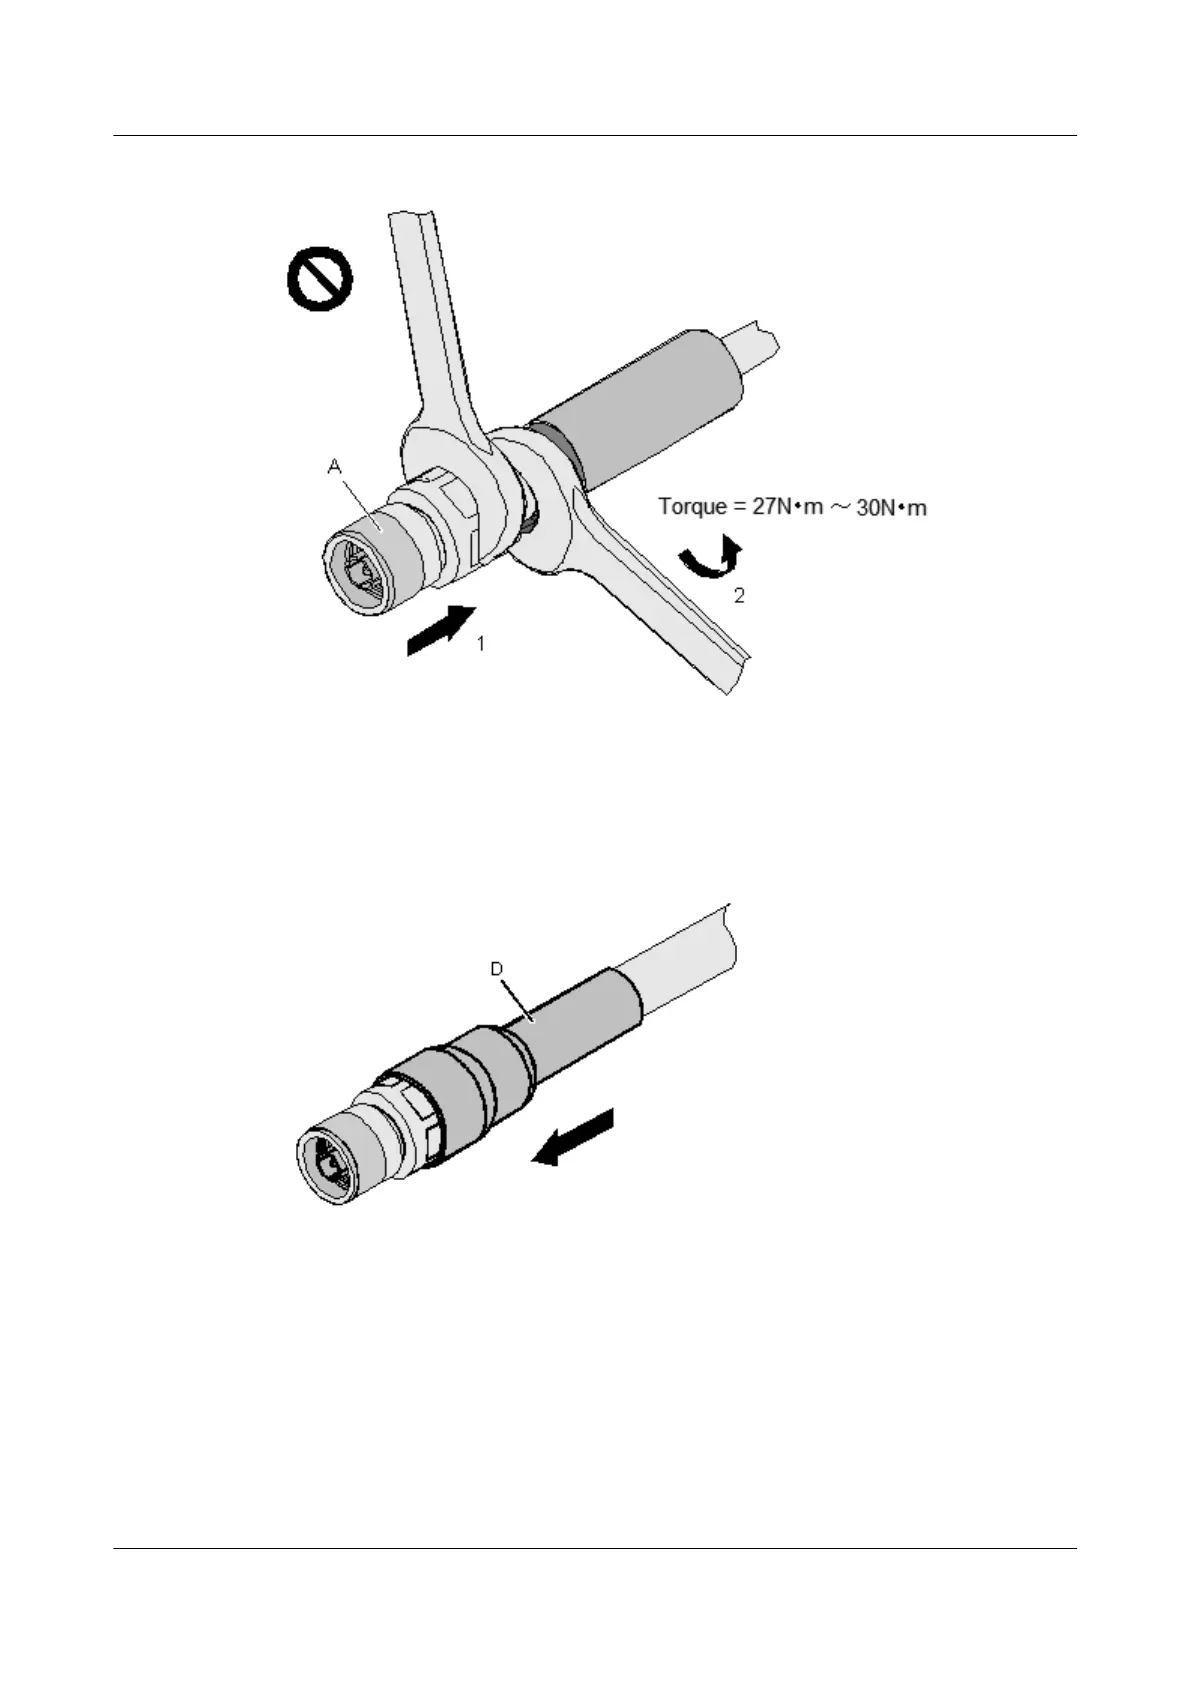
Figure 5-93 Fastening the body and back shell
Step 6 Push the heat-shrink tubing towards the connector, as shown in Figure 5-94. Then, heat the
tube.
Figure 5-94 Assembled N connector
Step 7 After the components are assembled, install the connector, as shown in Figure 5-95.
AP4050DN-E
Hardware Installation and Maintenance Guide
5 Appendix
Issue 05 (2018-02-02) Huawei Proprietary and Confidential
Copyright © Huawei Technologies Co., Ltd.
87