Step 9 Install cable trays and connect the cables of the system subrack.
Step 10 When the Power indicator is steady on, check whether the components are
running correctly.
● If yes, the installation is successful.
● If no, cables or components are incorrectly connected, or the newly installed
system subrack is faulty.
Step 11
Conrm the replacement.
1. Perform a post-replacement inspection.
After the parts replacement, return to the SmartKit page and click Replaced.
Then complete the parts check after the replacement as prompted.
If the 0xF00CE002A and 0xF00D00016 alarms are generated and contain the SN of the
faulty system subrack that has been replaced, check the device conguration
according to the alarm information. If the conguration is correct, log in to
DeviceManager to manually clear the alarms, return to the SmartKit page, and click
Recheck.
2. Check system status.
On the Parts Replacement page, click Inspection to check the system status
again. If any item fails inspection, rectify the fault based on the suggestions in
the inspection report.
3. After the preceding procedure is complete, check services on the host for
storage-related errors.
----End
Follow-up Procedure
After the system subrack is replaced, label it to facilitate subsequent operations.
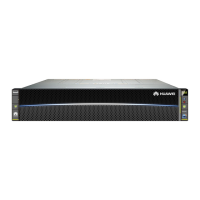
7.3 Replacing a Controller Enclosure
This section describes how to replace a controller enclosure.
7.3.1 Replacing a System Subrack (for 5110 V5/5110F V5/5300
V5/5300F V5)
This section describes how to replace a system subrack.
Impact on the System
Replacing a system subrack interrupts services running on the system subrack.
Perform this operation with caution and under the guidance of technical support
engineers.
Prerequisites
● The spare part is on hand.
OceanStor V5 Series
Parts Replacement 7 Replacing FRUs
Issue 15 (2019-12-30) Copyright © Huawei Technologies Co., Ltd. 159

 Loading...