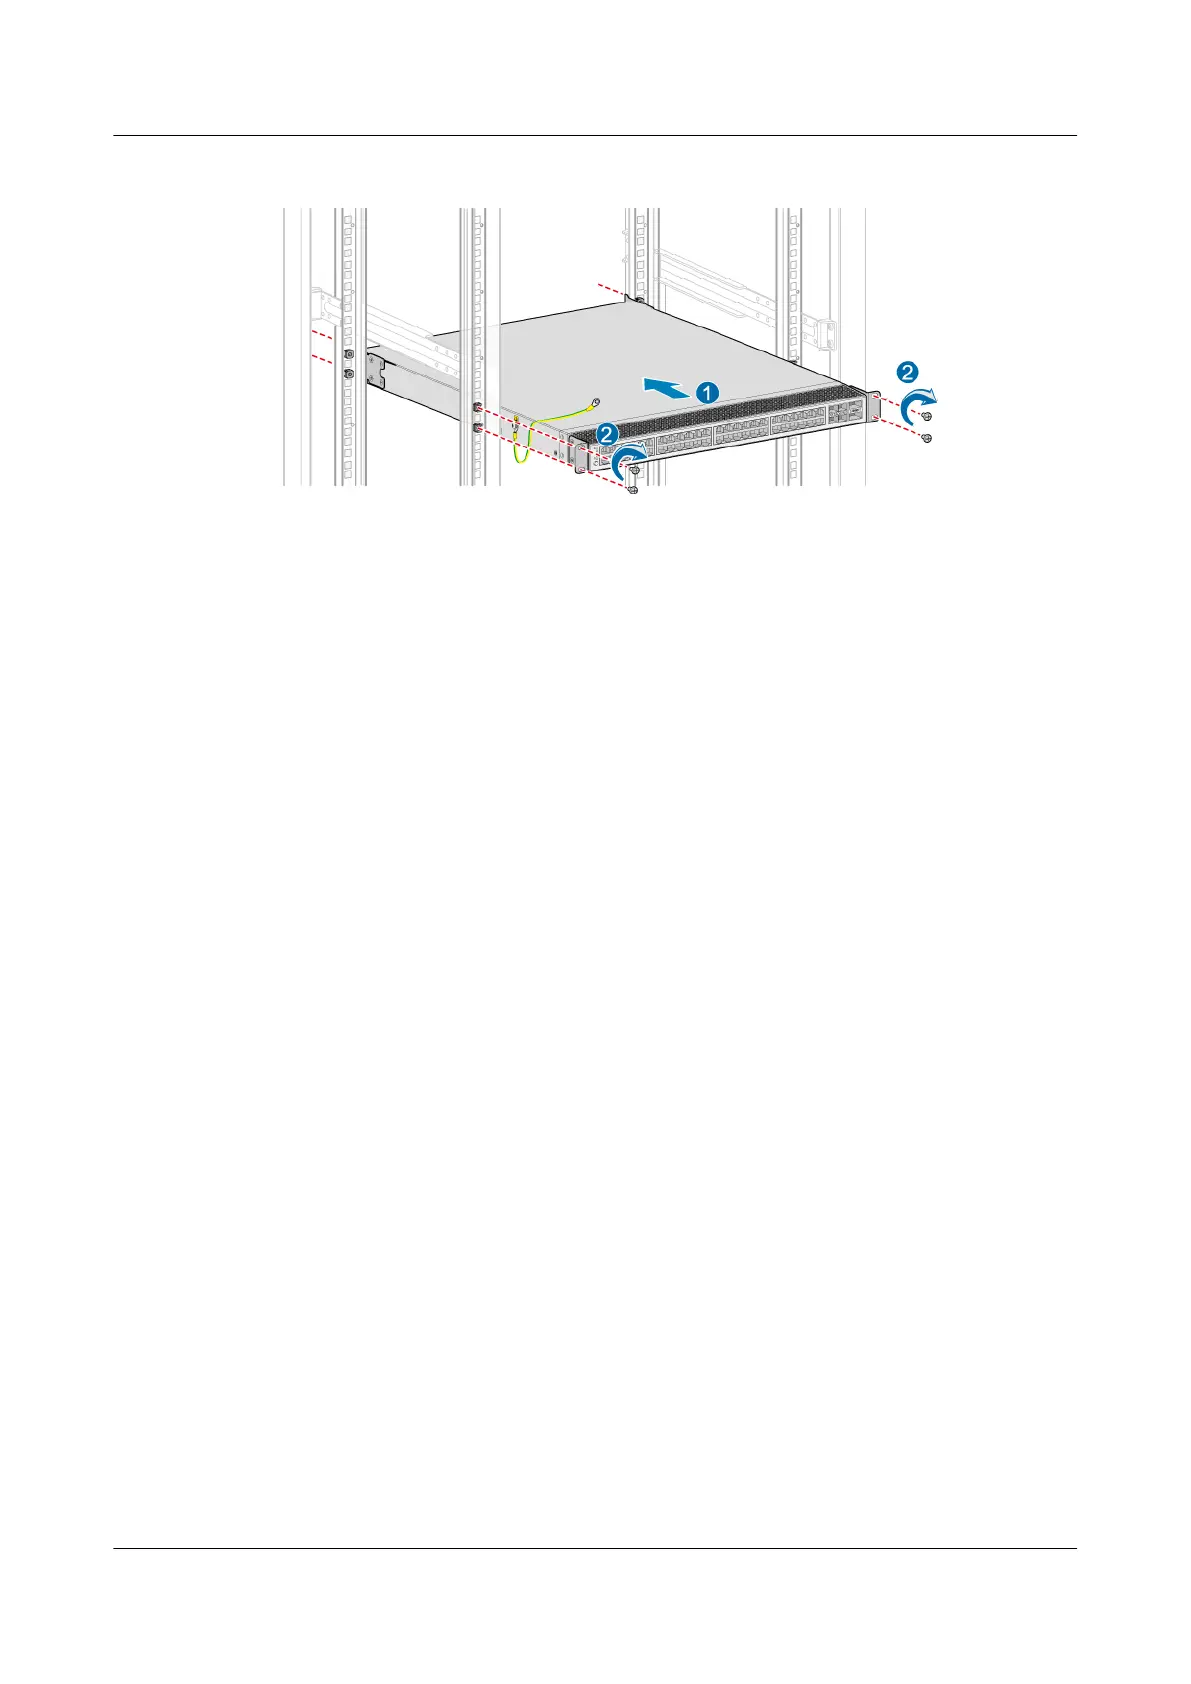
Figure 7-98 Installing a data switch
Step 9 Connect cables to the data switch and power it on.
Step 10 After the Power indicator is steady on, check whether each component is working
properly.
● If working properly, it indicates that the data switch has been successfully
installed.
● If not working properly, it indicates that cable connections are incorrect,
components are incorrectly installed, or the data switch is faulty.
Step 11
Conrm the replacement.
1. Perform a post-replacement inspection.
After the parts replacement, return to the SmartKit page and click Replaced.
Then complete the parts check after the replacement as prompted.
2. Check system status.
On the Parts Replacement page, click Inspection to check the system status
again. If any item fails inspection, rectify the fault based on the suggestions in
the inspection report.
3. After the preceding procedure is complete, check services on the host for
storage-related errors.
----End
Follow-up Procedure
● After the data switch is replaced, label it to facilitate subsequent operations.
● For details about how to
congure the IP address, see
Installation Guide
of
the appropriate version.
7.11 Replacing the Parts of a Quorum Server
This chapter describes how to replace the parts in a quorum server.
Table 7-1 lists the parts that can be replaced in a Huawei quorum server.
OceanStor V5 Series
Parts Replacement 7 Replacing FRUs
Issue 15 (2019-12-30) Copyright © Huawei Technologies Co., Ltd. 247

 Loading...