Step 2 Wear an ESD wrist strap.
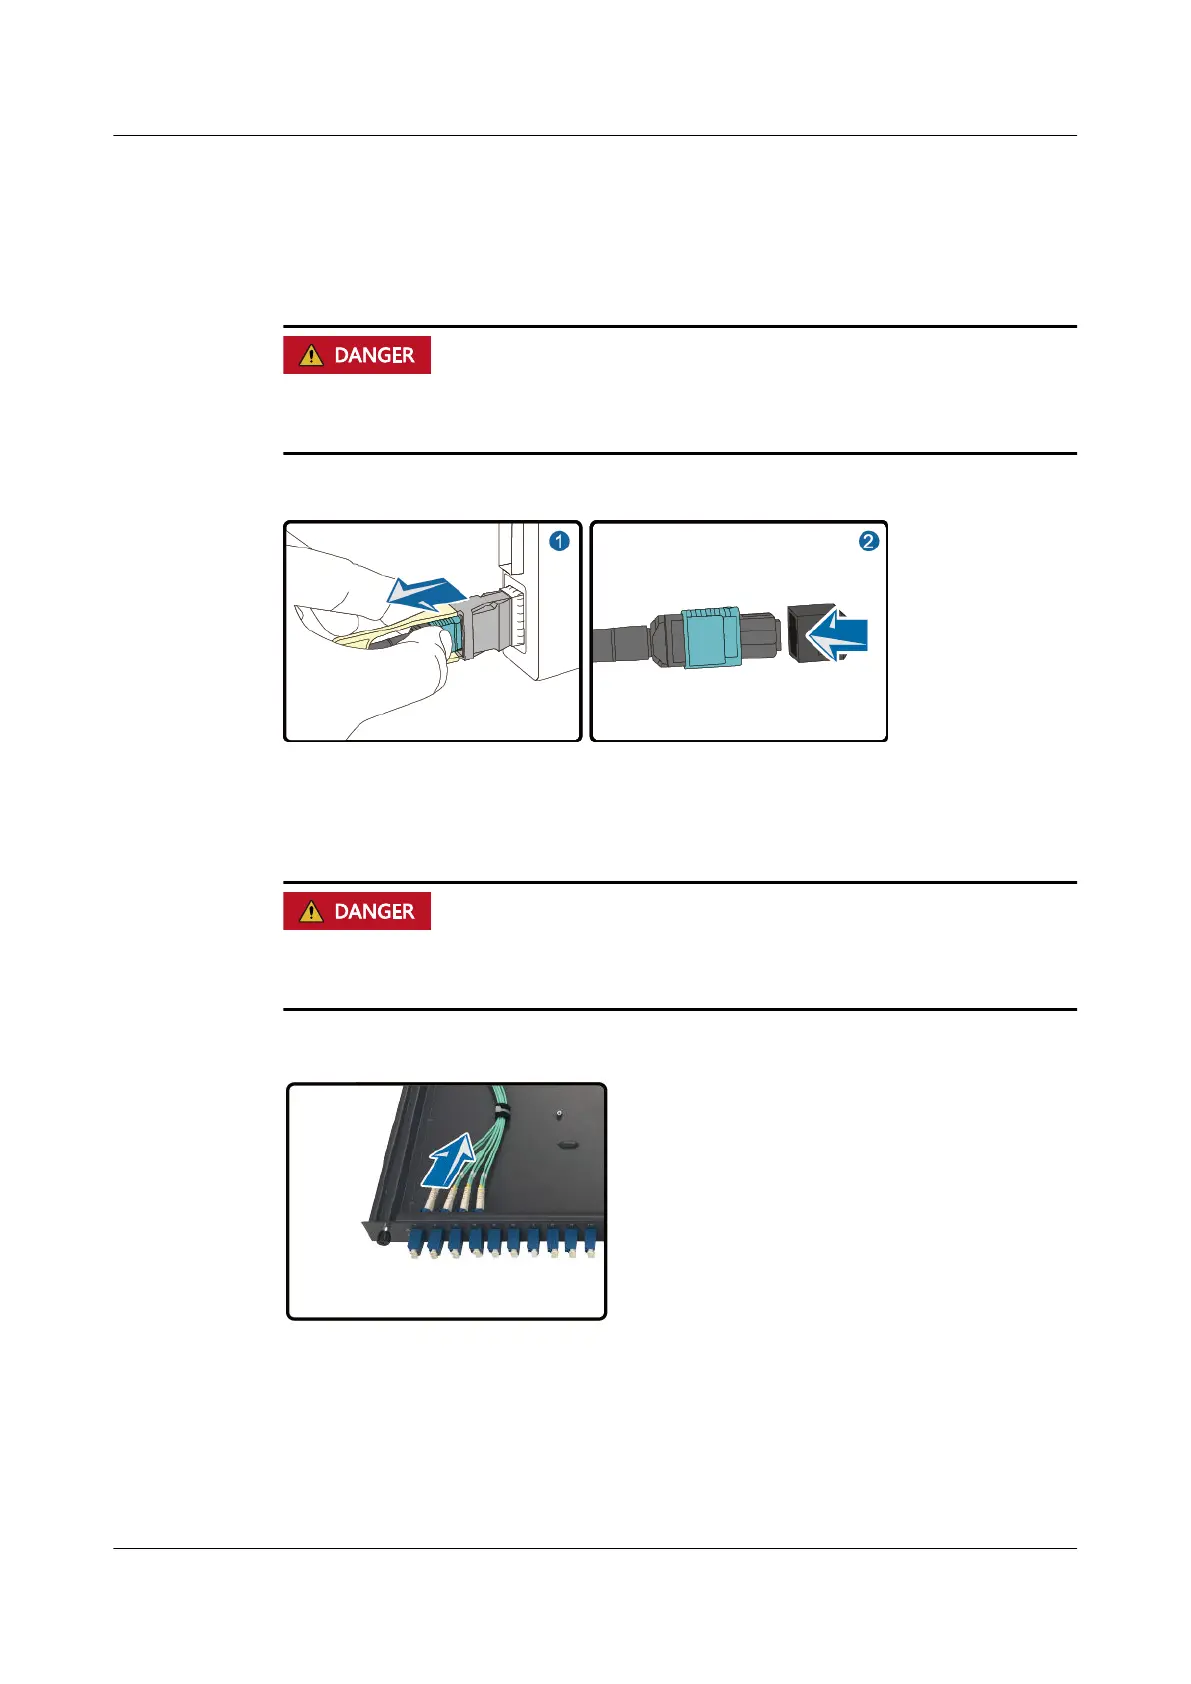
Step 3 Grip the green part of the optical ber, remove the MPO end of the optical ber
from the optical module, and cover the optical ber with a dustproof cap, as
shown in Figure 7-71.
Do not look into the optical port without eye protection. The laser beam on the
optical interface board or from the
ber may cause injuries to eyes.
Figure 7-71 Removing the MPO end of the optical ber
Step 4 Remove the DLC ends of the optical ber from the ODF distribution box and cover
the optical
ber with a dustproof cap, as shown in Figure 7-72.
Do not look into the optical port without eye protection. The laser beam on the
optical interface board or from the ber may cause injuries to eyes.
Figure 7-72 Removing the DLC ends of the optical ber
Step 5 Take the spare part out of its ESD bag.
Step 6 Take the dustproof cap
o the MPO end of the optical ber. Point the white dot of
the optical ber downward and insert it directly to the optical module. Grip the
black connector and push it forward until you hear the click or feel the vibration,
as shown in Figure 7-73.
OceanStor V5 Series
Parts Replacement 7 Replacing FRUs
Issue 15 (2019-12-30) Copyright © Huawei Technologies Co., Ltd. 217

 Loading...