2.5
7. Set the material height using the Head Up & Head Down push buttons and then press enter. Position the blade
about 3/8” above material.
8. If the blade is not running, you will be prompted by the words BLADE START. Start the blade and adjust the
blade speed as required.
9. When the cut is completed, the head will rise to the set material height, the blade will stop and the display window
will reset for the next cut.
10. To cut another piece, repeat steps 2 through 6.
NOTES:
1. To pause the SINGLE CUT CYCLE, press the CYCLE PAUSE button. The CYCLE START button will begin to
ash and the screen will indicate a paused condition. All movements will immediately cease, except blade will
continue to run. To continue the cycle, press CYCLE START.
2. To cut multiple pieces, switch to AUTO MODE and follow the automatic procedures.
3. Whenever a new job or new material is being loaded for production, the head up limit switch should be properly
set to clear the material positioned for a trim cut and the front vise should be closed (in MANUAL MODE).
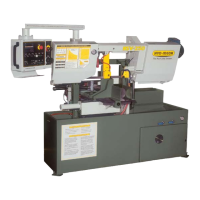
AUTOMATIC OPERATION
To enter AUTO MODE, the FIXED VISE must be closed and the LED on. When the AUTO MODE key is pressed,
the red indicator will come on. The screen will change to the JOB display window as shown below and will be ready for
editing or starting a new job. All manual functions will be disabled.
SINGLE CUT MODE
BLADE SPEED 0 SFM
FEED RATE 0”/M
LENGTH 0”
IN PROGRESS
JOB #_ IS PAUSED
TO RESUME PRESS CYCLE START
PAUSE SCREEN