3.2
RESTORING MACHINE TO USE AFTER LOCK-OUT
After completion of all repairs or maintenance to the locked-out machine, it shall be restored to use as follows:
1. The person(s) who performed the work shall verify that all areas around the machine are safe, before the machine
is re-energized. No one shall be permitted in un-safe areas around the machine. All guards and covers shall be
properly installed.
2. Each lock-out padlock shall be removed by the person who applied it.
3. After the lock-out padlocks are removed, and before the machine is started, the supervisor and all other
employees who use the machine, shall be informed that the lock-out has been removed. After notication is made,
the machine may be re-started.
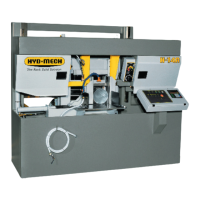
BLADE CHANGING PROCEDURE
SAFETY NOTE
On the H10A, the blade wheel doors are interlocked with a safety relay so that opening either door will shut down the
bandsaw hydraulics and prevent starting of the blade motor. Nevertheless, obey any workplace policies, which may
require lock-out of the machine for blade changing.
Safety glasses, gloves as well as a long sleeve shirt should be worn when handling blades. Note, however, that gloves
should never be work within two feet of a moving blade.
1. Raise the Head approximately 8” above the table.
2. Open the idler wheel and drive wheel doors.
3. Release the carbides from the locked position on both of the guide arms, so that the blade can be easily removed.
The carbides are released by turning the locking plate 270 degrees counter clockwise.
4. Release the blade tension.
5. At the top of the head, the blade runs in a protective channel. Grip the blade at each end of this channel, and twist
the blade teeth down to the opening in the channel, and slide the top of the blade forward. Let this portion of the
blade rest on the outfeed table, then slide the rest of the blade down and out of the blade guide blocks.
• The new blade will be supplied in a coil. While wearing gloves, hold the blade securely with both hands,
then slowly separate it into separate coils, and gradually allow these coils to spring open away from you.
• Do not let bare teeth contact the concrete oor because this may damage them.
6. If the blade is supplied with a protective plastic strip over the teeth, leave it in place until the blade is mounted in
the machine. Remove the protective strip before restarting the machine.
7. Place the new blade in the blade guides, and then slide the blade over the wheels. The teeth should be pointing
towards the drive side as they pass through the guides, and outwards as they pass around the wheels.
• Depending upon how the manufacturer folded the blade, it may be necessary to turn the blade inside out
to have the teeth point in the right direction at the guides, and at the wheels.
8. Re-tension the blade using the tension handle. Apply minimal tension rst, to permit aligning the back (smooth)
edge of the blade with the back edges of the blade wheels. Then apply proper tension (1000 – 1200 kg) on the
blade tension display. NOTE: The machine will not start unless tension pressure is within the proper range.
9. Start the blade for a few rotations. This allows the blade to fully seat in the carbide guides and track onto the
wheels.
10. Close the carbide guides locks, and then close the idler and drive doors. Break-in the blade.